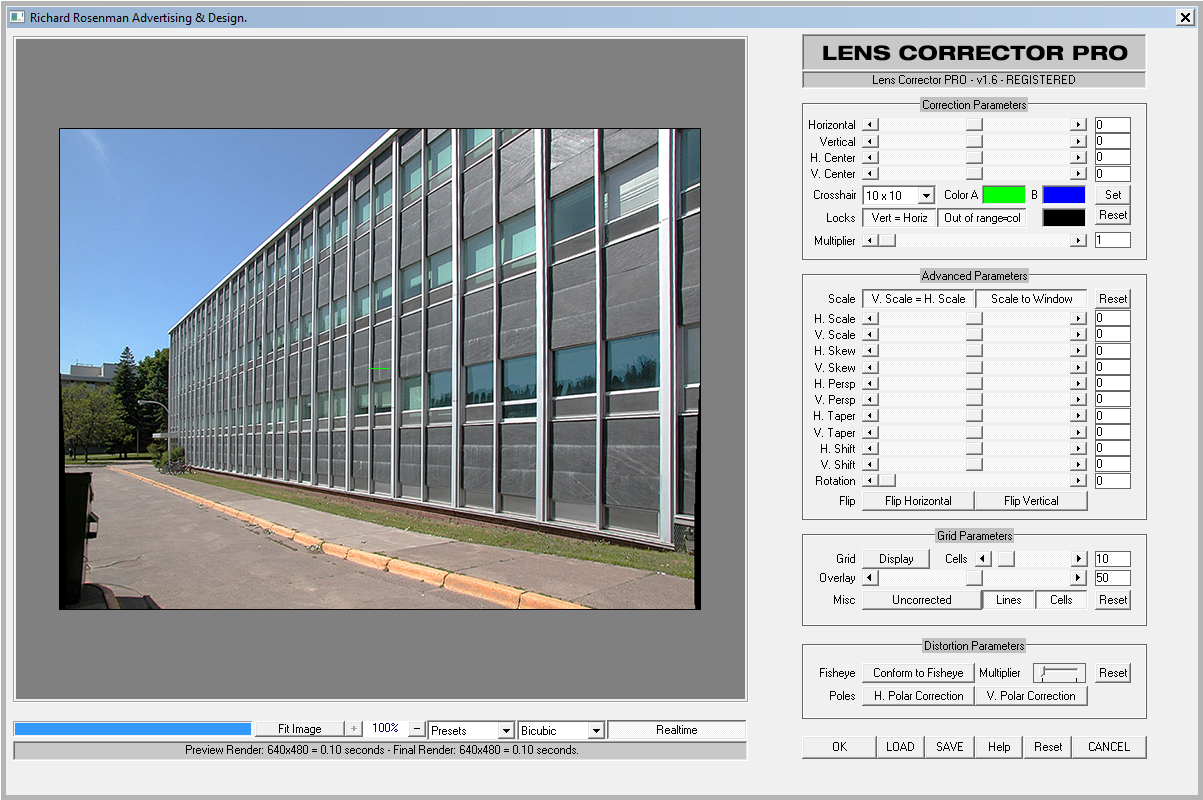
Lens Corrector PRO is a powerful plugin for Adobe Photoshop that takes camera lens distortion correction to a professional level, adding numerous image correction tools and algorithms for facilitating the removal of these types of distortions.
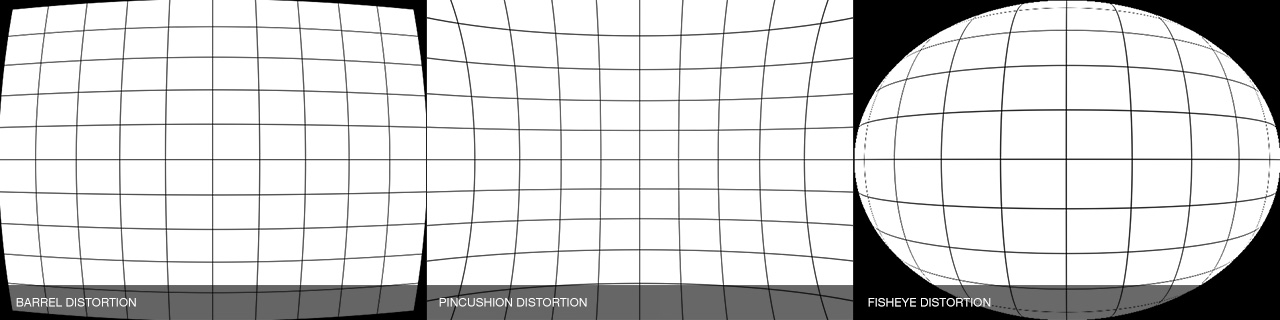
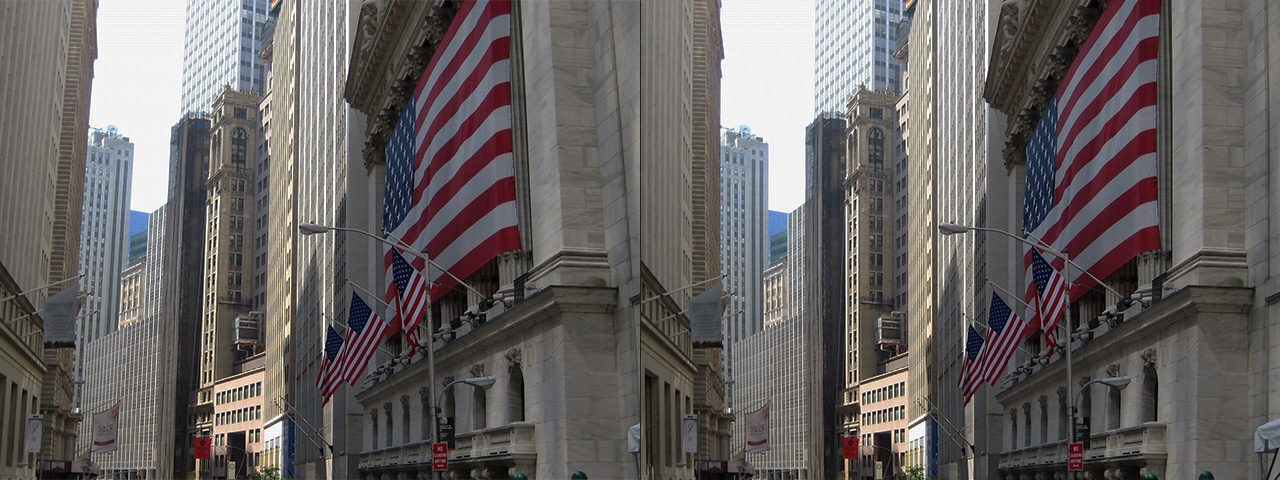
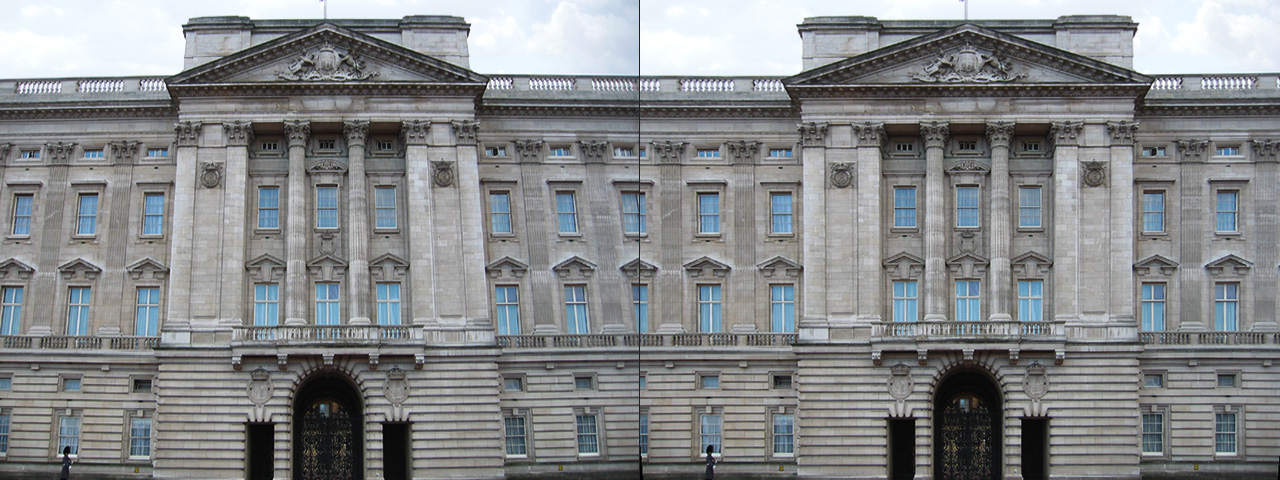
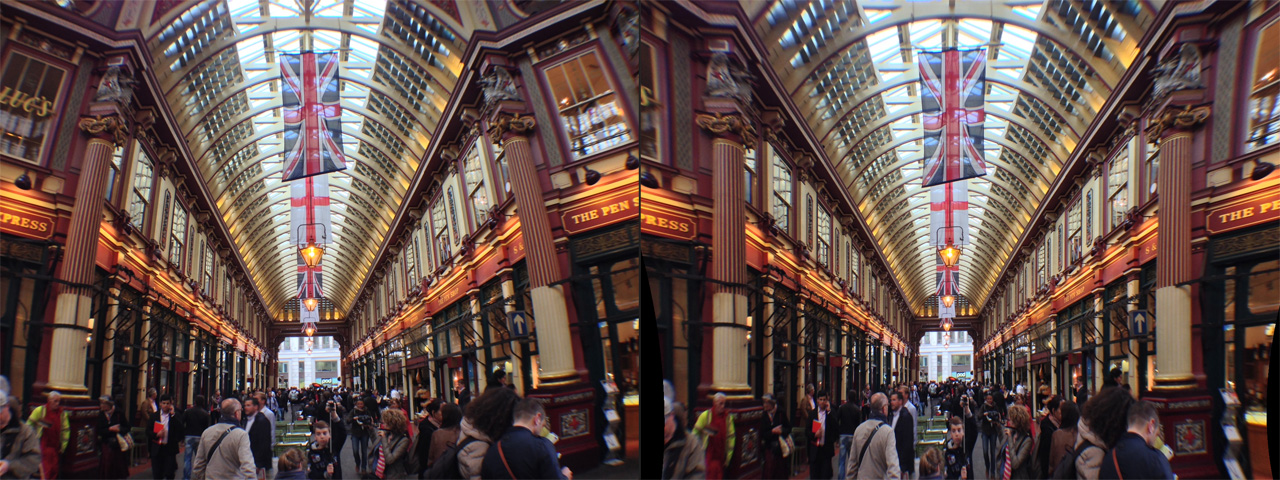
Whenever media is recorded with today’s conventional cameras, lens distortion (to some degree) is unavoidable. The amount of distortion can depend on various factors, but more specifically, the type of camera lens used. Lens distortion can be classified into two categories – “Barrel” distortion (similar to the exterior curves of a sphere) and “Pincushion” distortion (similar to the interior curves of a sphere). By using appropriate algorithms, these distortions can be minimized, eliminated and if desired, even reversed.
Lens Corrector PRO not only specializes in the removal (or introduction) of barrel and pincushion lens distortion, but also virtually any other type resulting from all types of camera lenses. Unlike most lens corrections plugins out there, Lens Corrector PRO features separate horizontal and vertical sliders for ultimate control.
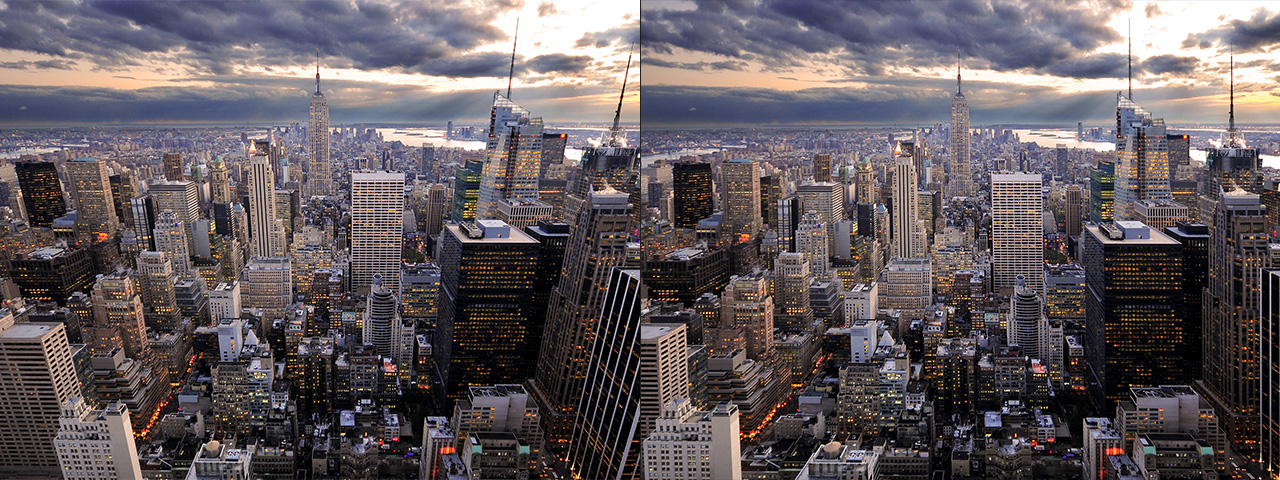
Lens Corrector PRO adds unparalleled power by providing the user with explicit horizontal and vertical axis controls for all distortion tools. This means the center point can be offset to accommodate even the toughest of all lens distortions out there.
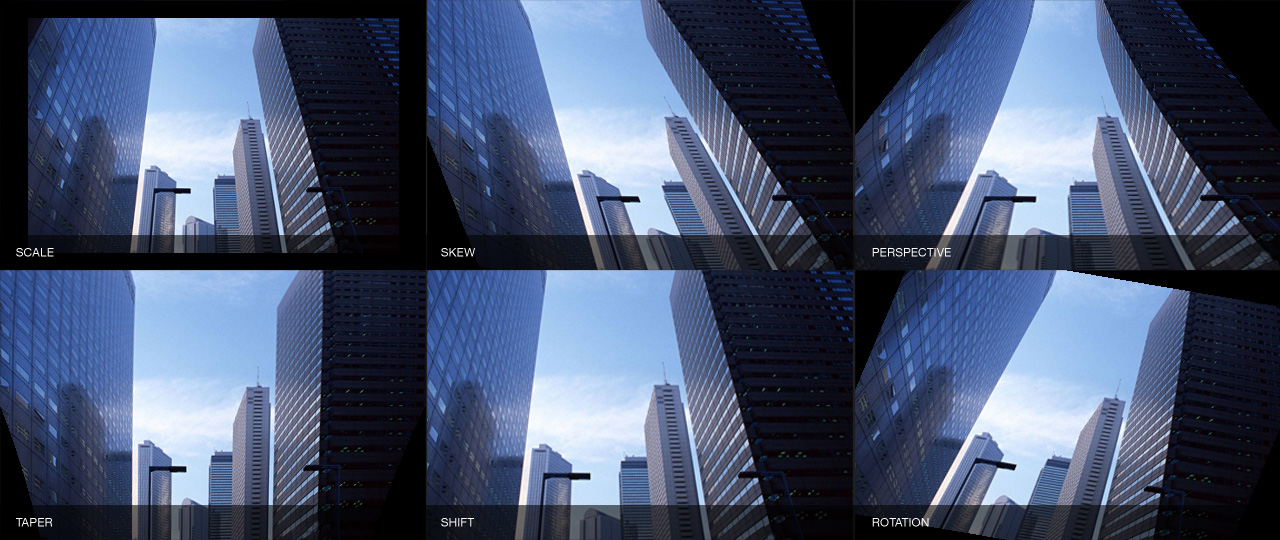
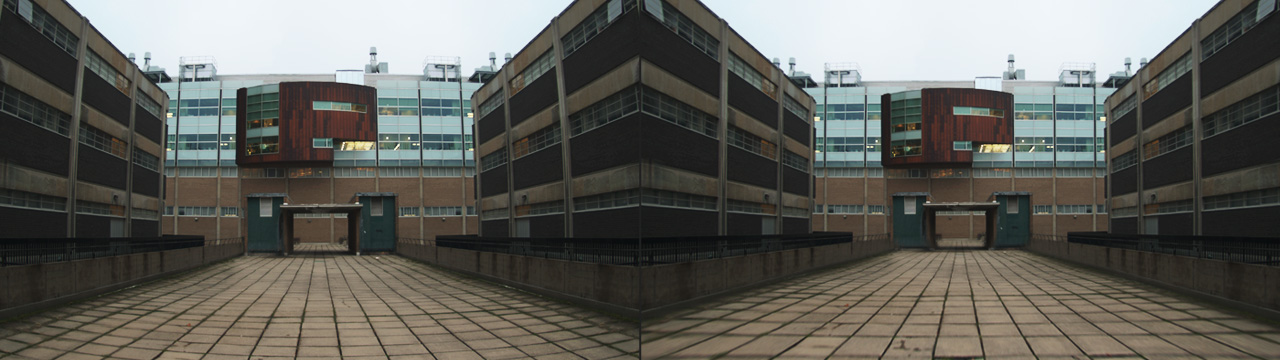
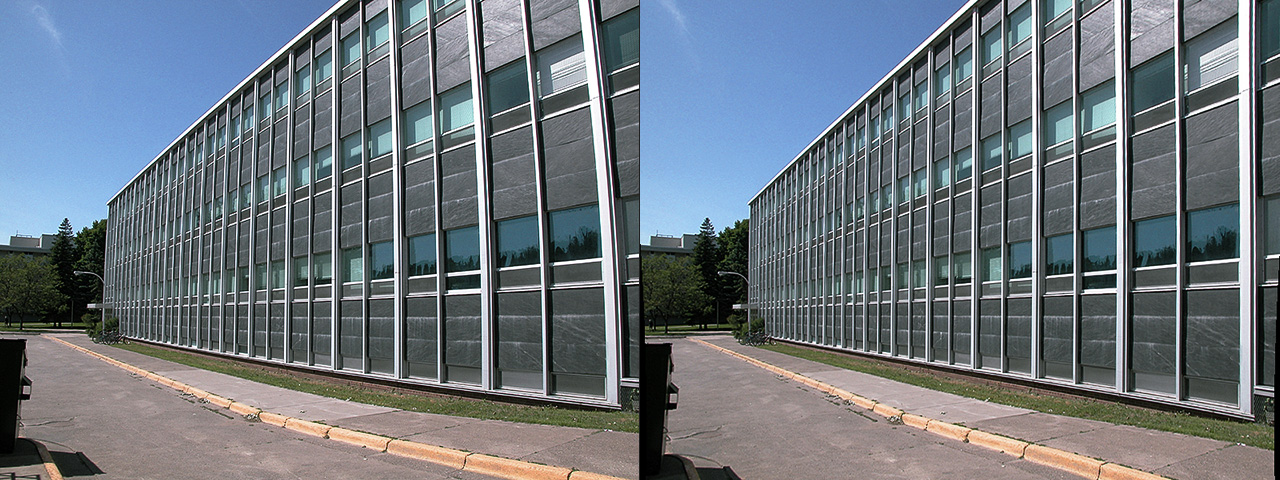
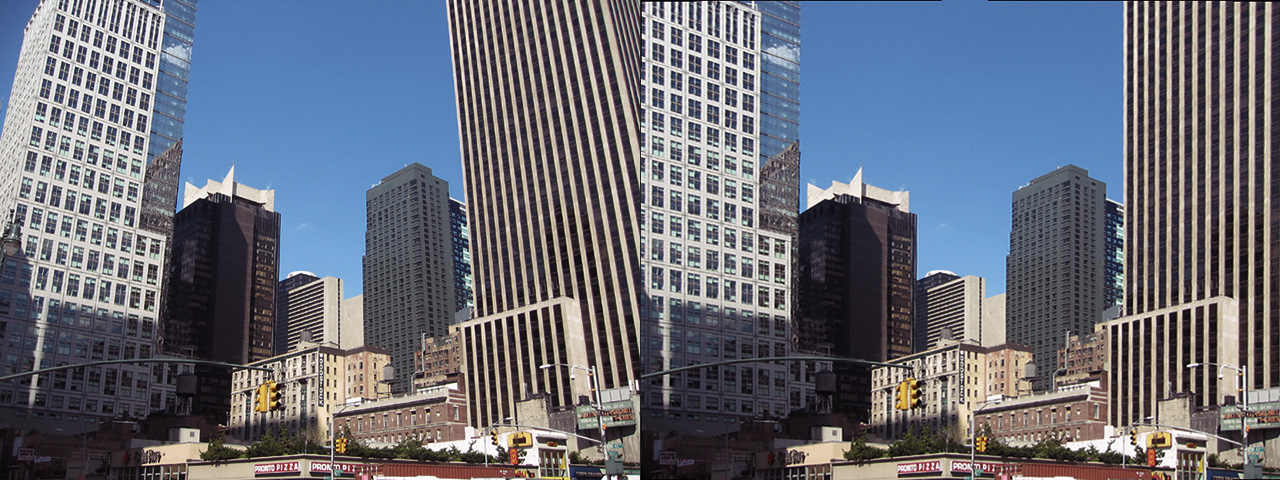
Lens Corrector PRO provides a robust number of tools for the correction of almost any type of lens / image distortion including scale, skew, perspective, taper, shift, rotation and flip, each for either the horizontal axis, vertical axis, or both. This allows correction for lens distortions produced by shooting from a low point-of-view or angled point-of-view, for example.
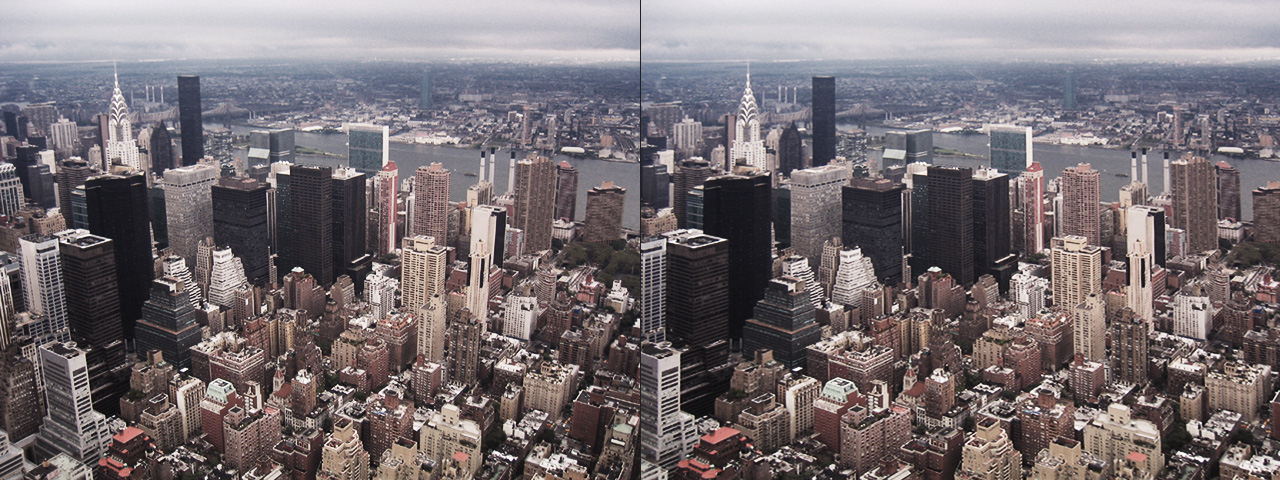
A gorgeous, easy-to-use interface with a massive preview window allows for the fine-tuning of high-resolution photographs. A fully resizeable interface provides unlimited boundaries restricted only by the user’s display resolution.
Lens Corrector PRO features a sophisticated grid overlay system ideal for facilitating distortion correction. Drop in your photograph, turn on the grid system and straighten horizontal and vertical photo lines to match the grid. It’s as simple as that!
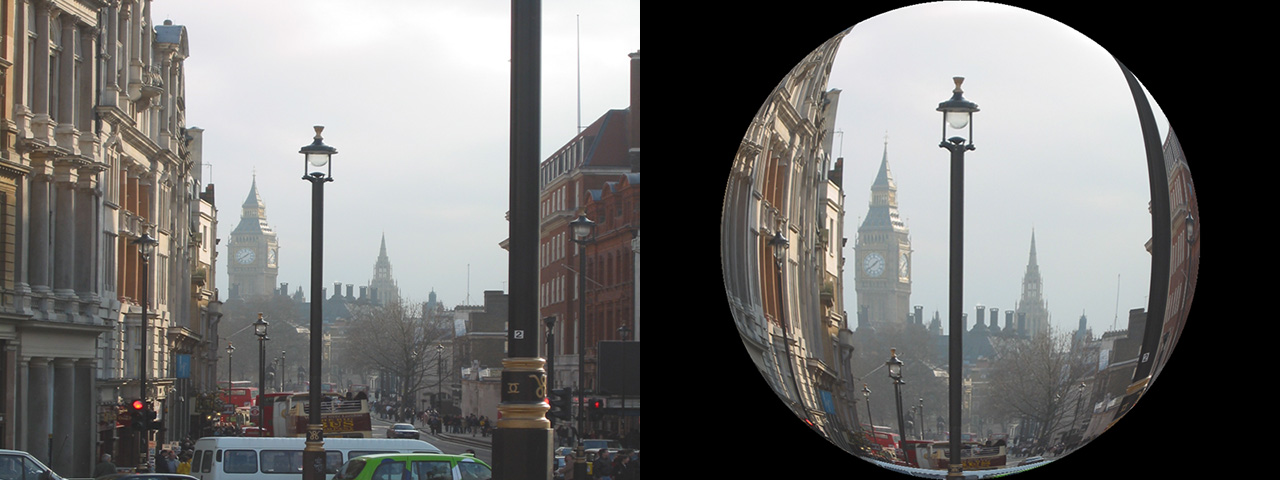
Finally, Lens Corrector PRO can perform fisheye distortion transformations along with horizontal and vertical polar correction.
Lens Corrector PRO is 100% multi-threaded capable of using an unlimited number of cores for ultimate speed.
Lens Corrector PRO supports both 8 bits / channel and 16 bits / channel color modes for professional workflows.
Correction Parameters
These are the main controls you’ll be using when correcting for lens distortion. Generally, you will not need to change the center axis or the multiplier, but in extreme cases, they can be of great help in reducing off-axis lens distortion.
Horizontal: Controls the horizontal amount of correction. (Use the multiplier for higher values).
Vertical: Controls the vertical amount of correction. (Use the multiplier for higher values). (NOTE: At default, the vertical is locked to the horizontal for proportional distortion correction. If you wish to set different horizontal and vertical amounts, simply deselect the Vert = Horiz button).
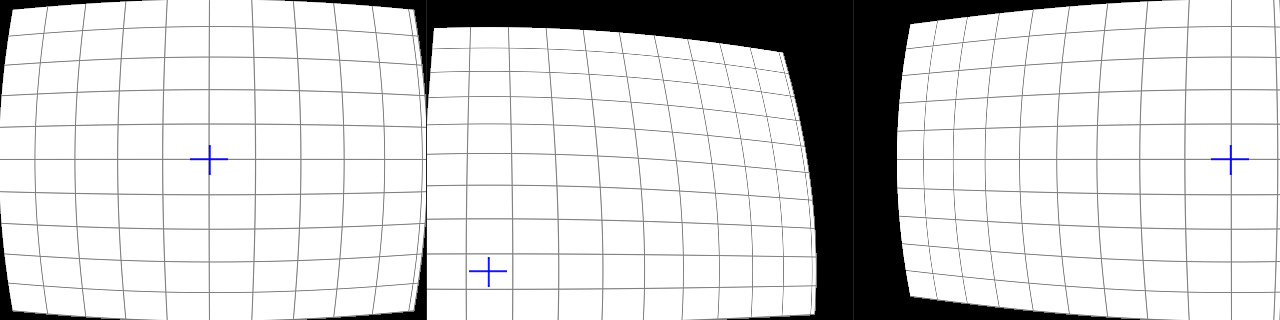
H. Center: Controls (in percentage) the horizontal center of the correction axis. (-100 is the left edge of the image, +100 is the right edge of the image).
V. Center: Controls (in percentage) the vertical center of the correction axis. (-100 is the top edge of the image, +100 is the bottom edge of the image).
Crosshair (dropdown menu): Specifies the display type of the axis crosshair. This is helpful when you wish to see the center axis more clearly, or not see it at all.
Color A: Specifies the color of the crosshair while in image preview mode. You may wish to change the crosshair color depending on what color your image is, in order to see it better. Defaults to green.
Color B: Specifies the color of the crosshair while in grid preview mode. Defaults to Blue.
Set: Selecting this button and LEFT-CLICKING in the preview window will specify a new correction axis center. The mouse will change to a crosshair which reminds you that you are in axis selection mode. Although you can keep working while in this mode, remember to turn off the button once you have selected your new axis point.
Locks (Vert = Horiz): This will lock the vertical correction to the horizontal for proportional correction.
Out of range col: This will color any Out of Range pixels the specified Out of Range Color. Out of Range pixels are those which, due to distortion, have been pulled in from off-screen. They are therefore invalid pixels and they can remain the color of the outer edge of the image from where they came from (button deselected), or they can be colored with the Out of Range color (button selected).
Out of Range Color: This specifies the ‘Out of Range’ color.
Reset: Resets all ‘Correction Parameter’ controls to default.
Multiplier: This is a multiplier for the correction controls. (Please note that high values can severely distort your image.)
Advanced Parameters
This section contains all the controls for advanced image fine tuning. You may find that correcting for lens distortion will (in most cases) scale your image to some degree. This is normal, and is due to the correction algorithms. With these controls, you can compensate for such scaling, as well as fine tune your image and even correct for additional distortions not necessarily caused by lens distortion. Finally, it is important to understand that all of the following controls work based upon the axis center. Therefore, adjusting the axis center will provide you with unlimited flexibility for these controls.
Scale to Window: This will attempt to fit the corrected image to the window size. By deselecting this button, you can see what the conventional correction algorithm does to the image scale. This feature will compensate for this scaling and refits your image to the window.
V. Scale = H. Scale: This locks the V.Scale to H. Scale for proportional scaling.
Reset: Resets all ‘Advanced Parameter’ controls to default.
H. Scale: This controls the horizontal scaling of the image.
V. Scale: This controls the vertical scaling of the image. (NOTE: At default, the vertical is locked to the horizontal for proportional scaling. If you wish to set different horizontal and vertical scale amounts, simply deselect the V. Scale = H. Scale button).
H. Skew: This controls the horizontal skew (shear) of the image. This is useful for straightening out angled lines.
V. Skew: This controls the vertical skew (shear) of the image. This is useful for straightening out angled lines.
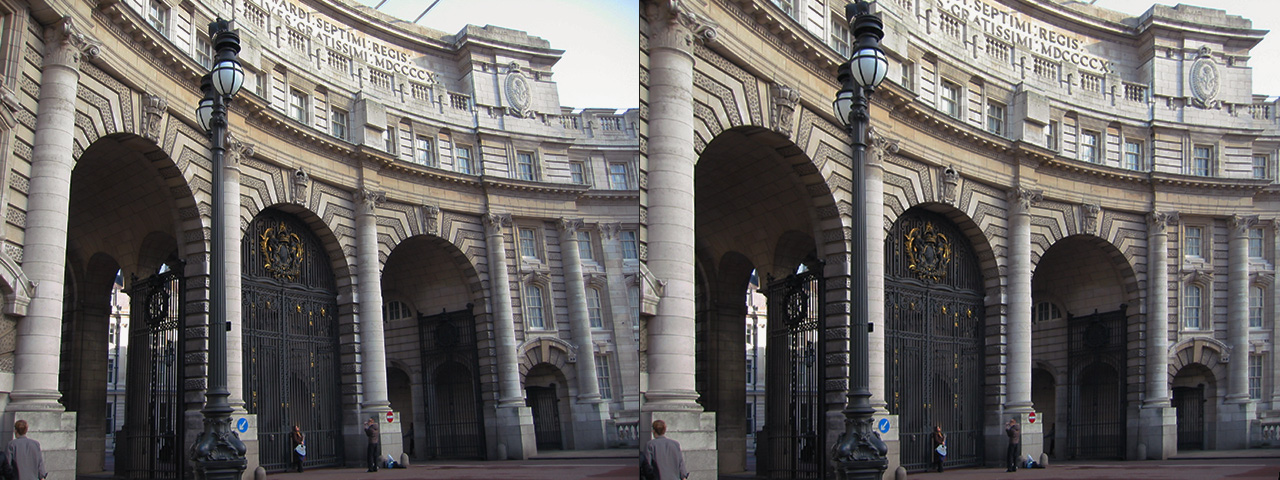
H. Persp: This controls the horizontal perspective of the image. This is useful for straightening out lines which tend to disappear towards a perspective point.
V. Persp: This controls the vertical perspective of the image. This is useful for straightening out lines which tend to disappear towards a perspective point.
H. Taper: This controls the horizontal tapering of the image. In case the above feature isn’t enough, taper adds to the perspective flexibility by producing a tapered distortion with a non-linear inner curve.
V. Taper: This controls the vertical tapering of the image. In case the above feature isn’t enough, taper adds to the perspective flexibility by producing a tapered distortion with a non-linear inner curve.
H. Shift: This controls (in percentage) the horizontal shift of the image. (-100 is the left edge of the image, +100 is the right edge of the image).
V. Shift: This controls (in percentage) the vertical shift of the image. (-100 is the top edge of the image, +100 is the bottom edge of the image).
Rotation: This controls the (clockwise) rotation of the image.
Flip Horizontal: This flips the image horizontally.
Flip Vertical: This flips the image vertically.
Statistics
This is where your rendering statistics are displayed.
Preview: Prints the total rendering time elapsed for generating the preview image.
Full Image: Prints the (estimated) total rendering time required for generating the full size image.
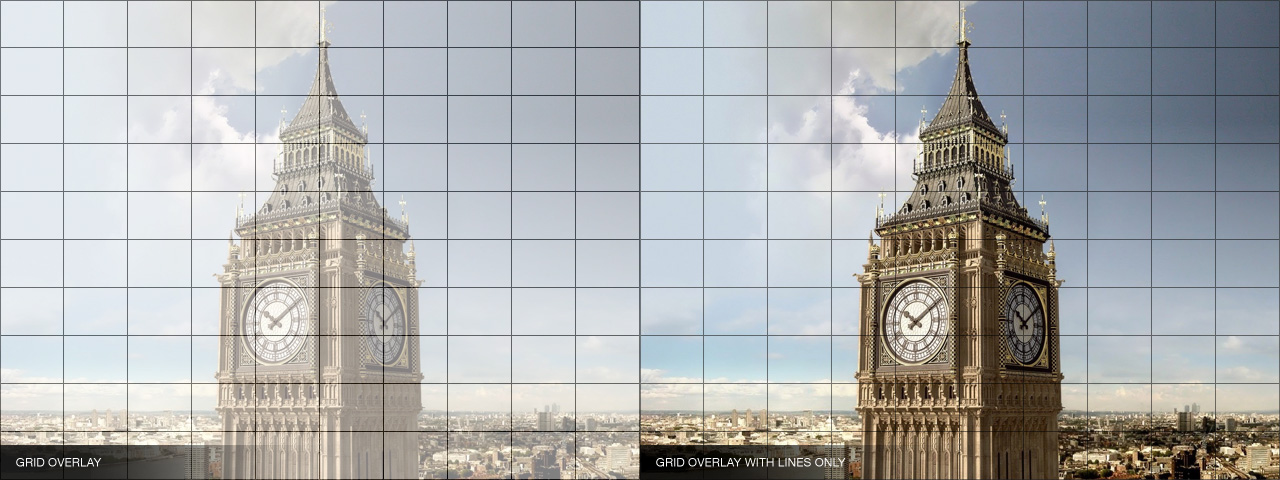
Grid Parameters
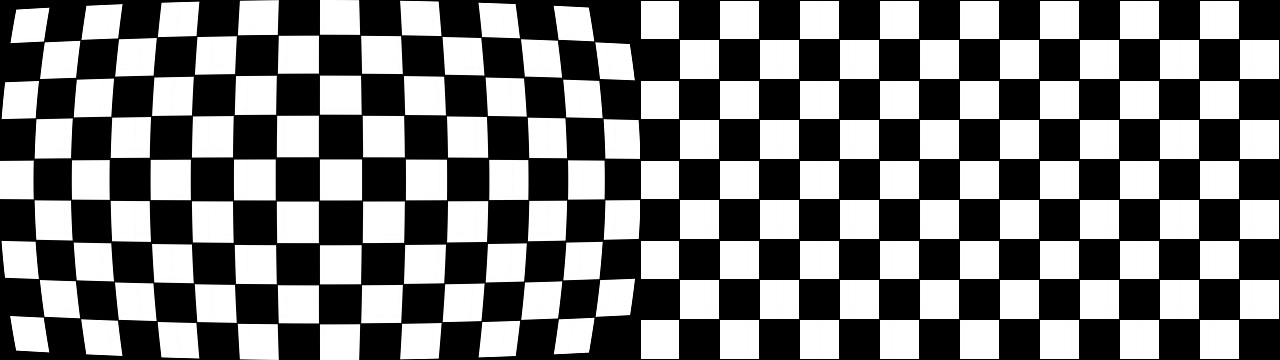
The grid is one of the most important and useful features of Lens Corrector PRO. Because it is often difficult to see EXACTLY what your correction is doing to the image, enabling the grid will replace the preview with a custom defined grid with the same lens correction applied to it. It is important to know that the grid color is based on the Out of Range color so if you wish to change it from the default black, simply change the Out of Range color.
Display: Displays a grid instead of the image for more accurate correction visualization.
Cells: Specifies the numbers of cells (rows and columns) of the grid.
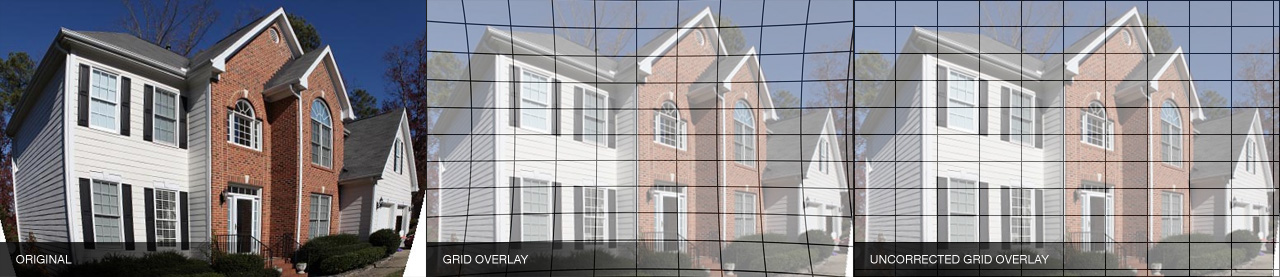
Overlay: Specifies (in percentage) the transparency of the grid over the image. This is useful when you want to see both the grid and image distortion together. In these cases, you may want to change the grid color from black to something brighter, depending on your image.
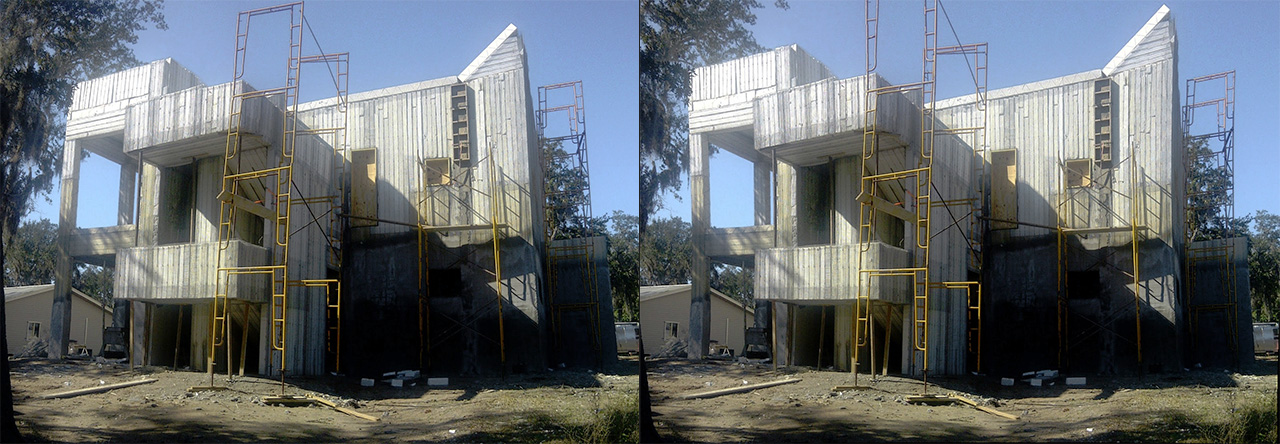
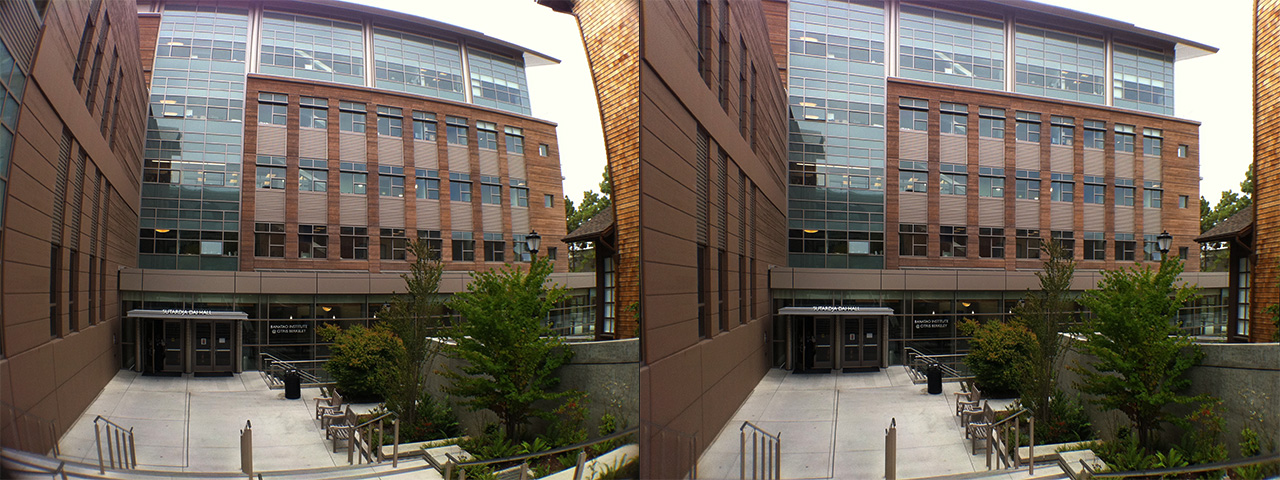
Uncorrected: Enabling this button will draw the grid without correction distortion. This is particularly useful for ensuring your corrected images’ lines are straight and match the grid’s horizontal and vertical lines. In the example below, one can see the vertical lines of the house perfectly match the vertical lines of the grids.
Lines: Disabling this button will restrict the grid lines from being drawn.
Cells: Disabling this button will restrict the grid cells from being drawn.
Reset: Resets all ‘Grid Parameter’ controls to default.
Distortion Parameters
These are additional distortion parameters for conforming an image into a fisheye transformation, as well as correcting polar pinching.
Conform to Fisheye: This will conform your image into a fisheye transformation.
Multiplier: This is a multiplier for the fisheye transformation. (Please note that high values can severely distort your image.)
Reset: Resets all ‘Distortion Parameter’ controls to default.
H. Polar Correction: This corrects for horizontal polar pinching. Polar correction is useful for unwrapping spherically-mapped textures.
V. Polar Correction: This corrects for vertical polar pinching. Polar correction is useful for unwrapping spherically-mapped textures.
Miscellaneous
This is where you specify miscellaneous parameters, as well as filtering and presets.
Filtering: Specifies what type of pixel interpolation to use. (Nearest Neighbor being fastest, Bicubic being best.)
Presets: Specifies preset configurations for various camera lenses.
Realtime (Pushbutton): Applies all effects (in realtime) on ‘mouse drag’ instead of on ‘mouse release’. (This relates specifically to slider controllers.)
LOAD/SAVE: Load and Save settings. (.INI files)
OK/CANCEL: Apply or cancel the filter respectively.
Help: Displays this help.
Reset: Resets all controllers to default settings.
Changelog
- v1.0 – First release.
- v1.1 – Fixed bug when applying filter resulting in a 200% speed increase.
- v1.2 – New GUI design.
- v1.2 – Windows Vista Compatibility.
- v1.3 – 64 bit release.
- v1.3 – 16 bits / channel color support.
- v1.4 – Multithreading support.
- v1.4 – Various minor bug fixes.
- v1.4 – Redesigned, larger dialog.
- v1.4 – Resizeable dialog.
- v1.5 – Fixed crash on second launch.
- v1.6 – Fixed file access crashing bug in Windows 10.
- v1.7 – Fixed incorrect logo display when using larger fonts or DPI.
- v1.7 – Centered interface to screen on first launch.
Installing this software is easy and only requires three simple steps:
1 – Download the software by clicking on the Download Demo button located above on the software page. This will prompt you to save a .zip file on your computer.
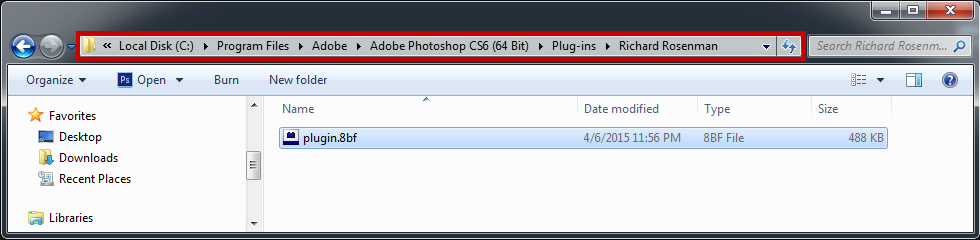
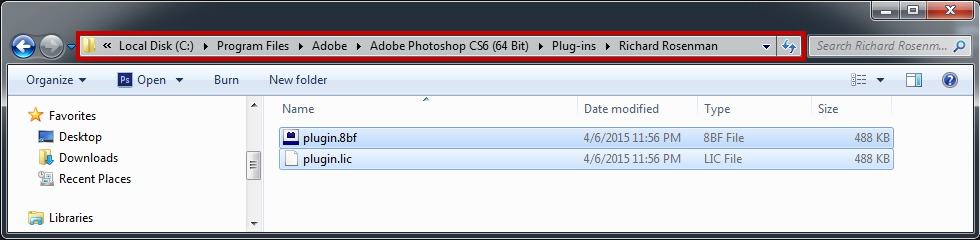
2 – Extract the contents from the .zip file and place the .8bf file into your host’s plugin folder. For instance, to install for Adobe Photoshop CS6, place the .8bf file into the location shown below. You can make a sub-folder to keep your plugins organized, such as the one below. Please make sure 64 bit plugins such as these are placed in the corresponding 64 bit Adobe Photoshop plugin folder.
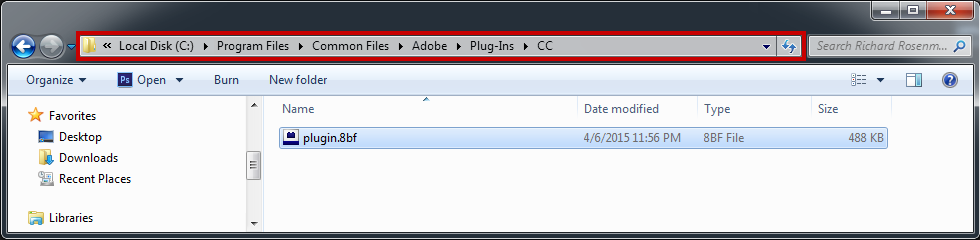
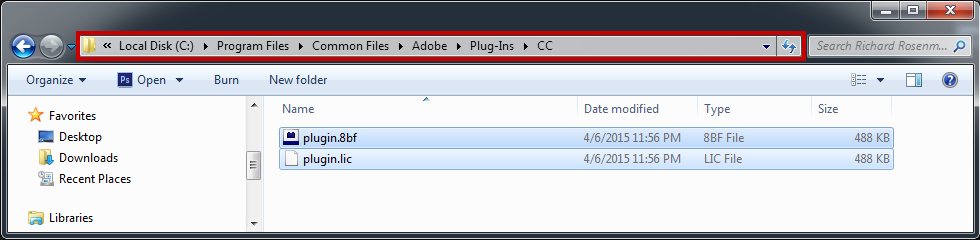
If you’re using Photoshop CC (eg. version 2013 – 2019 or later), your Photoshop plug-ins are stored in a folder shared between all Photoshop CC versions shown below.
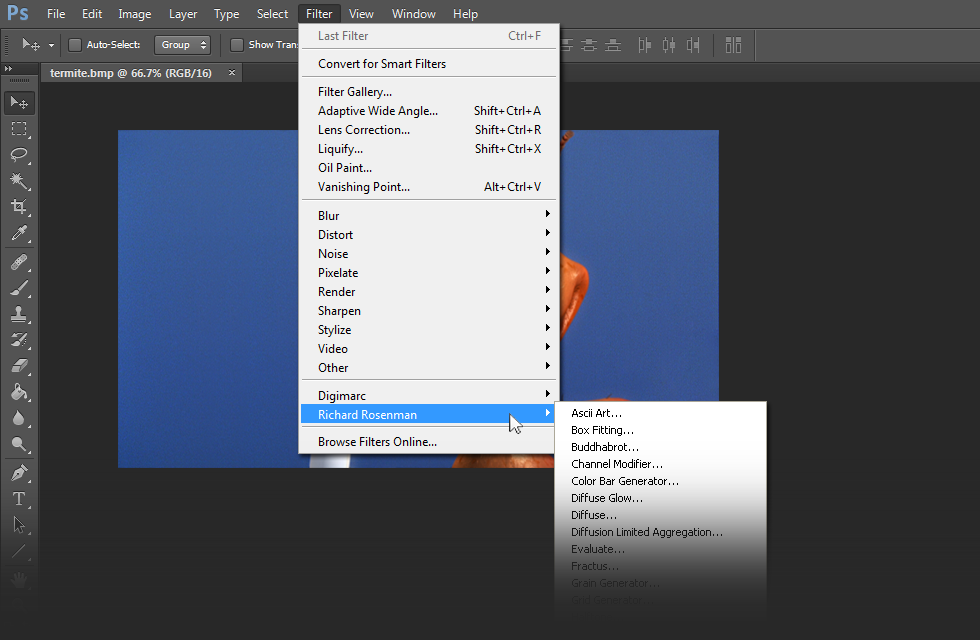
3 – Launch Adobe Photoshop, open an image and click on Filter > Richard Rosenman > Filter Name. If the filter is grayed out, it may not support your current image color depth.
If you have purchased a commercial license, please review the activation section.
If you have purchased a commercial license, you must activate your software. You can manually activate your software at any time by logging into your account. Activating this software is easy and only requires five simple steps:
1 – Log into your account by clicking on the Account button in the top menu.
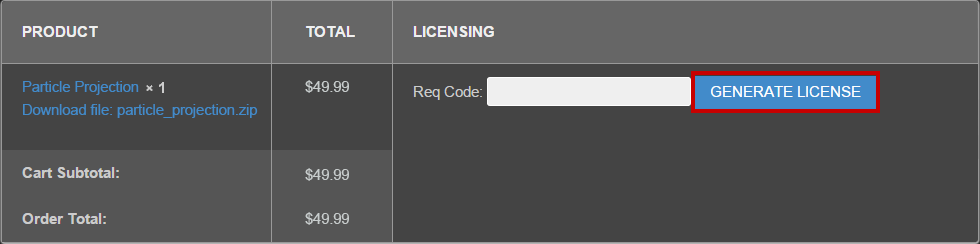
2 – Click on VIEW to display the order details containing the product you wish to activate.
3 – Enter your request code and click GENERATE LICENSE. Please see below for info on how to retrieve your request code.
Your request code can be found by clicking on the help button of the installed software.
4 – A file prompt will ask you to save the license file. You must save this license file in the same folder the plugin resides in. Below is an example for Photoshop CS6.
If you’re using Photoshop CC (eg. version 2013 – 2019 or later), your Photoshop plug-ins are stored in a folder shared between all Photoshop CC versions shown below.
5 – Relaunch Adobe Photoshop, open an image and click on Filter > Richard Rosenman > Filter Name. If the filter is grayed out, it may not support your current image color depth.
In the titlebar, your software should now display REGISTERED. It is now unlocked and ready for use.