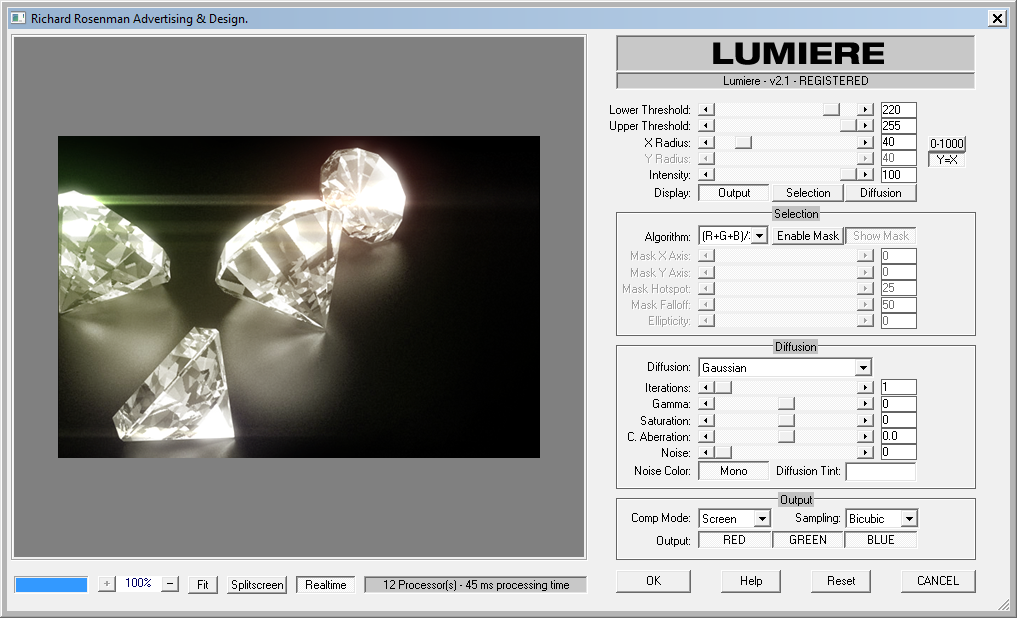
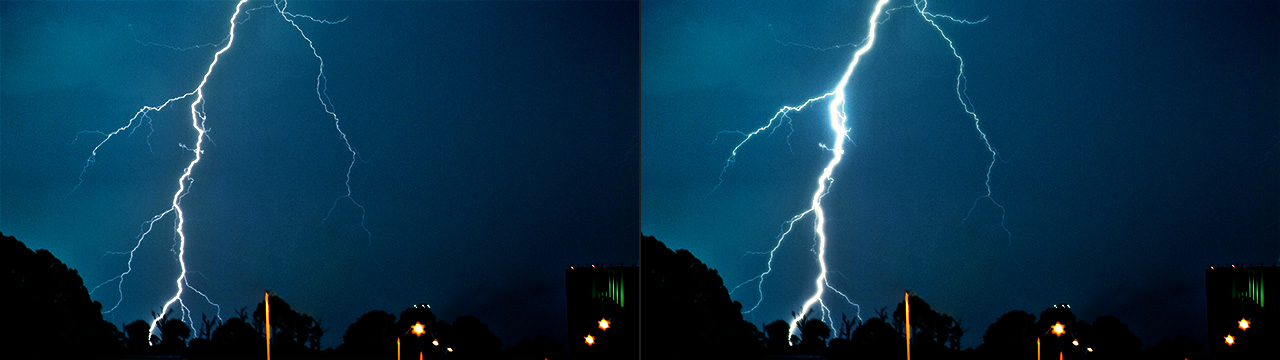
Lumiere is an extremely powerful plugin for Adobe Photoshop that generates advanced glow effects. Lumiere can produce sophisticated specular blooms, flared highlights and diffused glows with complete control over every possible variable, all at the artist’s fingertips. Lumiere works on image luminance – just like real glows do. The brighter areas of the image are processed into beautiful glows.
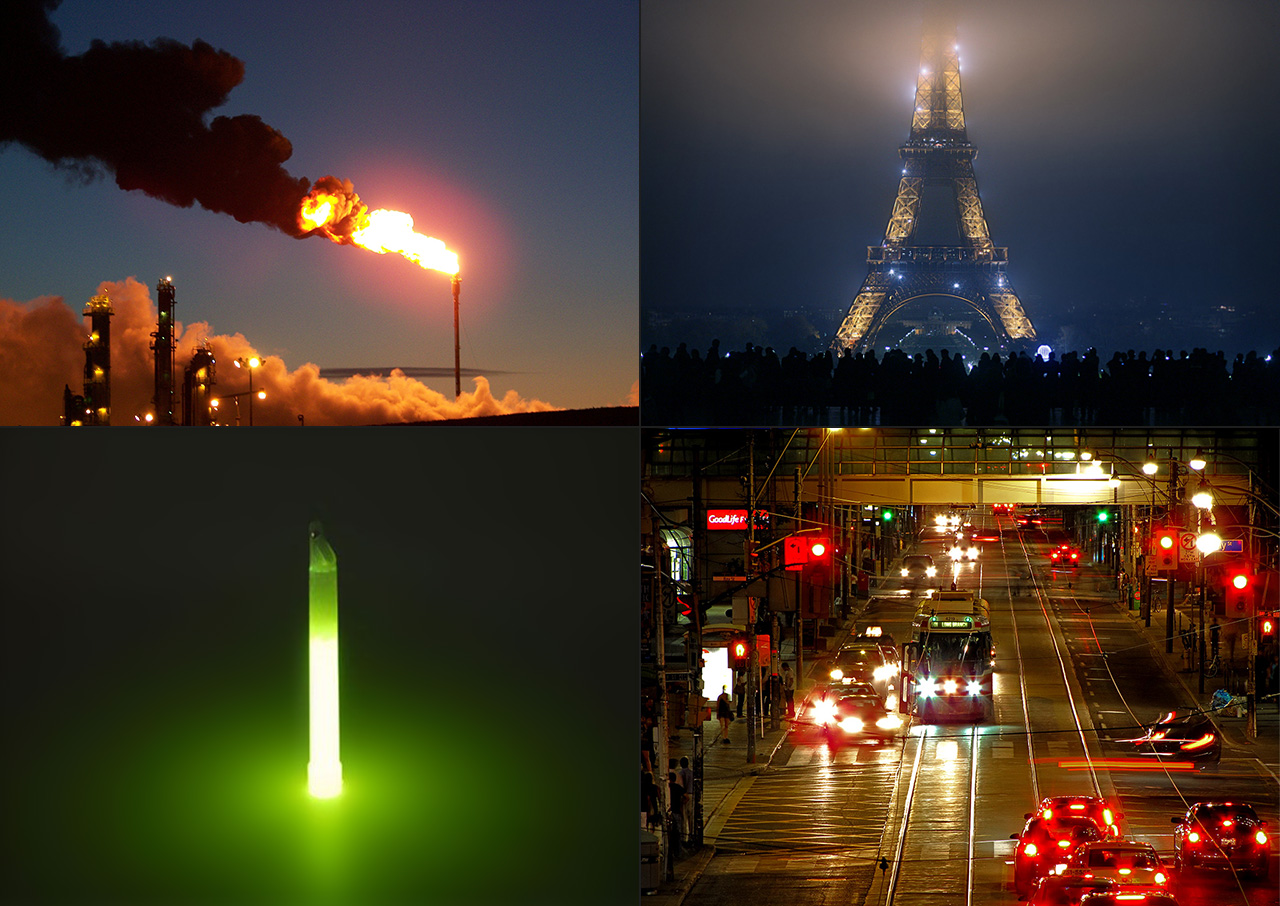
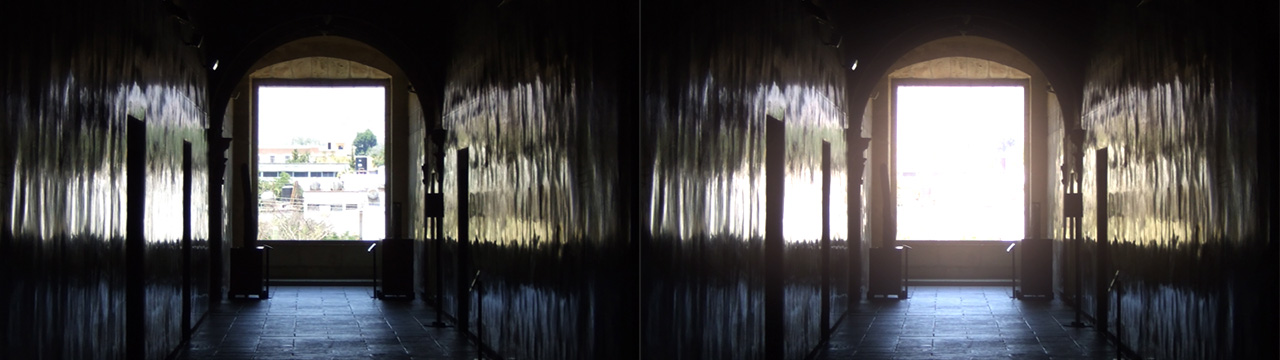
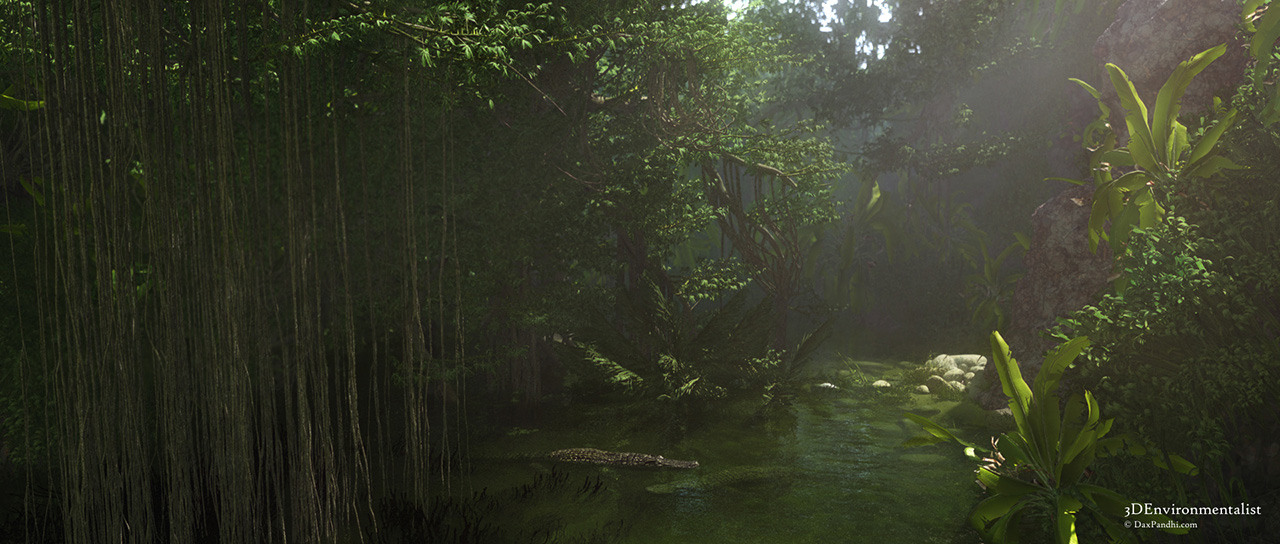
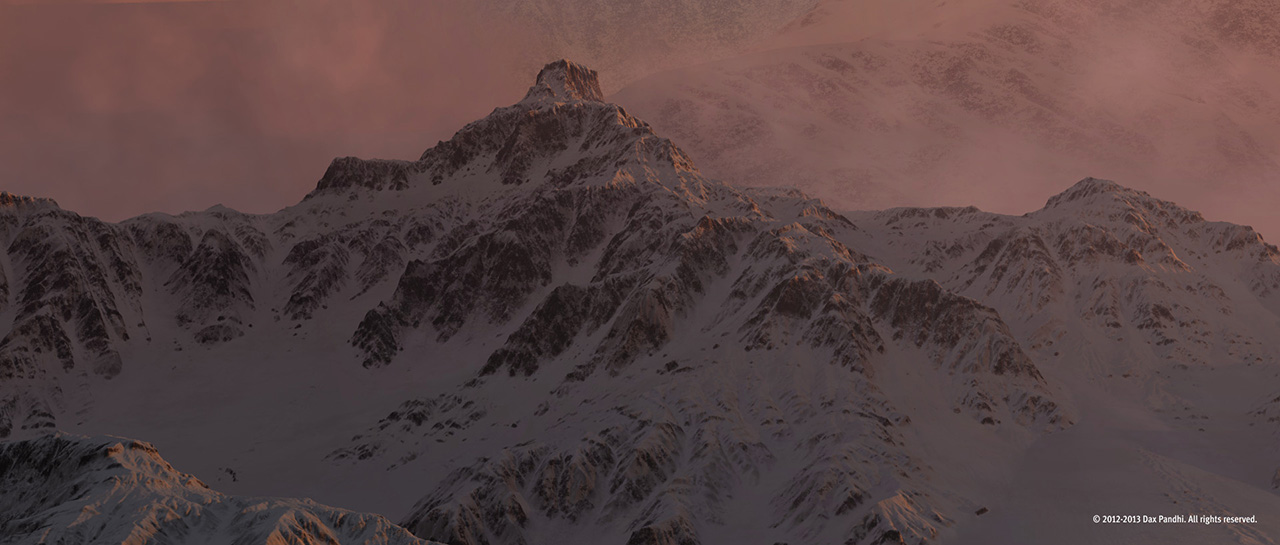
Glows (also called Diffuse Glows, Blooms, Specular Blooms, Ghosts, Filter Flares, Flares, Glares) describe the phenomena when bright objects in an image flare. This occurs in real-world photography for a number of different reasons: the actual emulsion of the film bleeds, internal reflections within the camera lens cause lens artifacts such as glow and lens flares or the photographer placed a special filter or gel over the lens. Reproducing this effect as a post process can easily be achieved with Lumiere for any number of technical or creative purposes.
Real-world diffused glows
Lumiere works by selecting a range of pixels above a brightness threshold, processing them using various diffusion algorithms and compositing them back on top of the source image. Lumiere’s tools provide fast and effortless previews of the selection and diffusion independently, for fine tuning. This displays what parts of the image are selected, and how these selections are processed into glows.
Left: Glow Selection, Middle: Glow Processed, Right: Glow Composite
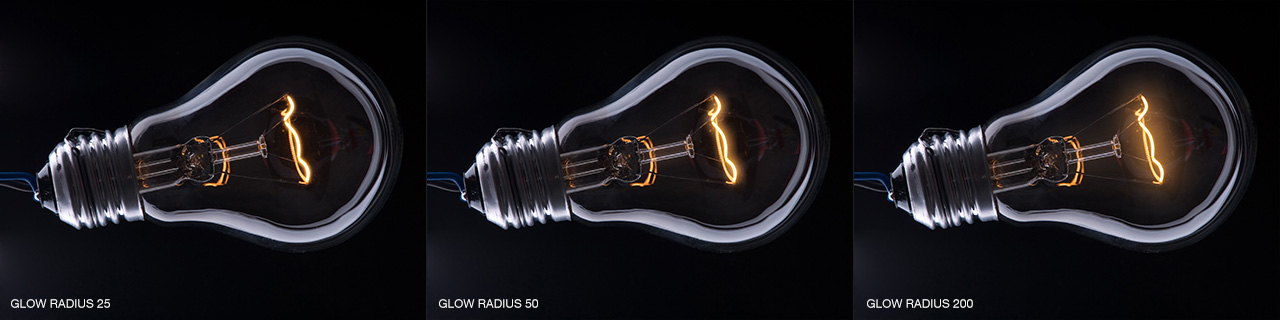
Lumiere allows fine-tuned control over each and every attribute throughout the process, such as meticulous control over the glow radius. Select from two different diffusion algorithms, control the number of diffusion iterations and precisely adjust the glow using gamma, saturation and even chromatic aberration features.
Lumiere glow radius
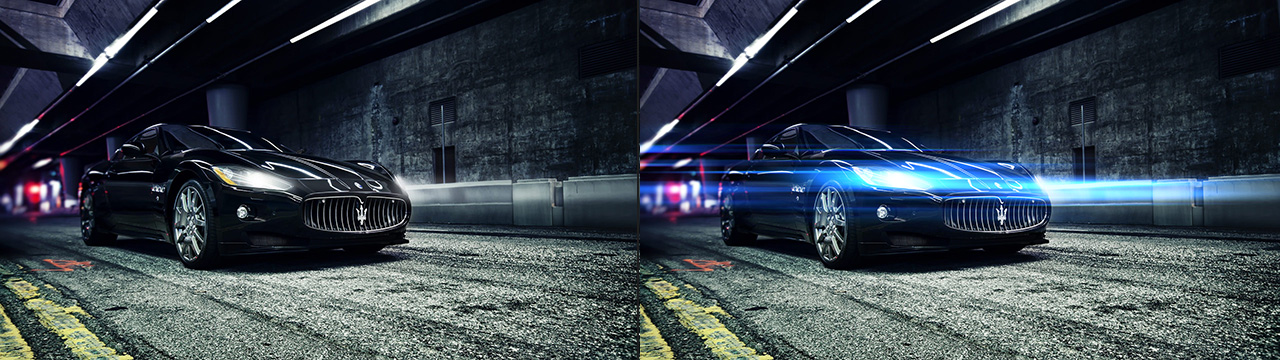
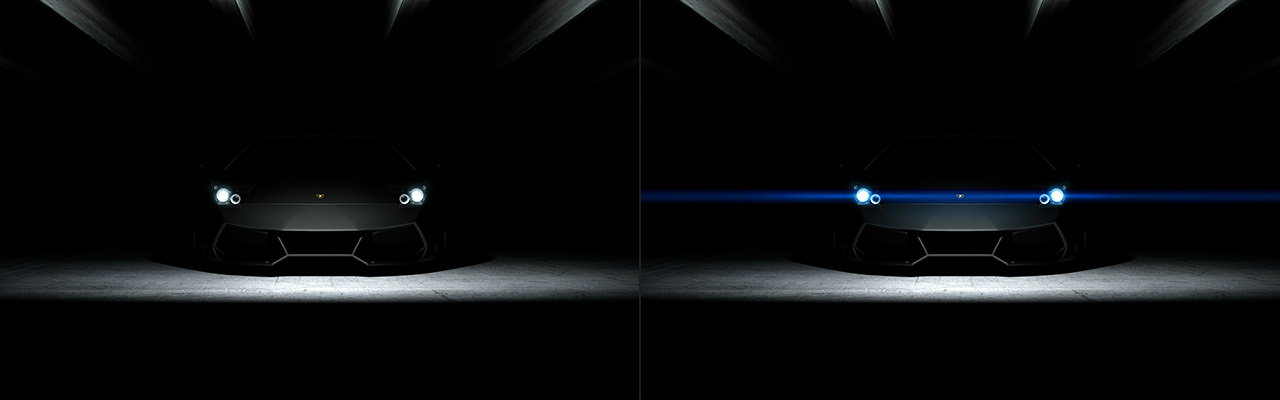
Specify a glow axis or adjust both independently for truly unique glow effects. Create gorgeous and vivid anamorphic glows in seconds.
Lumiere glow axis
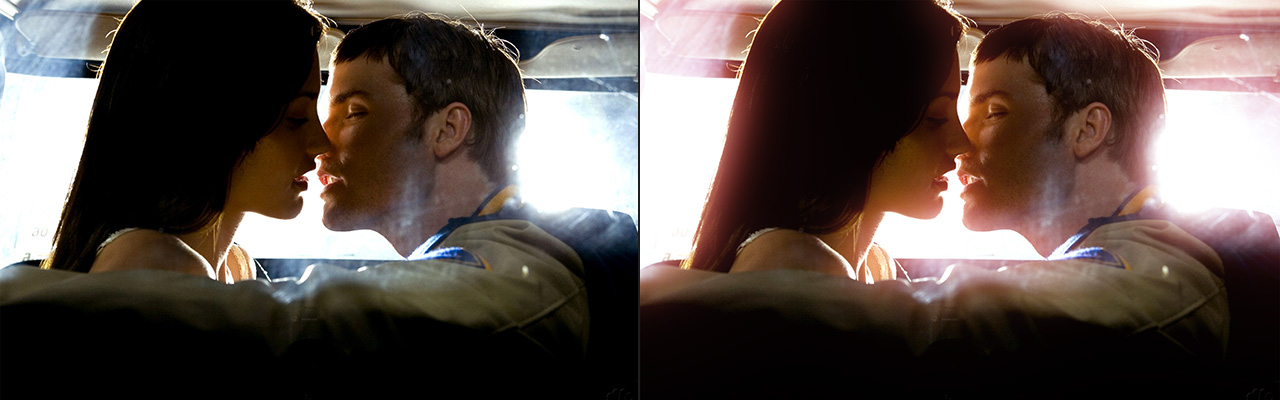
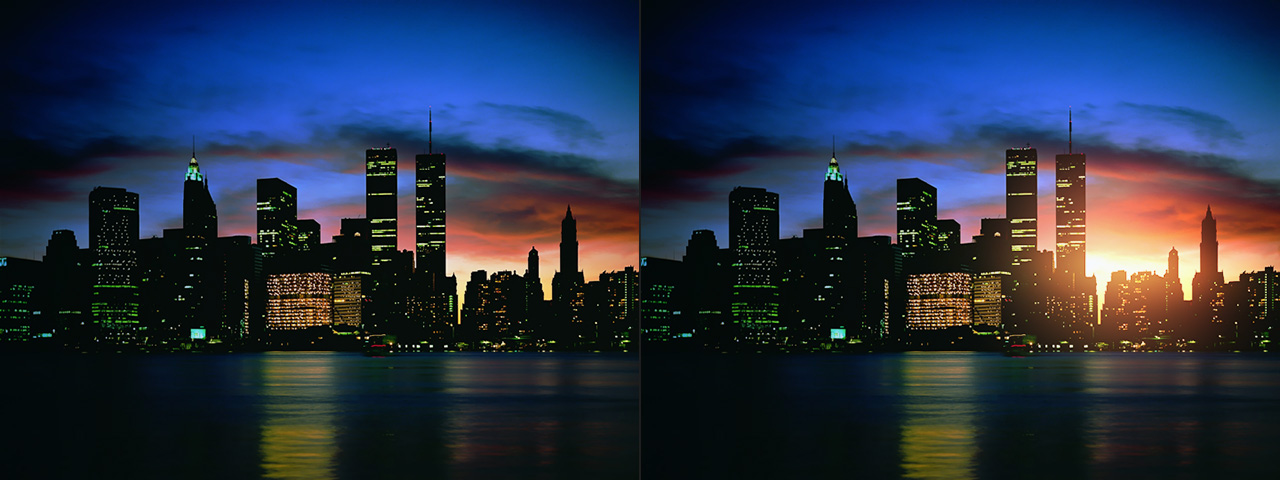
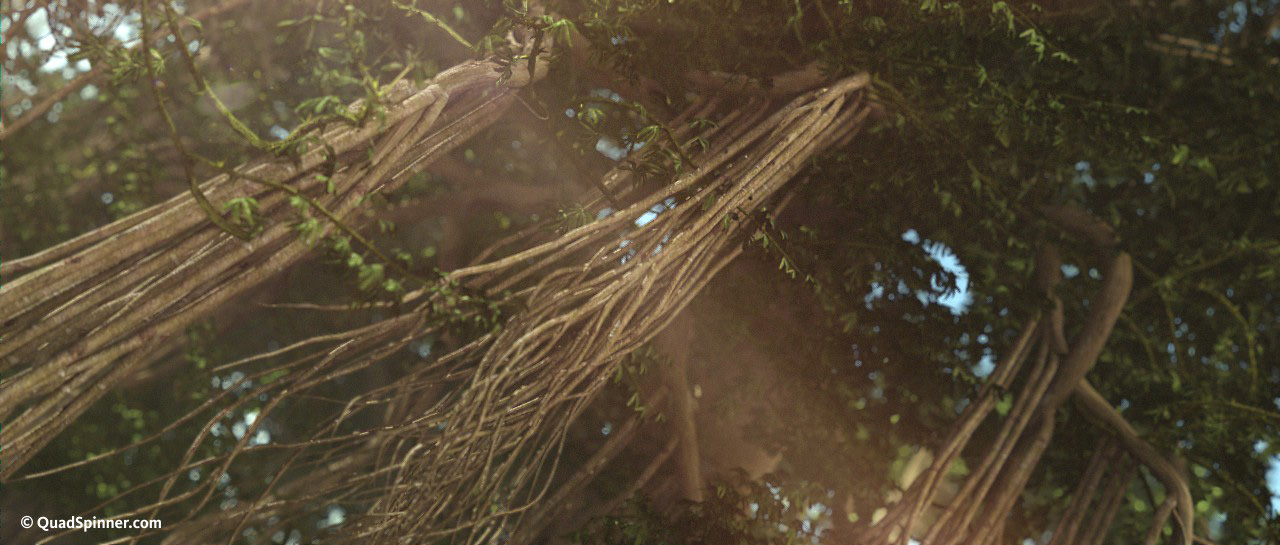
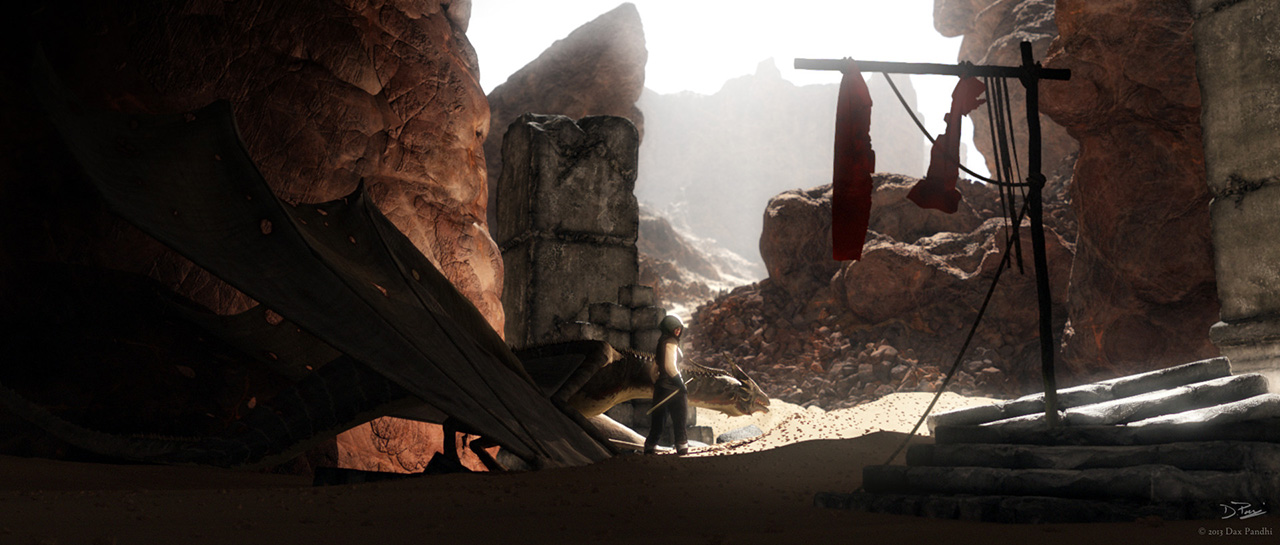
Lumiere is the ultimate creative tool for generating dramatic and impactful images. Specifically targeted glows can provide focus and direct the viewer’s attention to any particular part of your image.
Lumiere glows helps create focus
Lumiere offers professional-grade masking controls for isolated glows. The artist can specify a hotspot and falloff radius as well as image coordinates for advanced masking operations. Ten different luma conversion algorithms are available based on various industry standardized color spaces. Lumiere provides two highly optimized diffusion algorithms with independent axis control and multi-pass operations.
Lumiere masking features
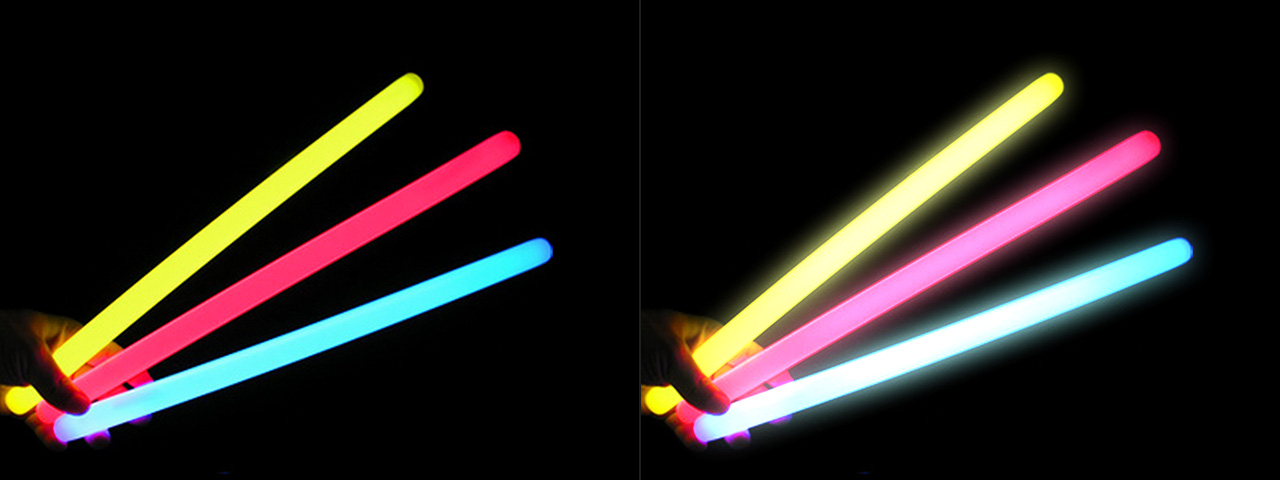
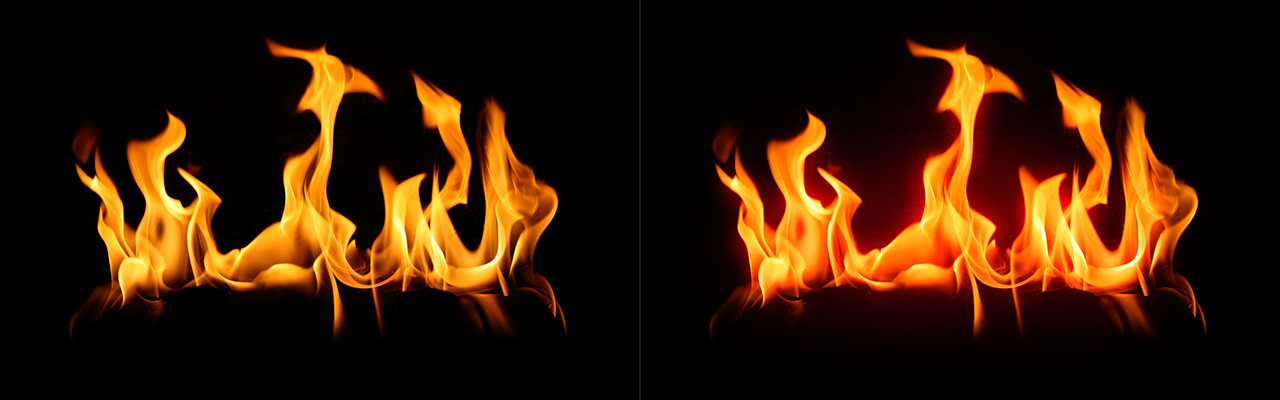
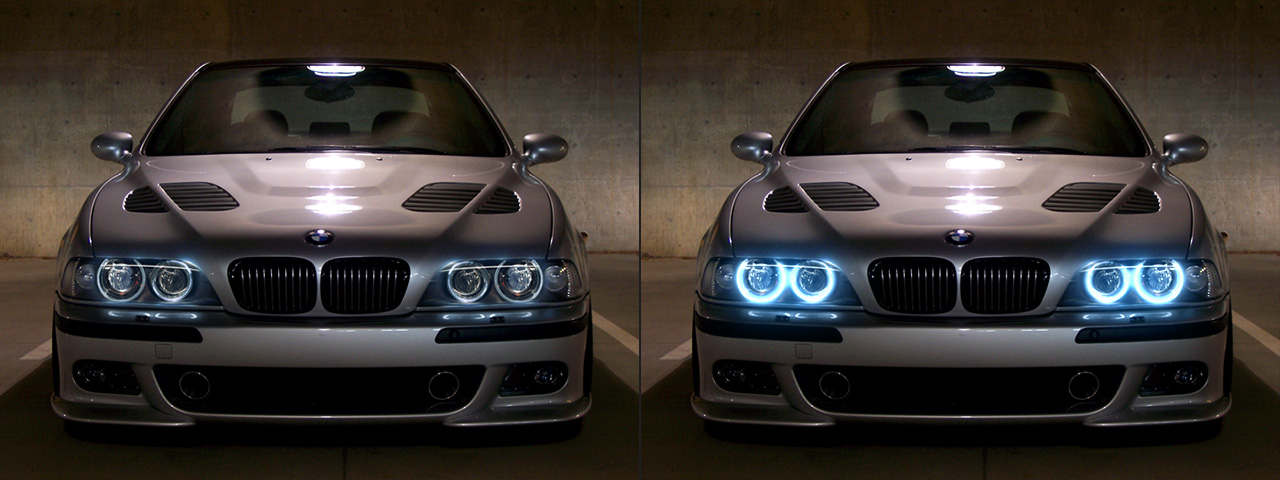
Lumiere intelligently analyzes the source image color and produces colored glows based on information, while providing the user with various additional color modification controls.
Lumiere performs glow on the source image colors – just like real glows
Lumiere’s glow-specific features such as gamma adjustment, saturation control, chromatic aberration, pixel noise capabilities and color tinting provide unsurpassed features for generating ultra-realistic glow effects. Re-introduce noise to match film and camera style optical effects.
Lumiere allows glow tinting for advanced color-corrected image integration
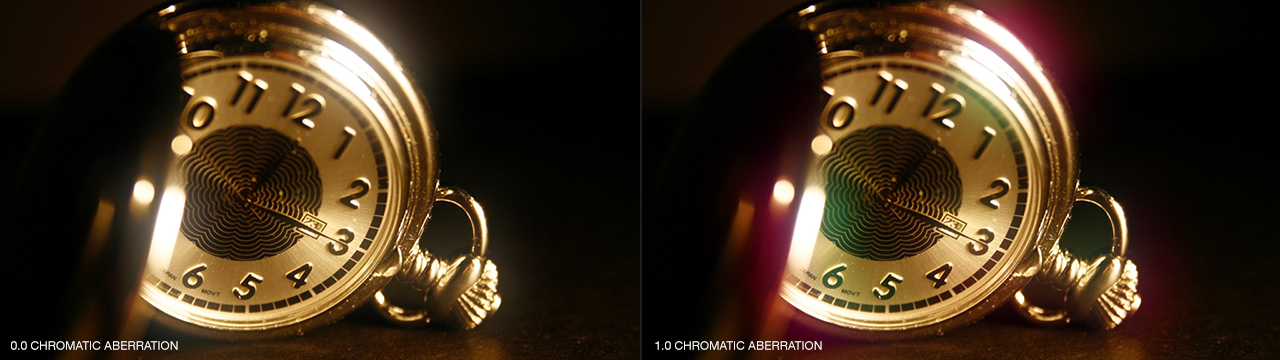
Lumiere even provides chromatic aberration tools capable of influencing the glow for truly unique and spectacular results.
Lumiere chromatic aberration
Lumiere has been developed for the professional digital imaging industry and therefore supports both 8 / 16 bits per channel color modes using 100% multithreaded rendering capabilities. A highly adjustable and resizable preview window instantly provides progress, zoom, image fit, side-by-side comparisons, realtime operations and statistical information after each pass.
Lumiere is 100% multi-threaded capable of using an unlimited number of cores for ultimate speed.
Lumiere supports both 8 bits / channel and 16 bits / channel color modes for professional workflows.
Workflow
Lumiere performs it’s operations using three logical steps. First is selection, next is diffusion and final is output. These sections have been logically separated into their own panel groups in Lumiere’s GUI for the sake of clarity and ease of use. A typical workflow is as follows: a selection of pixels is first specified using the lower and upper threshold. These pixels would generally consist of the brightest pixels in the image such as a light or sun, and the upper threshold would generally be left at 255. Next, the diffusion is applied. This blurs the selection to a specific size. Certain coloring operations can also be performed at this time to generate a suitable diffusion. Finally, the output occurs. The diffusion is additively composited with the original image using a specific blending mode to produce a diffused glow.
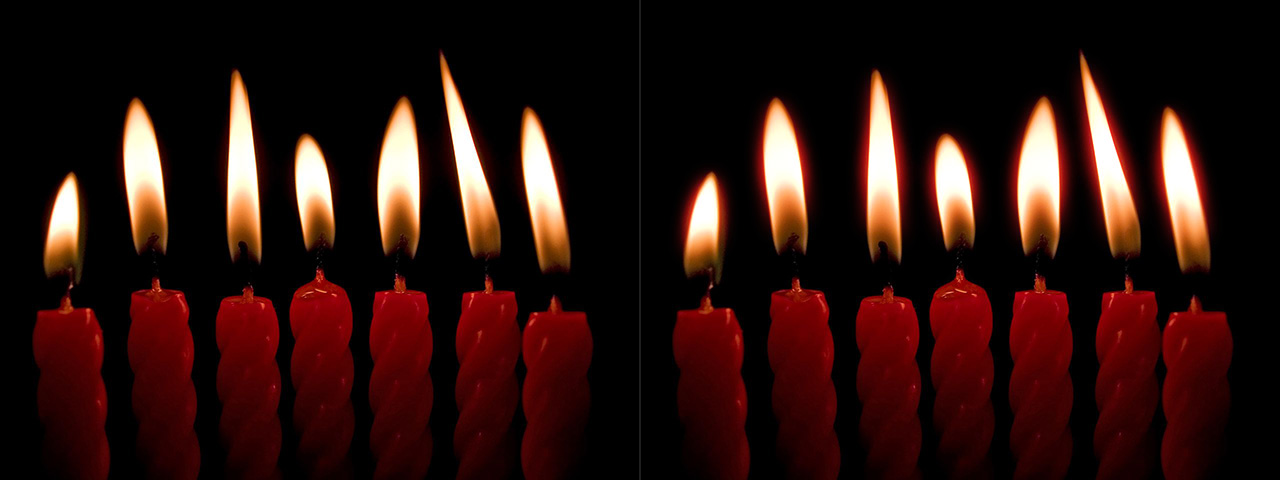
Lower Threshold: This slider controls the lower tolerance for selection. Pixels with a luminance value greater than this threshold and less than the upper threshold will be selected for diffusion.
Left: Source image, Right: glow threshold selection
Upper Threshold: This slider controls the upper tolerance for selection. Pixels with a luminance value less than this threshold and greater than the lower threshold will be selected for diffusion.
X Radius: This slider controls the size of the horizontal glow. Generally, sizes ranging from 0 to 255 are sufficient but if larger diffusion is required, simply use the 0-1000 button option. When the Y=X button is enabled, the X radius controls the Y radius as well.
Lumiere glow radius
By specifying varying X and Y radii, one can create striking effects such as anamorphic flares, streaks, etc.
Lumiere glow axis
Y Radius: This slider controls the size of the vertical glow. Generally, sizes ranging from 0 to 255 are sufficient but if larger diffusion is required, simply use the 0-1000 button option.
Lumiere glow axis
0-1000: This toggle increases the diffusion radius range from 255 to 1000.
Y=X: This toggle forces the Y radius to match the X radius for proportionally-sized glows.
Intensity: This slider controls the strength (in percent) of the glow. 0 results in a fully transparent glow while 100 results in a fully opaque glow.
Display (Output): Displays the final composited glow effect.
Display (Selection): Displays only the selected pixels for the glow effect.
Display (Diffusion): Displays only the diffused pixels for the glow effect.
Lumiere display mode
Selection
The selection algorithm specifies how Lumiere should calculate which pixels to select for diffusion. The most common is an average of all three color channels but sometimes it may be useful to use a specific color channel instead. For instance, on an image with a red moon on a blue sky, the red color channel may be selected for the algorithm which will automatically select only the moon pixels.
Algorithm (R+G+B)/3: The intensity is derived from the red, green and blue color channels added together and then averaged.
Algorithm (Red), (Green) & (Blue): The intensity is derived from the respective color channel.
Algorithm (H)LS, (Y)UV, (Y)CBR: The intensity is derived from the respective color space luminance channel.
Algorithm (R+G)/2, (G+B)/2, (B+R)/2: The intensity is derived from the two respective color channels added together and then averaged.
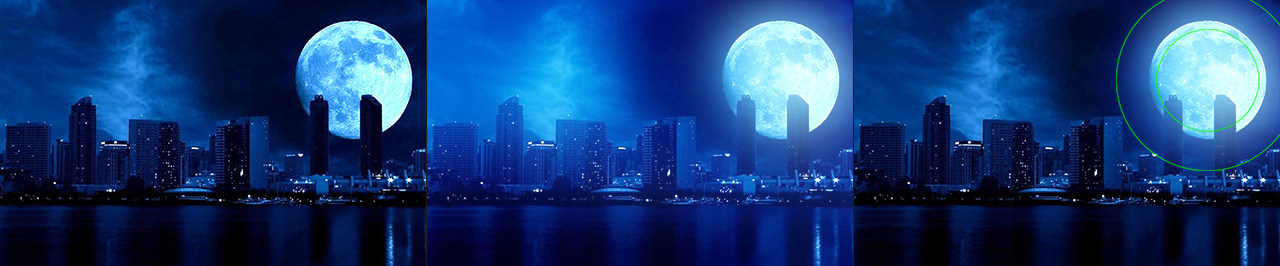
Masking is one of Lumiere’s most powerful features. This allows the artist to select only a specific area within a selection range. An example might be isolating a specific section of fire that requires glowing while the rest does not, or isolating a moon’s glow from the rest of the sky glow.
Enable Mask: This button will toggle masking capabilities for isolated glows.
Lumiere masking
Show Mask: This button will display or hide the mask selectors. When this button is enabled along with Enable Mask, clicking with the left-mouse button in the preview window will define a new mask location and clicking with the right-mouse button will scroll. When this button is disabled, clicking with the left-mouse button in the preview window will scroll.
Mask (X Axis), (Y Axis): These sliders control the location of the mask.
Lumiere mask position
Mask (Hotspot): This slider controls the hotspot mask selection. The glow will be 100% intense within the hotspot and will decrease to 0% intensity at the falloff.
Mask (Falloff): This slider controls the falloff mask selection. The glow will be 100% intense within the hotspot and will decrease to 0% intensity at the falloff.
Diffusion
Diffusion (Box, Gaussian): This drop-down specifies the type of diffusion algorithm to use. A box blur is generally faster but provides less accurate results. A gaussian blur will be a little slower but will yield optimal results. A box blur will produce box-shaped results while a gaussian blur will produce bell-shaped results.
Lumiere diffusion type
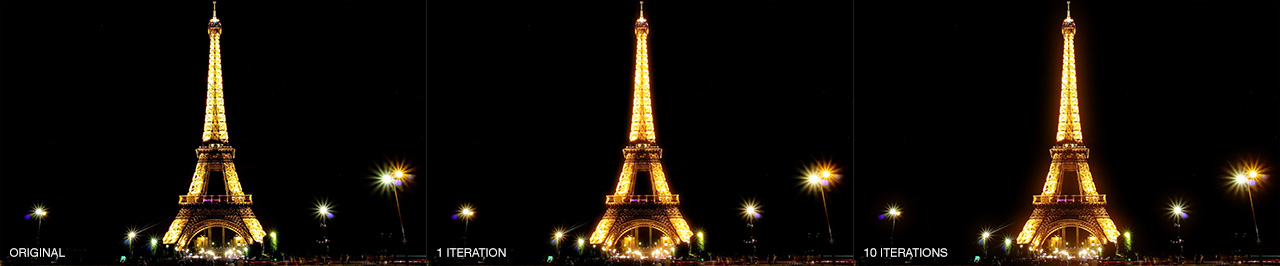
Iterations: This slider controls the number of diffusion passes to apply. Occasionally, a single diffusion pass may not be sufficient and you may require multiple passes to create a smooth glow. This can be especially true for large glows. You may also wish to use additional diffusion passes to smooth out box blurs or concentrate the centers of gaussian ones. Additional diffusion passes linearly increase processing time so use with caution.
Lumiere glow iterations
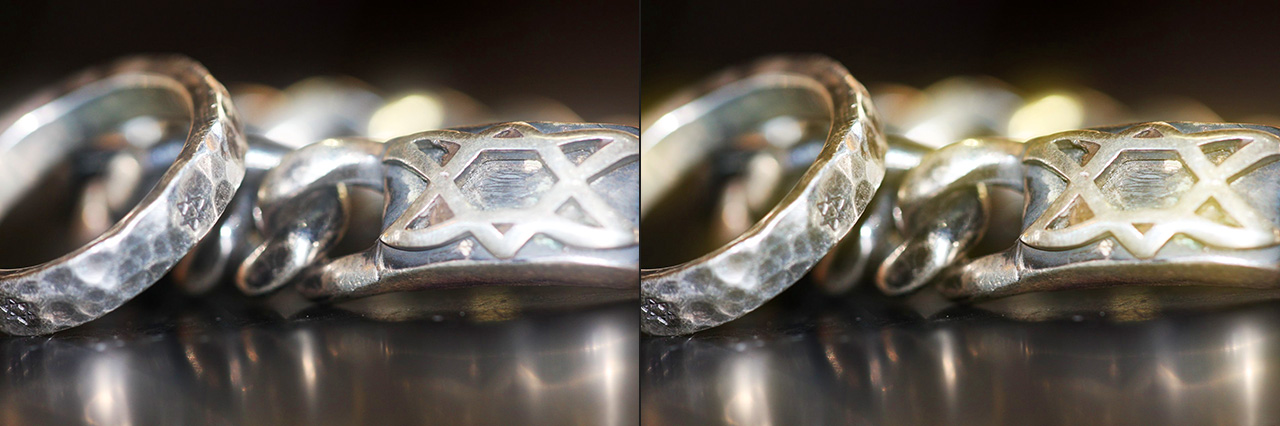
Gamma: This slider controls the glow gamma. This is often used to further concentrate a glow.
Saturation: This slider controls the saturation of the glow effect. You may occasionally want to use this feature to emphasize the colors in the glow effect or, alternately, desaturate the glow entirely when introducing diffusion tinting.
Chromatic Aberration: Controls the amount of chromatic aberration introduced to the glow effect. This feature simulates camera lens imperfections by separating color channels and applying diffusion, resulting in a spectral glow.
Lumiere chromatic aberration
Noise: This slider controls the amount of pixel noise to be added to the glow effect.
Noise Color (Mono): This button toggles between colored and monochromatic noise. Monochromatic noise calculates a color variance of the same value for all color channels while color noise calculates a unique color variance for each color channel.
Diffusion Tint: This color swatch specifies the glow color. This color will be multiplied with the currently-existing glow color. If you would like a glow specific to only the diffusion tint, you should set the diffusion saturation to -100 to remove all initial glow color.
Lumiere glow tinting
Output
Comp Mode: This drop-down specifies how to composite the glow effect (Add, Dodge, Lighten, Screen). All these modes operate in the same manner as the industry standardized blending modes. They all operate additively.
Sampling: This drop-down controls what type of sampling to use for features that use scaling functions such as chromatic aberration. If you introduce chromatic aberration and the glow appears pixelated, set the sampling mode to bicubic.
Output (Red, Green, Blue): Specifies what color channels to output.
Interface
Progress Bar: Displays the progress of the current glow effect.
Zoom: Specifies how large to display the preview image. The preview window size will directly affect Lumiere’s performance.
Fit: Fits the preview image within the preview window.
Splitscreen: Divides the preview window to show an unprocessed and processed image for side-by-side comparison.
Realtime: Applies all effects (in realtime) on ‘mouse drag’ instead of on ‘mouse release’.
Status: Displays statistics pertaining to the image processing.
OK: Applies the glow effect on the image.
Help: Displays a general help window.
Reset: Resets all controllers to default settings.
CANCEL: Exits the plugin without applying the glow effect on the image.
Additional Info
- v1.1 – When using chromatic aberration and full size preview, the edges of the preview will not diffuse correctly: this is a display bug only and applying the effect will result in correct output.
Changelog
- v1.0 – First release.
- v1.1 – Antialiased mask
- v1.1 – Don’t output mask if enabled
- v1.1 – Don’t output splitscreen if enabled
- v1.1 – Don’t output selection or diffusion if enabled, only final image.
- v1.1 – Don’t output selection or diffusion if enabled, only final image.
- v2.0 – 64 bit release.
- v2.0 – Added upper and lower thresholds for more specific color range selections.
- v2.0 – Added X & Y specific blur radii, with lock toggle, for individual axis glowing.
- v2.0 – Antialised mask gizmo.
- v2.1 – Fixed file access crashing bug in Windows 10.
- v2.2 – Fixed incorrect logo display when using larger fonts or DPI.
- v2.2 – Centered interface to screen on first launch.
Installing this software is easy and only requires three simple steps:
1 – Download the software by clicking on the Download Demo button located above on the software page. This will prompt you to save a .zip file on your computer.
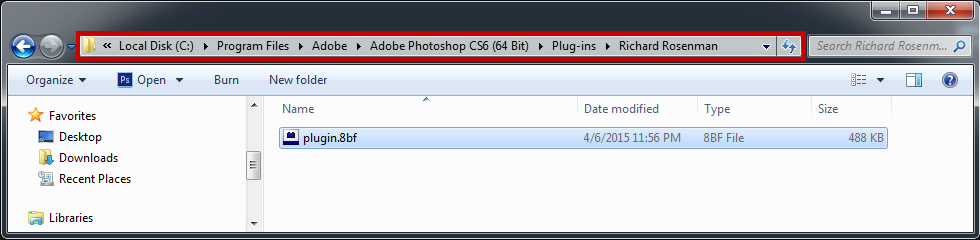
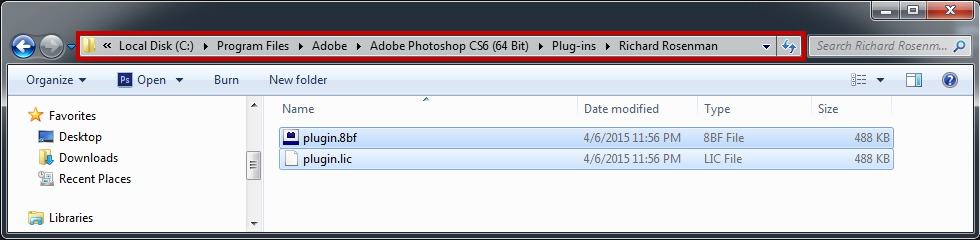
2 – Extract the contents from the .zip file and place the .8bf file into your host’s plugin folder. For instance, to install for Adobe Photoshop CS6, place the .8bf file into the location shown below. You can make a sub-folder to keep your plugins organized, such as the one below. Please make sure 64 bit plugins such as these are placed in the corresponding 64 bit Adobe Photoshop plugin folder.
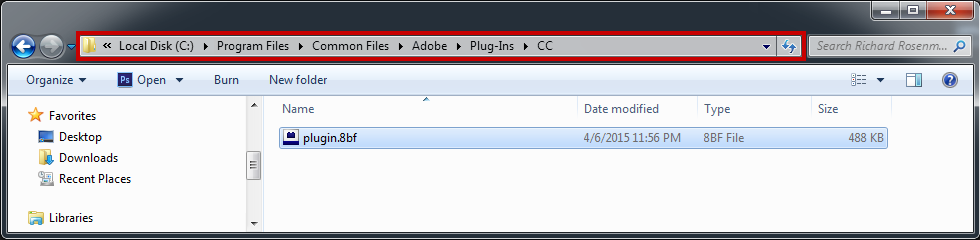
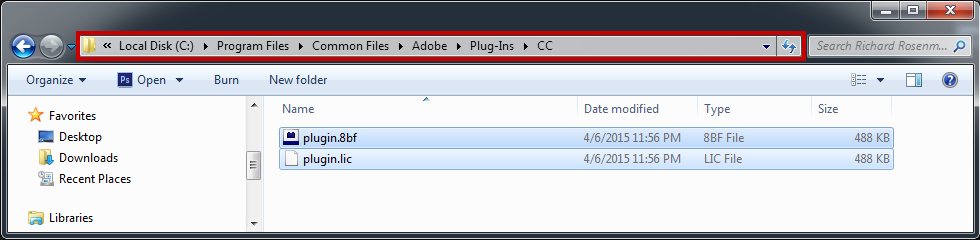
If you’re using Photoshop CC (eg. version 2013 – 2019 or later), your Photoshop plug-ins are stored in a folder shared between all Photoshop CC versions shown below.
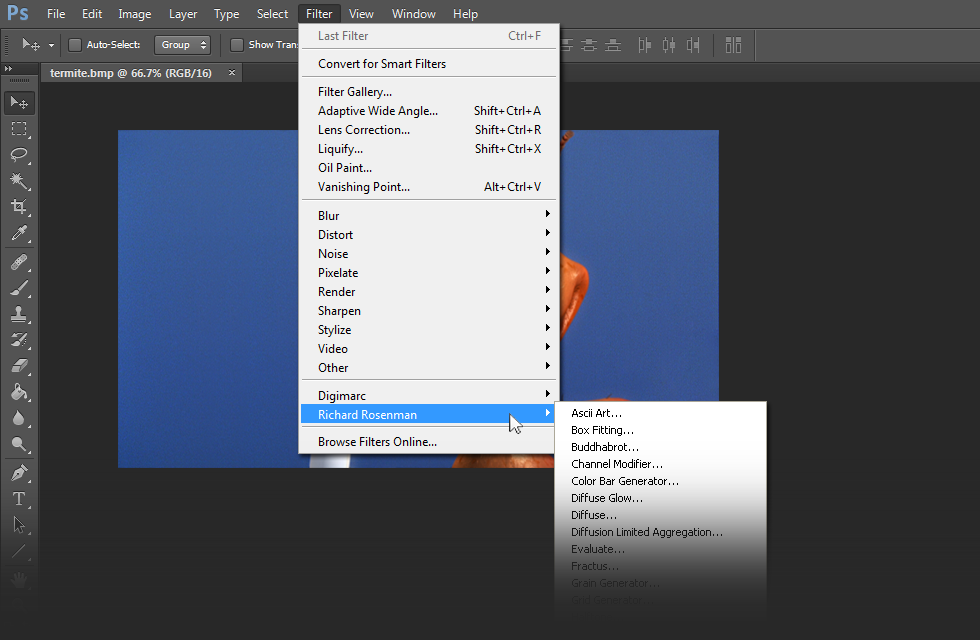
3 – Launch Adobe Photoshop, open an image and click on Filter > Richard Rosenman > Filter Name. If the filter is grayed out, it may not support your current image color depth.
If you have purchased a commercial license, please review the activation section.
If you have purchased a commercial license, you must activate your software. You can manually activate your software at any time by logging into your account. Activating this software is easy and only requires five simple steps:
1 – Log into your account by clicking on the Account button in the top menu.
2 – Click on VIEW to display the order details containing the product you wish to activate.
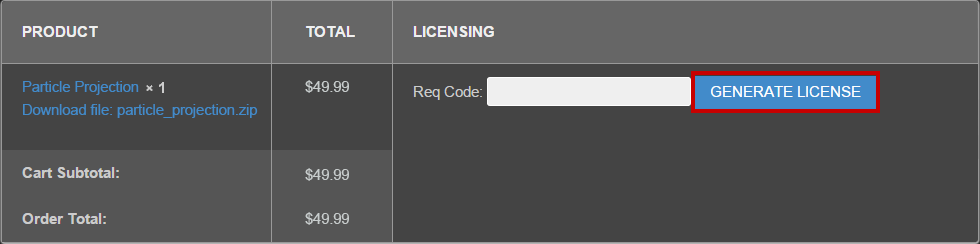
3 – Enter your request code and click GENERATE LICENSE. Please see below for info on how to retrieve your request code.
Your request code can be found by clicking on the help button of the installed software.
4 – A file prompt will ask you to save the license file. You must save this license file in the same folder the plugin resides in. Below is an example for Photoshop CS6.
If you’re using Photoshop CC (eg. version 2013 – 2019 or later), your Photoshop plug-ins are stored in a folder shared between all Photoshop CC versions shown below.
5 – Relaunch Adobe Photoshop, open an image and click on Filter > Richard Rosenman > Filter Name. If the filter is grayed out, it may not support your current image color depth.
In the titlebar, your software should now display REGISTERED. It is now unlocked and ready for use.