Particle Projection is a powerful After Effects plugin for generating complex particle arrays projected through the use of a displacement layer. Particle Projection can create stunning and unique generative effects with an incredible level of detail.
Particle Projection operates by generating an array of particles and then projecting them in 3D perspective according to the displacement layer’s corresponding pixel luminance value. The brighter the pixel value, the greater the particle projection. Selecting interesting displacement layers and filtering them appropriately will result in unique projections. Imported footage isn’t always necessary and using generative effects like After Effect’s Turbulent Noise will produce amazing results.
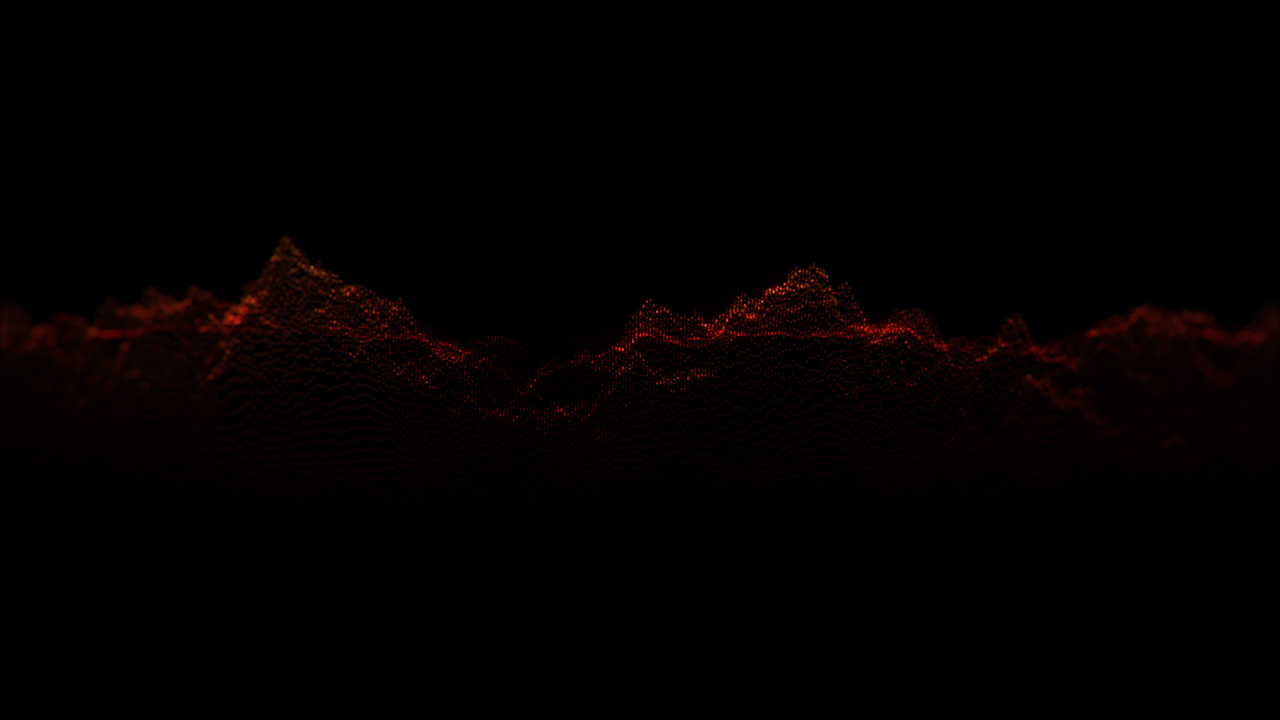
Particle Projection’s algorithm works by projecting particles through a displacement layer
Particle Projection offers a set of powerful features for generating truly unique effects. Select the particle size and spacing independently, control the effect intensity, adjust the projection’s axis point, invert the translation and specify particle colors. Since every control is fully animatable and keyframable within After Effects, the possibilities are endless.
Particle Projection offers an exciting toolset for generating truly unique effects
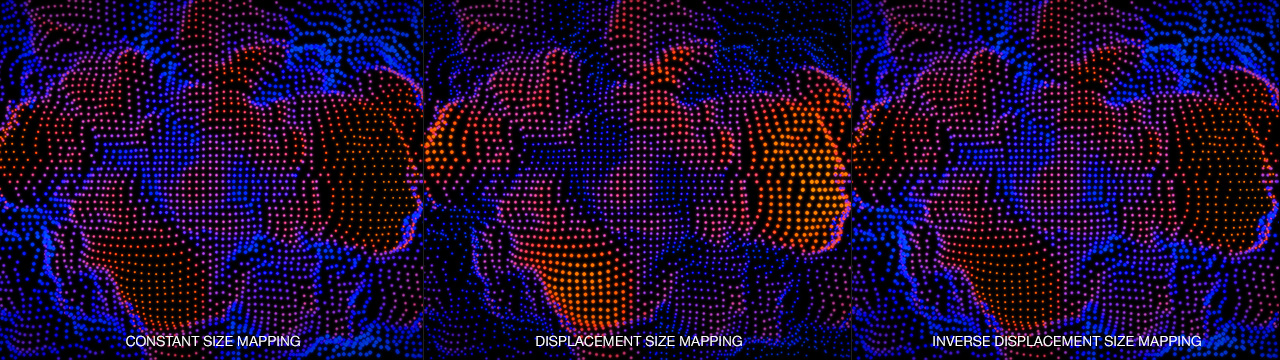
Particle Projection also offers dynamic mapping features. For instance, it is possible to affect the particle size, color, and transparency according to the displacement layer’s value. Brighter displacement layer values will result in certain particles being larger than others, certain particles shaded one color versus the other, or certain particles being more transparent than the other. Each mapping control also provides an inverse option for ultimate control.
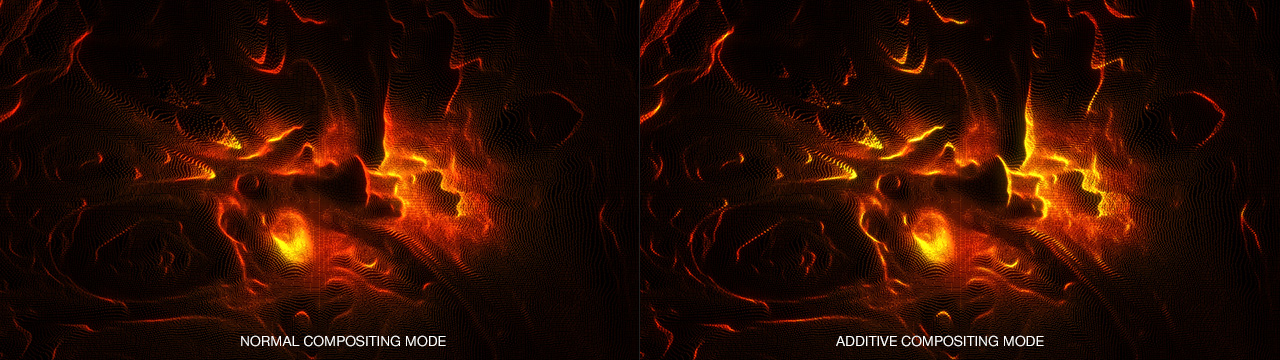
Particle Projection offers normal and additive compositing modes
Particle Projection offers normal and additive compositing modes allowing particles overlaid upon one another to feature vibrant and illuminated properties. This is in addition to the layer’s compositing mode which allows multiple instances of the effect to be combined together.
Particle Projection offers dynamic mapping tools
From generative backgrounds, high-tech elements, experimental design, and more, Particle Projection is a must-have plugin for both professional and hobbyist designers alike.
For a complete list of features, check out the documentation tab,. Better yet, download the free demo of Particle Projection today!
Particle Projection supports both 8 bits / channel and 16 bits / channel color modes for professional workflows.
Workflow
Particle Projection is capable of working in 8 bits per channel and 16 bits per channel color modes. It is recommended to work in 16 bits per channel color mode so that the displacement map can provide 32,768 levels of luminance as opposed to 256 when working in 8 bits per channel color mode. While Particle Projection will also work in 32 bits per channel color mode, it will down-convert 32 bit float values to 16 bits per channel.
Particle Projection must be provided a displacement layer to work from. If the displacement layer has any effects applied to it, it must first be pre-composed or the effects will be ignored. This is normal operation within After Effects for any effects that depend on layer input.
Particle Projection projects particles based on luminance values. As a result, grey-scale displacement layers provide the best output.
Particle Projection can have motion blur by applying the CC Force Motion Blur effect.
Applying a blur effect to the displacement layer will reduce projection detail and produce more organic results. One is not better than the other but both produce very different results. Sometimes combining both blurred and sharp displacement layers produces great results.
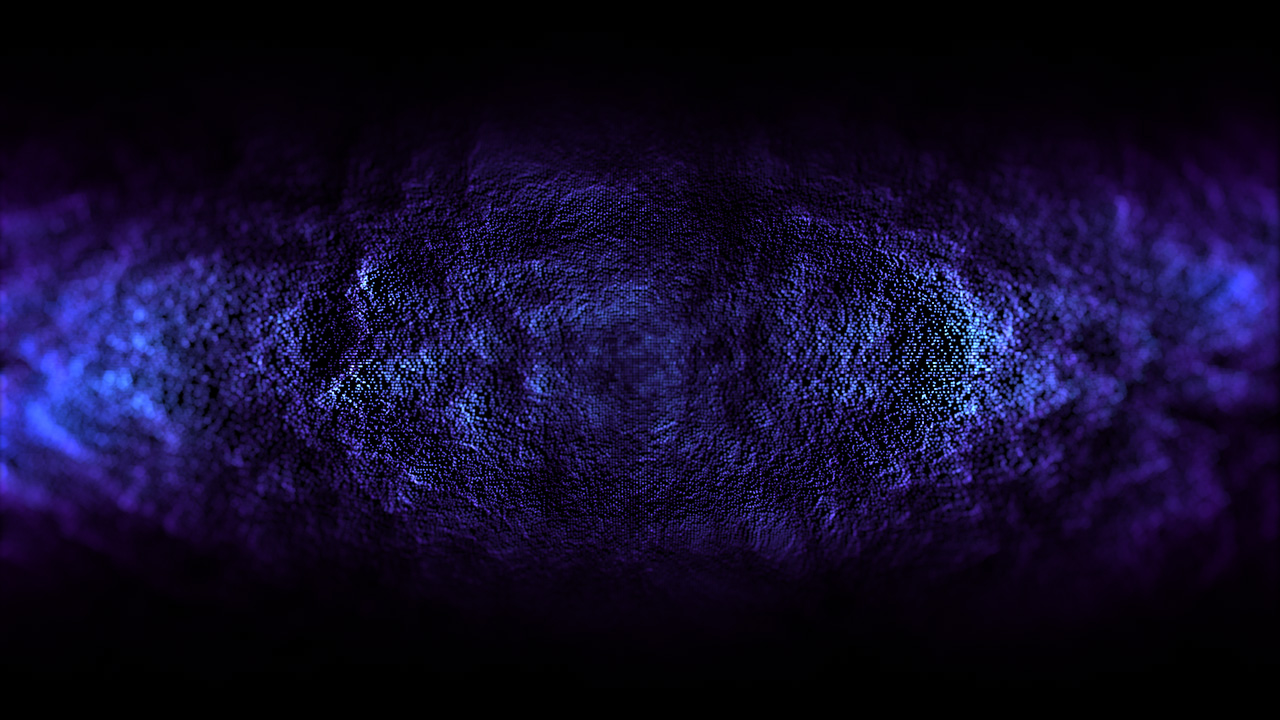
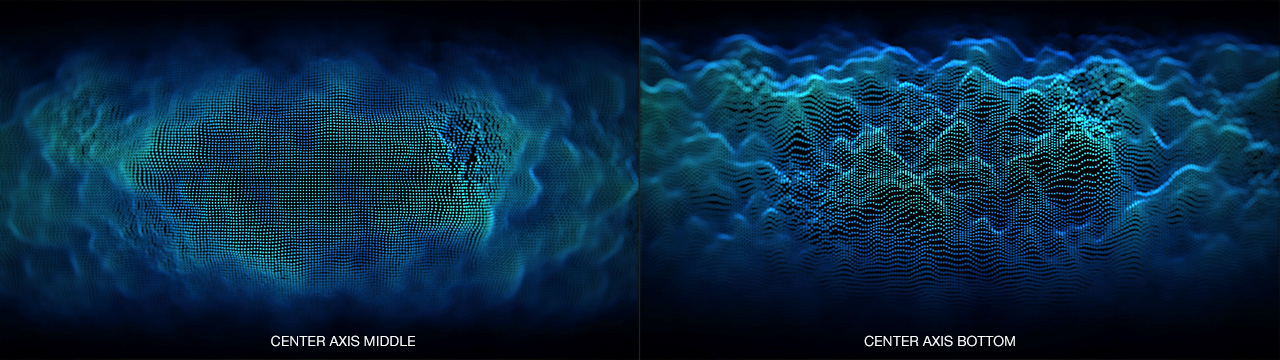
Adjusting the center axis produces unique results
Controls
Displacement Layer: Specifies the displacement layer to be used for projection. If there are any effects applied to the displacement layer, it must be pre-composed in order for those effects to be taken into consideration.
Particle Size: Specifies the particle radius.
Size Mapping: Specifies how to map the particle size to the displacement layer. Constant disregards the displacement layer and applies a constant size dictated by the particle size controller. Displacement maps larger particles to brighter values. Inverse Displacement maps smaller particles to brighter values.
Particle Spacing: Specifies the spacing between particles. The spacing is calculated by taking the particle size into consideration.
Effect Intensity: Controls the displacement intensity. Although the intensity of the displacement layer directly affects the intensity of projection, this control acts as a multiplier.
Axis Center: Specifies the center axis from which point the particle are projected from. Adjusting this axis can yield very unique results, especially when set to off-screen coordinates.
Axis Contraint: Allows the effect to be constrained to either the XY Axis, X Axis or Y Axis.
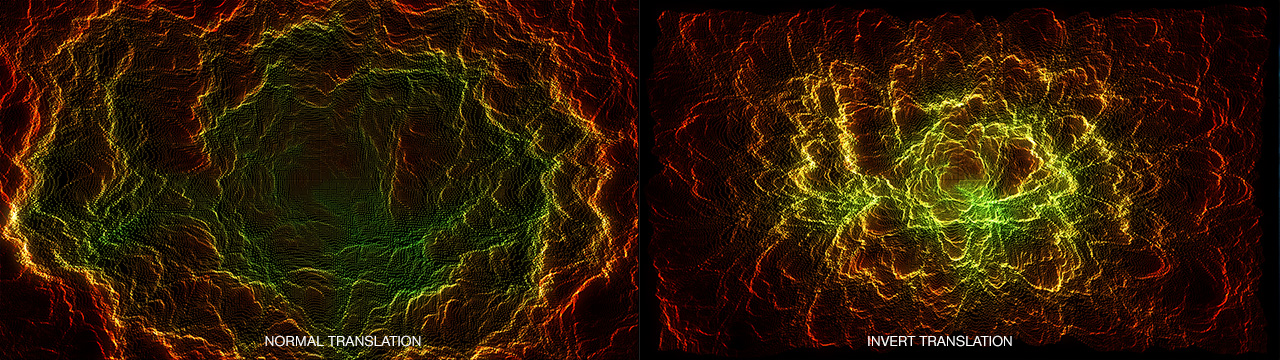
Invert Translation: Toggles between positive and negative projection translation.
Black Background: Specifies whether to color the background black or reveal the image.
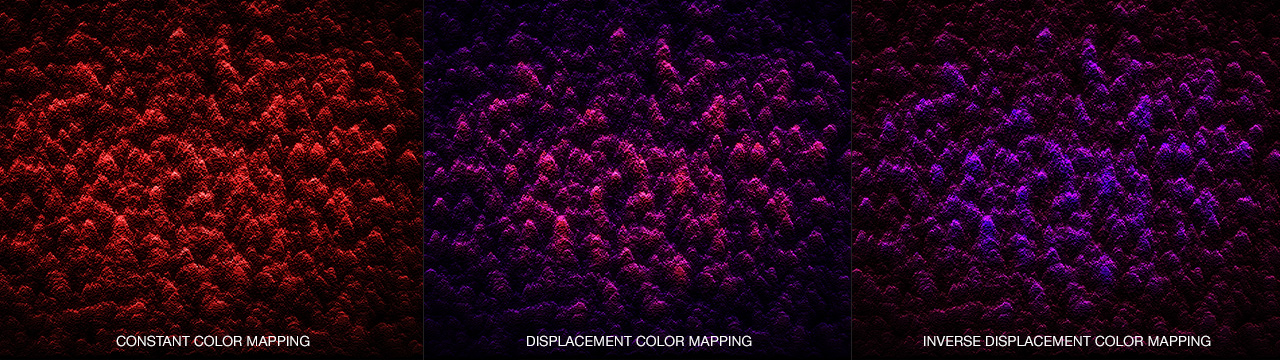
Color A: Specifies the color for constant color mapping.
Color B: Specifies the secondary color for use when displacement or inverse displacement color mapping is selected.
Color Source: Specifies whether to assign colors based on the color swatches or on the source image. This allows the particles to be colored based on any image imported into After Effects. When Source Image is specified, the Color Mapping functions become disabled.
Color Mapping: Specifies how to map color to the particles. Constant disregards the displacement layer and applies a constant color dictated by the Color A controller. Displacement maps Color A to brighter values and Color B to darker ones. Inverse Displacement maps Color B to brighter values and Color A to darker ones.
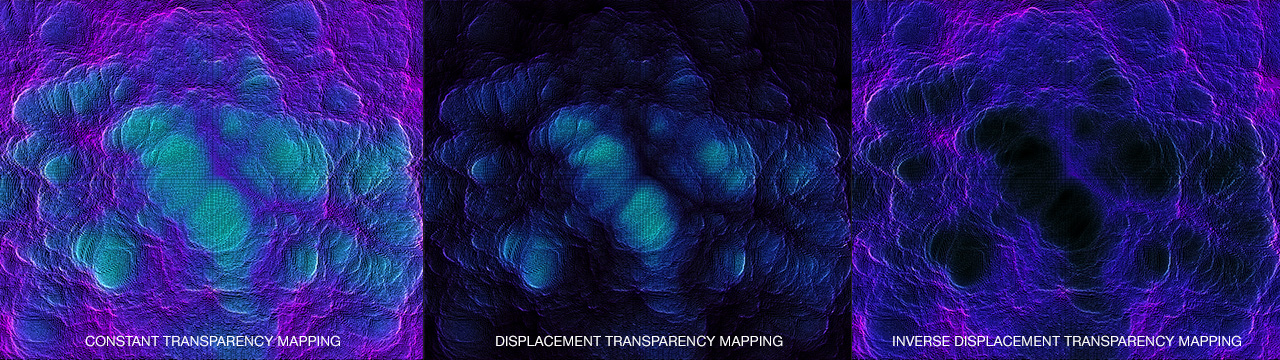
Transparency Mapping: Specifies how to map transparency to the particles. Constant disregards the displacement layer and applies a constant transparency of 0%. Displacement maps 100% transparency to brighter values and 0% transparency to darker ones. Inverse Displacement maps 0% transparency to brighter values and 100% transparency to darker ones.
Compositing Mode: Specifies the particle compositing mode. Normal overwrites particle intensities while additive adds particle intensities together, thereby making overlapping areas brighter and more apparent.
Extend Boundaries: Increases the particle array so that when invert translation is enabled, additional particles will fill the screen.
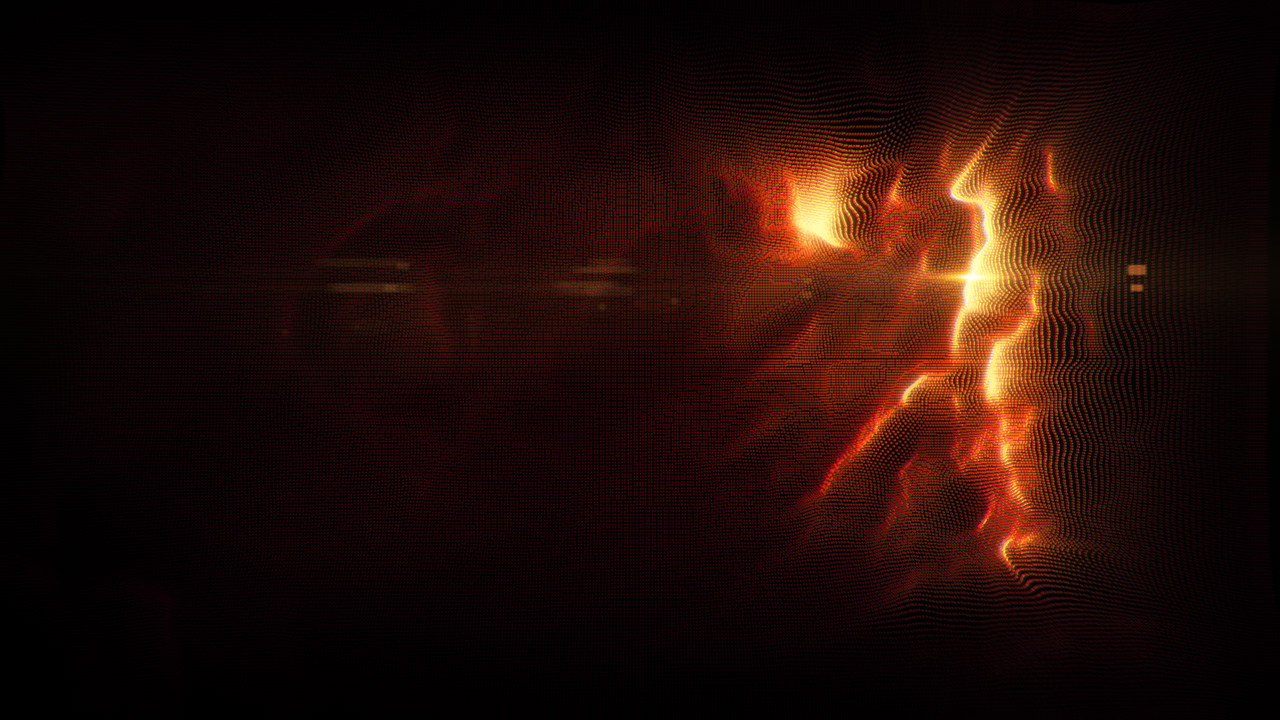
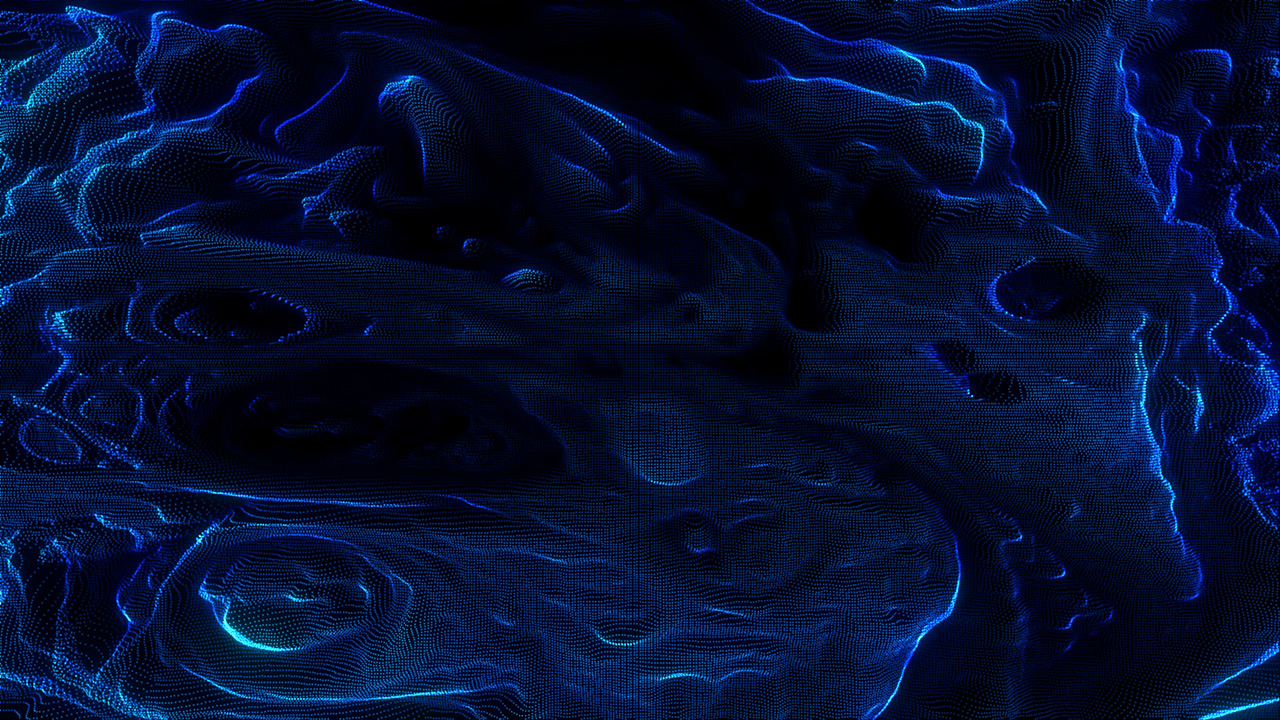
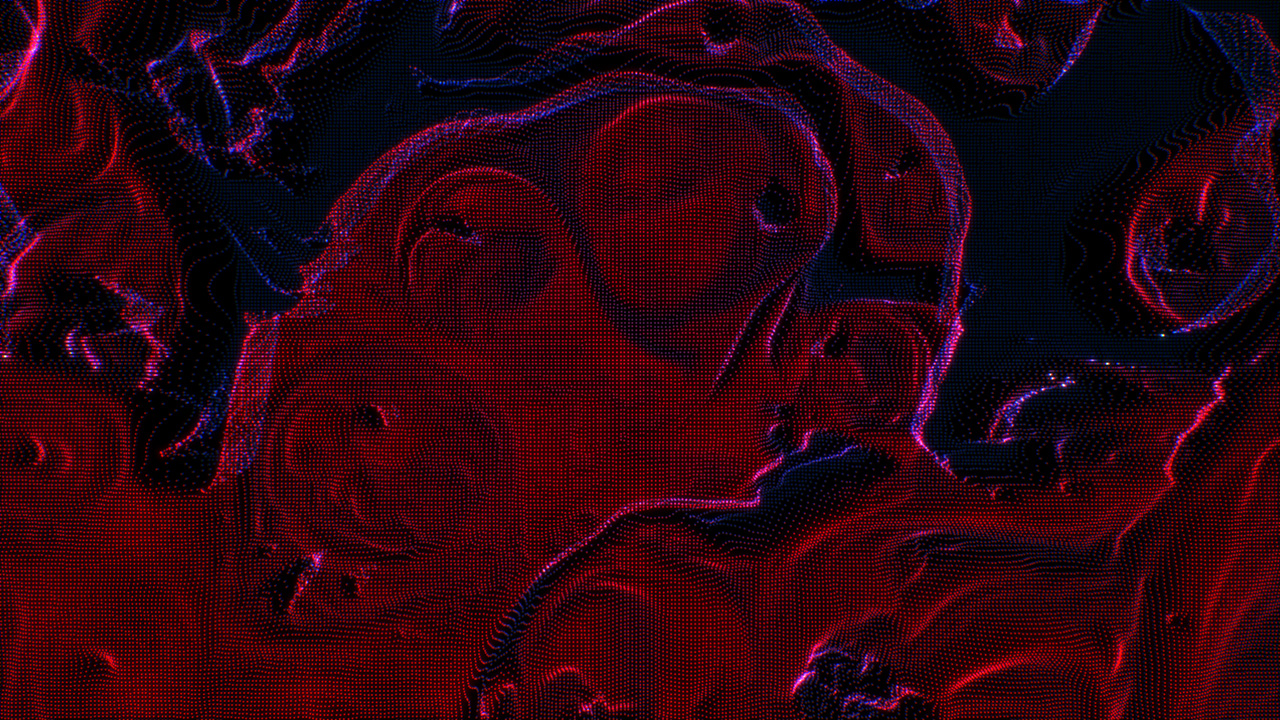
Abstract footage produces stunning results
Changelog
v1.0 – First release.
v1.1 – Added Progress Bar.
v1.1 – Fixed Undersampling Display.
v1.1 – Added Axis Constraint.
v1.1 – Added Color Source.
v1.1.1 – (Mac) M1 Silicon support.
This section features video generated with the Particle Projection plugin for After Effects.
Music from https://filmmusic.io: “Crypto” by Kevin MacLeod (https://incompetech.com) Licence: CC BY (http://creativecommons.org/licenses/by/4.0/)
Installing this software is easy and only requires three simple steps:
1 – Download the software by clicking on the Download Demo button located above on the software page. This will prompt you to save a .zip file on your computer.
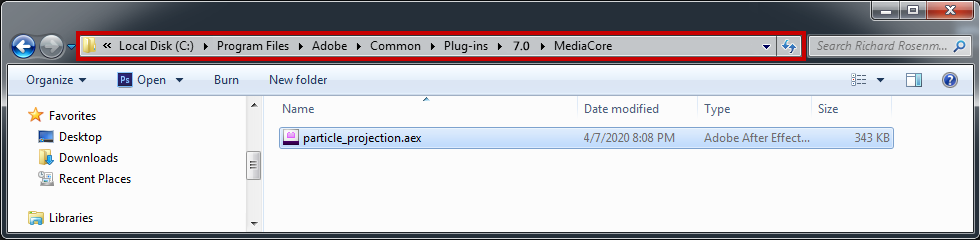
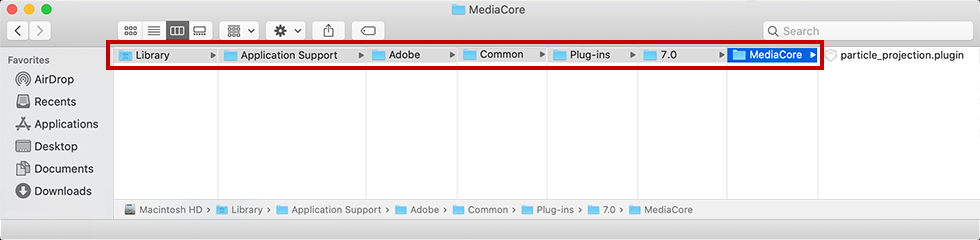
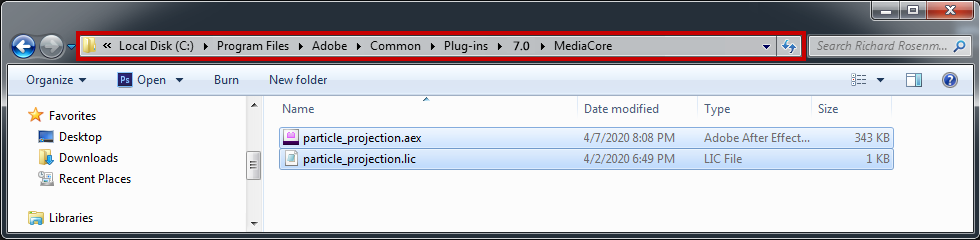
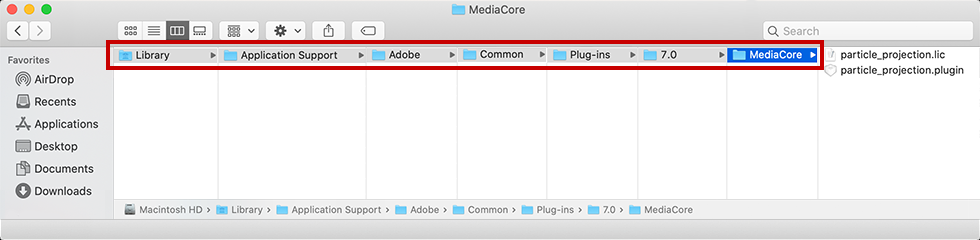
2 – Extract the contents from the .zip file and place the .aex (Windows) or .plugin (Mac) file into your host’s plugin folder. For all Adobe After Effects versions CS6 and higher, this folder is the MediaCore folder.
Windows : To install for Adobe After Effects for Windows, place the .aex file into the location shown below. You can make a sub-folder to keep your plugins organized.
Mac: To install for Adobe After Effects for Mac, place the .plugin file into the location shown below. You can make a sub-folder to keep your plugins organized.
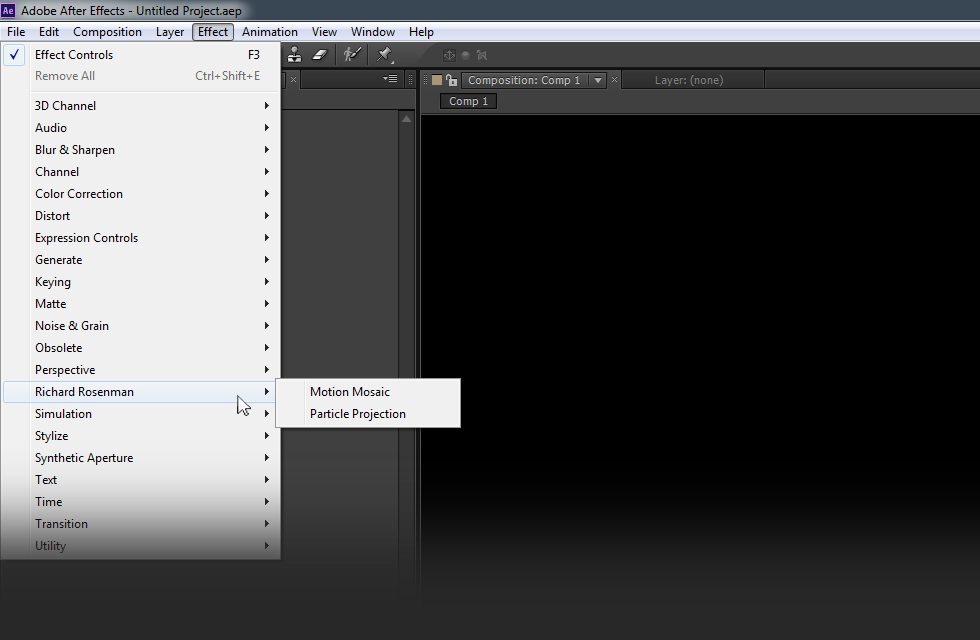
3 – Launch Adobe After Effects, create a new composition, add a new solid, and click on Effect > Richard Rosenman > Effect Name.
If you have purchased a commercial license, please review the activation section.
If you have purchased a commercial license, you must activate your software. You can manually activate your software at any time by logging into your account. Activating this software is easy and only requires five simple steps:
1 – Log into your account by clicking on the Account button in the top menu.
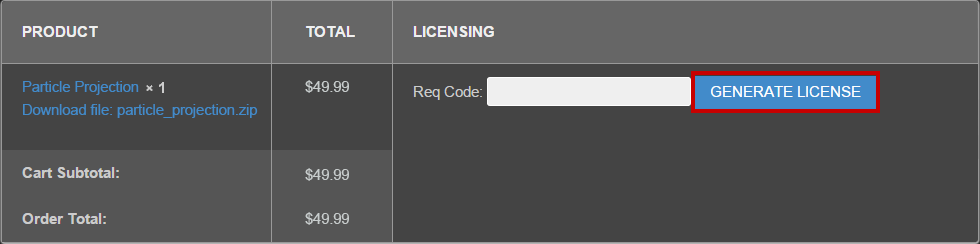
2 – Click on VIEW to display the order details containing the product you wish to activate.
3 – Enter your request code and click GENERATE LICENSE. Please see below for info on how to retrieve your request code.
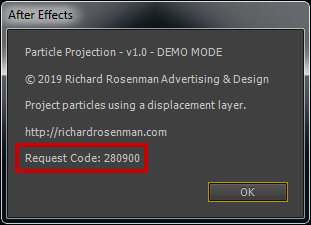
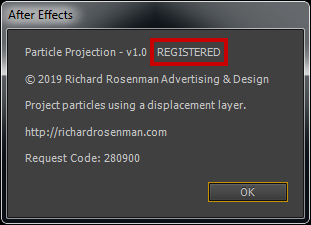
Your request code can be found by clicking on the About button located at the top of the plugin interface. Please Note: In After Effects 2020 or newer, the About button has been hidden. It can be accessed by right-clicking on the plugin name.
4 – A file prompt will ask you to save the license file. You must save this license file in the same folder the plugin resides in.
Windows : To activate for Adobe After Effects for Windows, place the .lic file into the location shown below. You can make a sub-folder to keep your plugins organized.
Mac : To activate for Adobe After Effects for Mac, place the .lic file into the location shown below. You can make a sub-folder to keep your plugins organized.
5 – Relaunch Adobe After Effects, create a new composition, add a new solid, and click on Effect > Richard Rosenman > Effect Name.
If you on click the About button located at the top of the plugin interface once again, your software should now display REGISTERED. If it is registered but you still see a red x, simply clear your cache. It is now unlocked and ready for use.
This software is compatible with the following Windows OS:
Windows 11 Home 64 bit
Windows 11 Pro 64 bit
Windows 11 Enterprise 64 bit
Windows 11 Education 64 bit
Windows 10 Home 64 bit
Windows 10 Pro 64 bit
Windows 10 Enterprise 64 bit
Windows 10 Education 64 bit
Windows 8 64 bit
Windows 8 Pro 64 bit
Windows 8 Enterprise 64 bit
Windows 7 Home Basic 64 bit
Windows 7 Home Premium 64 bit
Windows 7 Professional 64 bit
Windows 7 Enterprise 64 bit
Windows 7 Ultimate 64 bit
This software is compatible with the following Mac OS:
macOS 10.15: Ventura
macOS 12.: Monterey
macOS 11.00: Big Sur
macOS 10.15: Catalina
macOS 10.14: Mojave
macOS 10.13: High Sierra
macOS 10.12: Sierra
OS X 10.11: El Capitan
OS X 10.10: Yosemite
OS X 10.9 Mavericks
This software is compatible with the following hosts:
Any host capable of running Apple’s M1 Silicon and Intel CPUs
Any host capable of running Adobe After Effects 64 bit compliant plugins
Adobe After Effects (Version CS6 or higher, including CC) 64 bit