Path Animator is a handy After Effects plugin that will animate a layer along a path dynamically, and without keyframes. Simply select the layer, select the path, and watch Path Animator effortlessly bind them together. Animation is achieved by animating a single slider.
Path Animator GUI
Path Animator is a complete replacement for After Effects’ cumbersome path animation tool. The standard process for path animation is to copy a path and paste it into a layer’s position property. This will create a number of keyframes outlining the path direction. Any changes made to the original path after keyframing won’t automatically update across the timeline. You’re essentially locked into those exact path shapes at each keyframe, which makes iterating or refining your animation a pain. Even simple tweaks like adjusting the curvature of a segment require manually editing each keyframe, which quickly becomes tedious and error-prone for complex animations. This restrictive workflow can be a major bottleneck for animators requiring flexibility and efficiency.
After Effects path animation relies on cumbersome keyframes which can’t be adjusted
Path Animator is fully dynamic. Once the layer is bound to the path, any path adjustments will immediately reflect in the layer’s position and rotation. You can even keyframe the path over time and the layer will adjust accordingly. No more messy keyframes. No more tedious copy & paste.
A single intuitive slider from 0% to 100% controls the layer’s position along the path. Want your object to follow the path from start to finish? Just keyframe the slider. Need to make a change to the path’s shape? No problem – since the layer is dynamically linked to the path, any edits are instantly reflected in the animation. It’s clean, responsive, and eliminates the manual labor of adjusting dozens of keyframes every time you tweak the path.
With Path Animator you can animate any layer along a path with only a single slider
Path Animator provides extended functionality by supporting multiple paths. You can animate layers across literally thousands of paths using a single slider and two keyframes. Animate layers concurrently or sequentially across multiple paths. Randomize the layer position, scale, rotation and opacity across all paths for more organic results.
Animate along multiple paths, concurrently or sequentially
Path Animator even provides fine-tuning control over what happens to the layer once its reached the end of its path. Loop, stop or hide the layer, depending on your animation needs.
Path Animator supports both 8 bits / channel and 16 bits / channel color modes for professional workflows.
Path Animator is 100% multi-threaded capable of using an unlimited number of cores for ultimate speed.
Path Animator is 100% Multi-Frame Rendering (MFR) capable for significant speed gains.
Workflow
Path Animator couldn’t be any easier to use. Here’s a simply step-by-step outline to get you started:
1. Create a new composition.2. Create a new solid.
3. Create a new path on the solid. Path Animator works on masks.
4. Import your sprite or create a sprite layer and place it in your composition.
5. Add the Path Animator Effect to your solid and specify the path and sprite layer.
Path Animator uses masks as its path. If your path is currently a shape, you can easily convert it into a mask using Create Mask From Shape located in the Layer menu.
If your mask has animation, this will also carry through into your animation.
Path Animator uses any type of layer for a sprite. It can be an imported graphic, image, animation, or After Effects composition. If your layer has animation, this too will carry into your path animation.
Once you’ve got your effect set up, animation is as easy as animating the Position slider, from 0% to 100%. You can add easing to the start and end keyframes to control acceleration.
Path Animator does not support motion blur natively. To use motion blur, simply apply the CC Force Motion Blur effect to the layer. Alternately, the motion blur effect can be added to an adjustment layer above the Path Animator effect.
Main Parameters
Path Animator can use all paths concurrently or sequentially
Layer: Specifies which layer to use for path animation. It can be an imported graphic, image, animation, or After Effects composition. If your layer has animation, this too will carry into your path animation.
Path Selection: Specifies which path to use for path animation. You can have any number of paths to choose from. Path Animator uses masks so if your path is a shape, you can easily convert it into a mask using Create Mask From Shape located in the Layer menu.
Use All Paths: Toggles Path Animator to use all paths for path animation. If Sequentially is disabled, this will result in multiple copies of the sprite layer, each assigned to an individual path. When animated, all sprites will move along the path concurrently.
Sequentially: When Use All Paths is enabled, this parameter toggles Path Animator to animate only one sprite sequentially across all paths. This is useful for a text path where a sprite layer should travel along each letter sequentially.
Position Randomness: When Use All Paths is enabled, this parameter will vary the position of the sprite along each path.
Scale Randomness: When Use All Paths is enabled, this parameter will vary the scale of the sprite along each path.
Rotation Randomness: When Use All Paths is enabled, this parameter will vary the rotation of the sprite along each path.
Opacity Randomness: When Use All Paths is enabled, this parameter will vary the opacity of the sprite along each path.
End Overflow Action: When Use All Paths is enabled, this parameter will specify how a sprite should behave once it reaches the end of its path. This is useful when using advanced animation properties such as the Expression Language Menu > Property > LoopOutDuration to create continuously looping animation.
Loop will reassign the sprite to the beginning of the path.
Stop will stop and hold the sprite at the end of the path.
Hide will remove the sprite at the end of the path.
Auto Orient: Toggles sprite auto orientation. When enabled, any animated sprite will rotate along the path to maintain its direction.
Position: Specifies the position (in percentage) of the sprite along each path.
Scale: Specifies the size (in percentage) of the sprite along each path.
Rotation: Specifies the rotation (in degrees) of the sprite along each path.
Opacity: Specifies the opacity (in percentage) of the sprite along each path.
Seed: Specifies the seed value for the random number generator.
Changelog
v1.0 – First release.
Installing this software is easy and only requires three simple steps:
1 – Download the software by clicking on the Download Demo button located above on the software page. This will prompt you to save a .zip file on your computer.
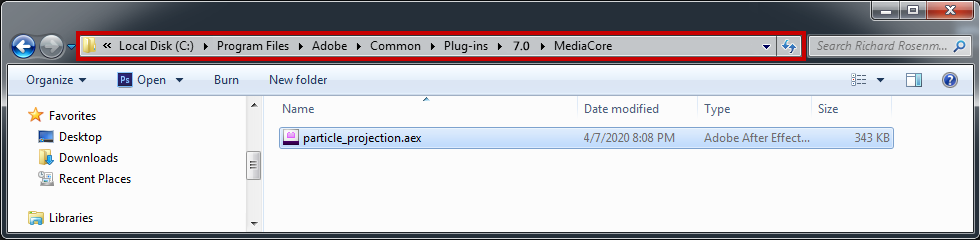
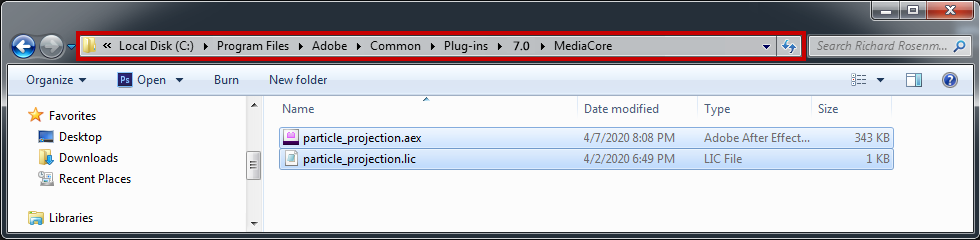
2 – Extract the contents from the .zip file and place the .aex file into your host’s plugin folder. For all Adobe After Effects versions CS6 and higher, this folder is the MediaCore folder. Place the .aex file into the location shown below. You can make a sub-folder to keep your plugins organized.
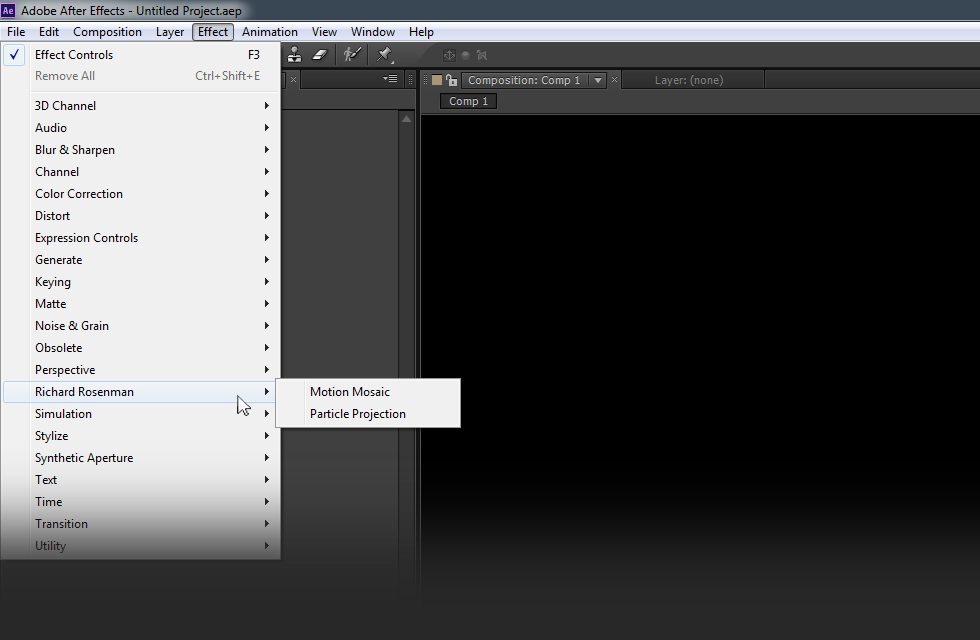
3 – Launch Adobe After Effects, create a new composition, add a new solid, and click on Effect > Richard Rosenman > Effect Name.
If you have purchased a commercial license, please review the activation section.
If you have purchased a commercial license, you must activate your software. You can manually activate your software at any time by logging into your account. Activating this software is easy and only requires five simple steps:
1 – Log into your account by clicking on the Account button in the top menu.
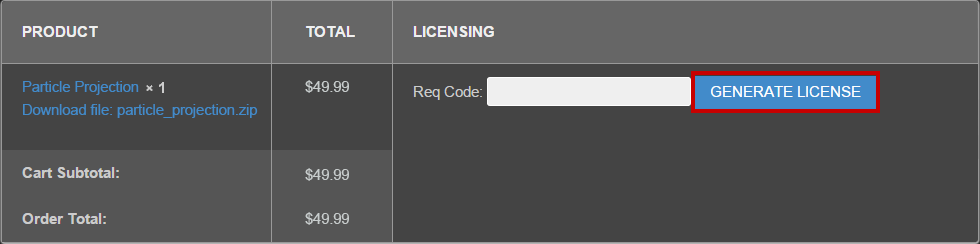
2 – Click on VIEW to display the order details containing the product you wish to activate.
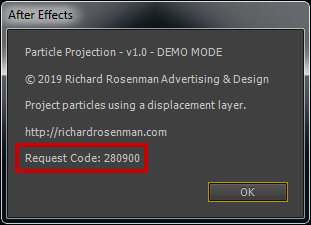
3 – Enter your request code and click GENERATE LICENSE. Please see below for info on how to retrieve your request code.
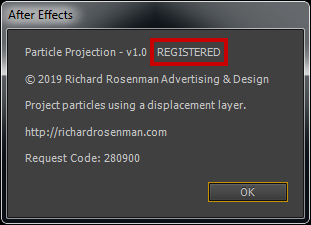
Your request code can be found by right-clicking on the plugin name in the effect window and selecting About.
4 – A file prompt will ask you to save the license file. You must save this license file in the same folder the plugin resides in.
Place the .lic file into the location shown below. You can make a sub-folder to keep your plugins organized.
5 – Relaunch Adobe After Effects, create a new composition, add a new solid, and click on Effect > Richard Rosenman > Effect Name.
If you on click the About button located at the top of the plugin interface once again, your software should now display REGISTERED. If it is registered but you still see a red x, simply clear your cache. It is now unlocked and ready for use.
This software is compatible with the following Windows OS:
Windows 11 Home 64 bit
Windows 11 Pro 64 bit
Windows 11 Enterprise 64 bit
Windows 11 Education 64 bit
Windows 10 Home 64 bit
Windows 10 Pro 64 bit
Windows 10 Enterprise 64 bit
Windows 10 Education 64 bit
Windows 8 64 bit
Windows 8 Pro 64 bit
Windows 8 Enterprise 64 bit
Windows 7 Home Basic 64 bit
Windows 7 Home Premium 64 bit
Windows 7 Professional 64 bit
Windows 7 Enterprise 64 bit
Windows 7 Ultimate 64 bit
This software is compatible with the following hosts:
Adobe After Effects (Version CS6 or higher, including CC) 64 bit