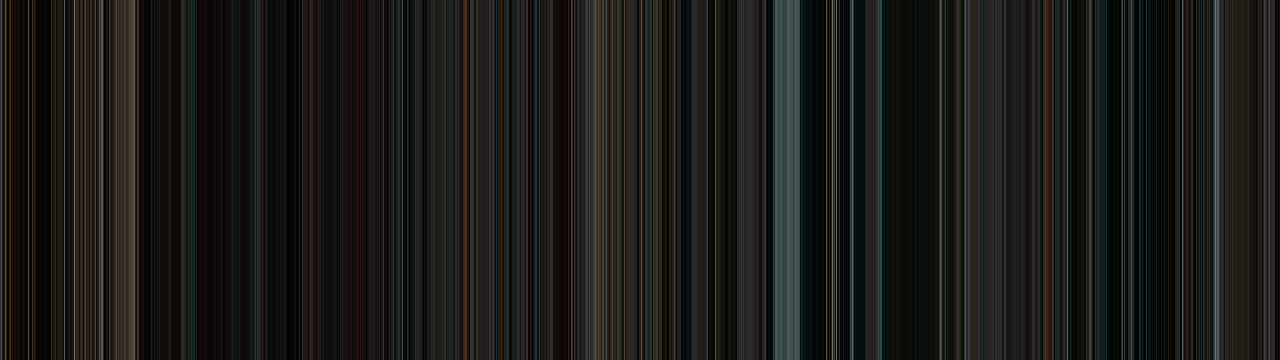
Palette Mapper is an exciting plugin for Adobe After Effects that extracts the color palette from a video sequence on a frame-by-frame basis and maps it horizontally into an image using vertical lines. Palette Mapper can be used as a creative application to produce beautiful imagery, or as an analytical tool for the study of color grading in film, video and animation.
Palette Mapper works by scanning each frame of the footage, analyzing all the pixel values to extrapolate an averaged frame color, and mapping them into a set of sequential vertical lines. The result is an image showcasing the changes in tone and luminance throughout the entire length of a sequence. Although there are various tools available to achieve a similar effect, it’s always been through a complex and time consuming process, often hindered by technical limitations.
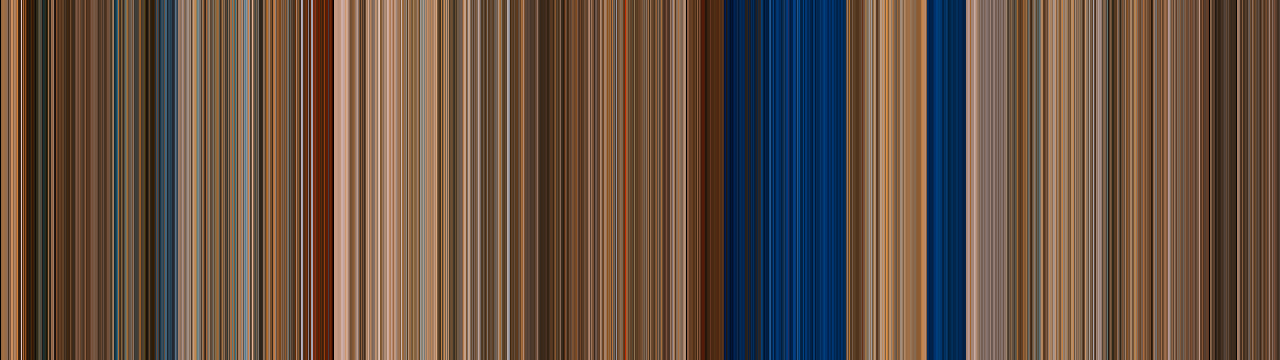
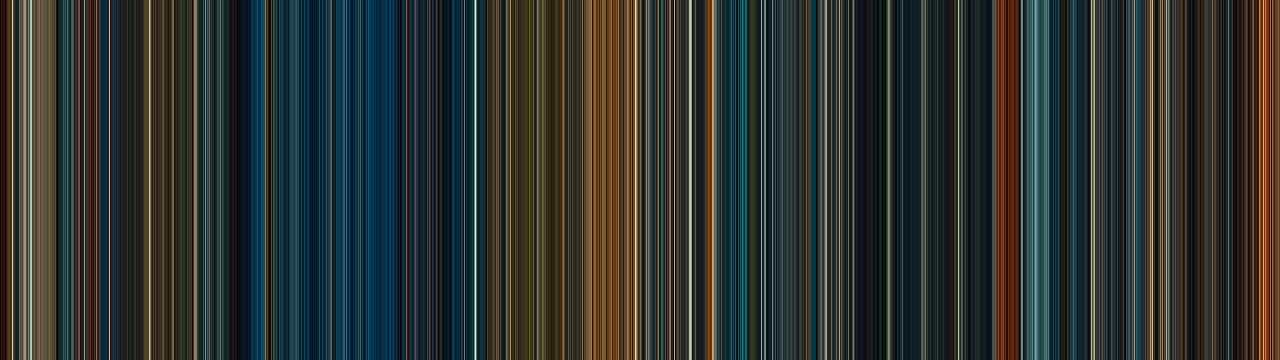
Mad Max: Fury Road (2015)
Palette Mapper is a fast and light-weight plugin with a minimalist set of powerful features. A typical 1920×360 image takes approximately one minute to render. The plugin can be toggled between color or luminosity mapping and it also features an image cache flusher. Palette Mapper allows the selection of another layer as the source input which means the mapping can be applied to an entirely different composition, with any desired aspect ratio. Map to landscape, portrait, 1:1 or any other custom image aspect ratio.
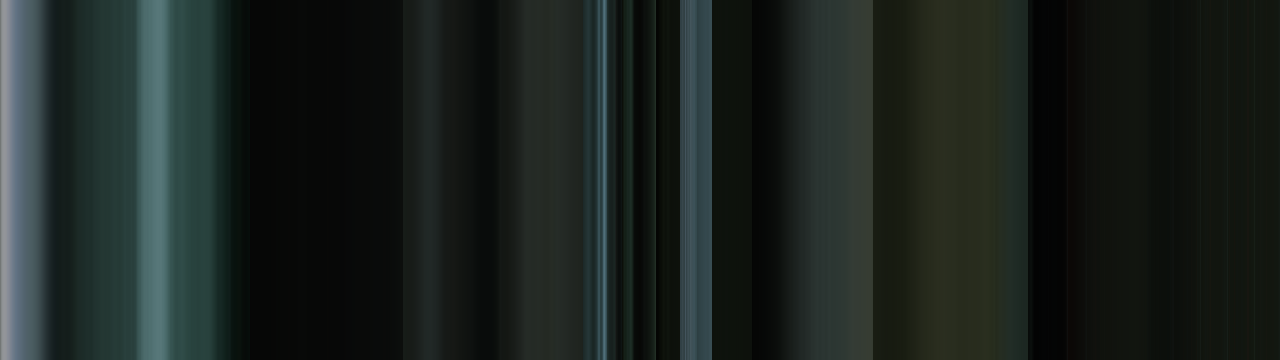
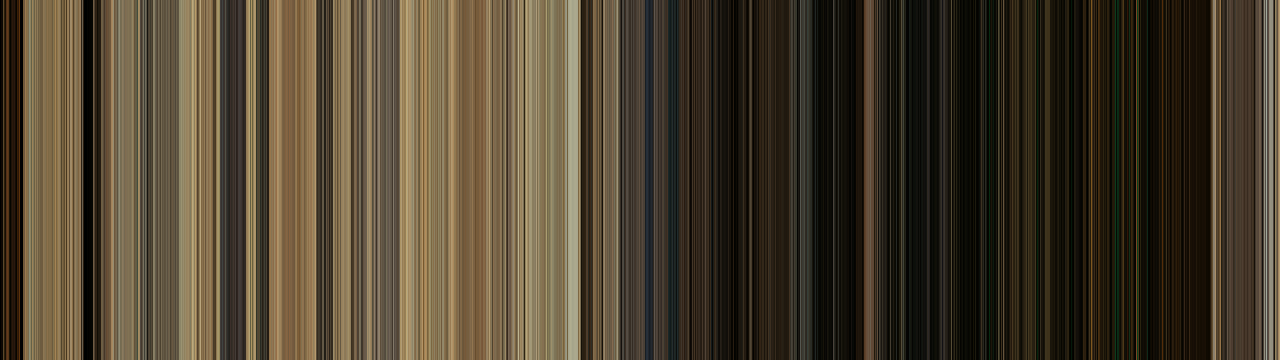
Monsters, Inc. (2001)
Palette Mapper is extremely powerful and only restricted by the limitations of After Effects. As a matter of fact, it can generate images up to 30,000 pixels wide, the internal resolution limit imposed by After Effects. Click on the image below to see a 30,000 pixel wide palette map of The Matrix (1999) that took approximately 3.5 hours to render!
The Matrix (1999) – Click image for 30,000px version!
From creative backgrounds to film analysis, Palette Mapper is a must-have plugin for artists, videographers and designers alike. For detailed step-by-step instructions, check out the documentation tab.
Palette Mapper supports both 8 bits / channel and 16 bits / channel color modes for professional workflows.
Workflow
Palette Mapper is capable of working in 8 bits per channel and 16 bits per channel color modes. Working in 8 bits per channel color depth will provide up to 1,677,7216 colors while 16 bits per channel color depth will provide up to 281 trillion colors. Palette Mapper will also work in 32 bits per channel color mode, but it will down-convert 32 bit float values to 16 bits per channel.
Palette Mapper will map one vertical line per frame. This means if an image of 1920 pixels wide is desired, 1920 frames will be scanned. Footage can be time-compressed to fit an entire feature-length film into a smaller-sized image.
Palette Mapper is extremely powerful and only restricted by the limitations of After Effects. As a matter of fact, it can generate images up to 30,000 pixels wide, the internal resolution limit imposed by After Effects.
Palette Mapper generates an internal image buffer for color storage. As a result, this buffer must occasionally be flushed so as to make these buffers available for new images.
After Effects is extremely aggressive with caching. As a result, it is recommended the cache is flushed occasionally, especially when replacing footage. This can be achieved by going to Edit -> Purge -> Purge all Memory.
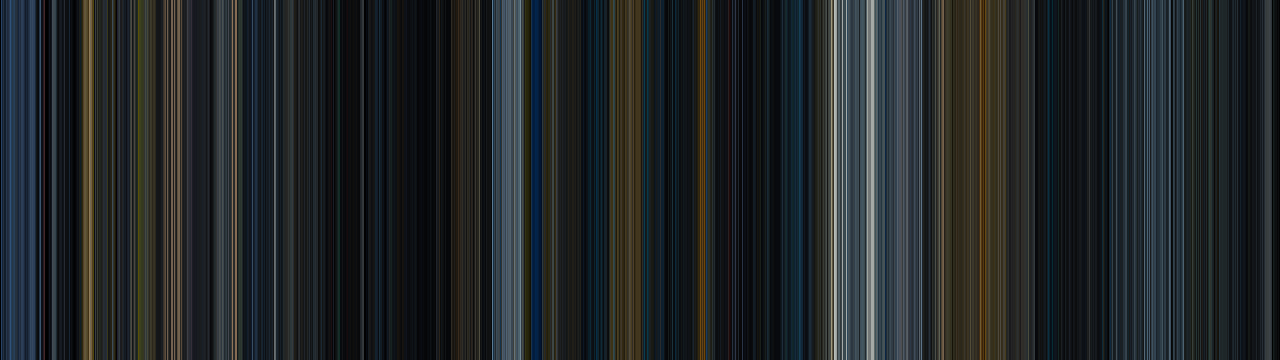
The Matrix (1999) entire movie mapped to 1280 pixel-wide image
The Matrix (1999) opening shots mapped to 1280 pixel-wide image
Quick Start
The following is a quick-start step-by-step tutorial showing how to use Palette Mapper. There is also a video tutorial version in the tutorials menu section located near the top of the page.
1 – Import the source footage into After Effects by going to File -> Import -> File.
2 – Create a composition for it by dragging it to the Create a new Composition button. Rename it to Footageby going to Compostion -> Compostion Settings and editing the name.
3 – Set the duration to the size of the image. For example, if we want to create a 1920×360 image, we will set the duration to 1920. If you want to crop the length, simply go to Composition -> Compostion Settings and set the duration to 1920. If you want to also scale the footage to a length of 1920, go to Layer -> Time -> Time Stretch and set the new duration to 1920 frames.
4 – Create a new composition for your image. Go to Composition -> New Composition and set the duration to 1920.
5 – Create a solid for your image. Go to Layer -> New -> Solid and create a black solid. Name it Image and ensure the resolution matches your composition resolution: 1920×360.
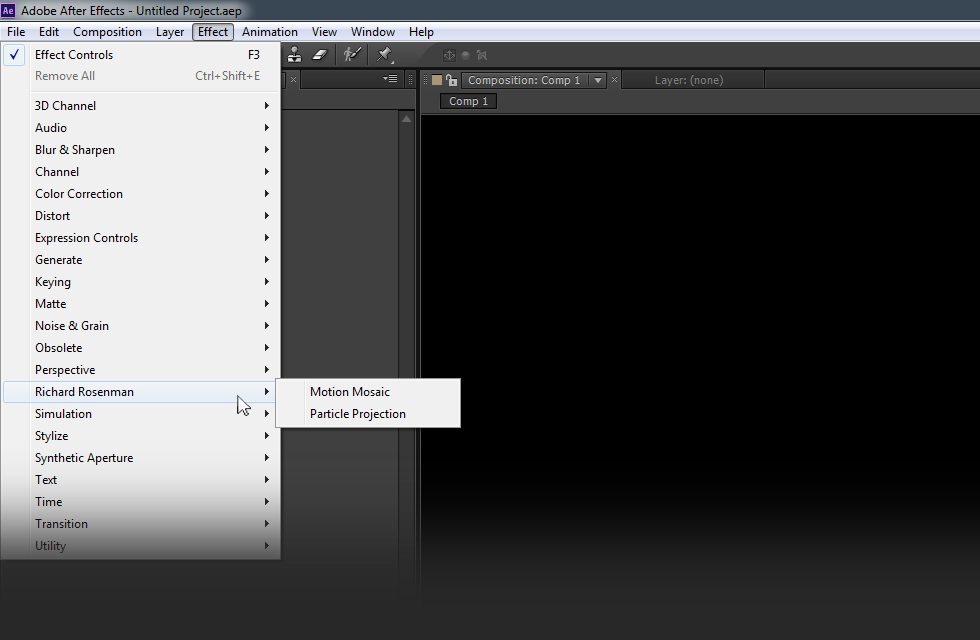
6 – Add the Palette Mapper plug-in to the solid by selecting that layer and then going to Effect -> Richard Rosenman -> Palette Mapper.
7 – Specify the input footage. First add the Footage composition from the project window to the project timeline and place it above the Image layer. We don’t need to see it so we can disable its visibility by clicking on the eye icon. Then click on the Image layer and in the Palette Mapper plug-in settings select the Footage layer.
8 – Ensure the current frame is set to 0 and press the play button to generate a RAM preview. The image will be rendered.
9 – When the render concludes, ensure you are on the last frame and save your image. We can achieve this by going to Composition -> Save Frame As -> File. This will add it to the Render Queue.
10 – Edit your Render queue settings and press render when ready.
Controls
Footage Layer: Specifies the layer to source the footage from. If there are any effects applied to the displacement layer, it must be pre-composed in order for those effects to be taken into consideration.
Flush Buffer: Flushes the internal image buffer. Palette Mapper stores the footage color in its internal frame buffer for every frame the timeline scrubs through. If a new footage is swapped out with an old one, the old data still remains in the buffer. Therefore, it is recommended the buffer is flushed every time a new footage is imported.
Mode: Toggles between color and luminosity mode. Color mode samples and averages all the color values of the footage while luminosity mode derives the luminosity value from the averaged color value.
The Matrix (1999) mapped in color mode
The Matrix (1999) mapped in luminosity mode
Changelog
v1.0 – First release.
v1.1 – Fixed missing request code & description in After Effects v26+.
This section features images generated with the Palette Mapper plugin for After Effects. Each image represents it’s corresponding film in its entirety, with the exception of intro and end credits.
A Clockwork Orange (1971)
Carrie (1976)
Color Out of Space (2019)
Ex Machina (2014)
Godzilla: King of Monsters (2019)
Green Zone (2010)
Guardians of the Galaxy (2014)
Mad Max: Fury Road (2015)
The Matrix (1999)
Monsters, Inc. (2001)
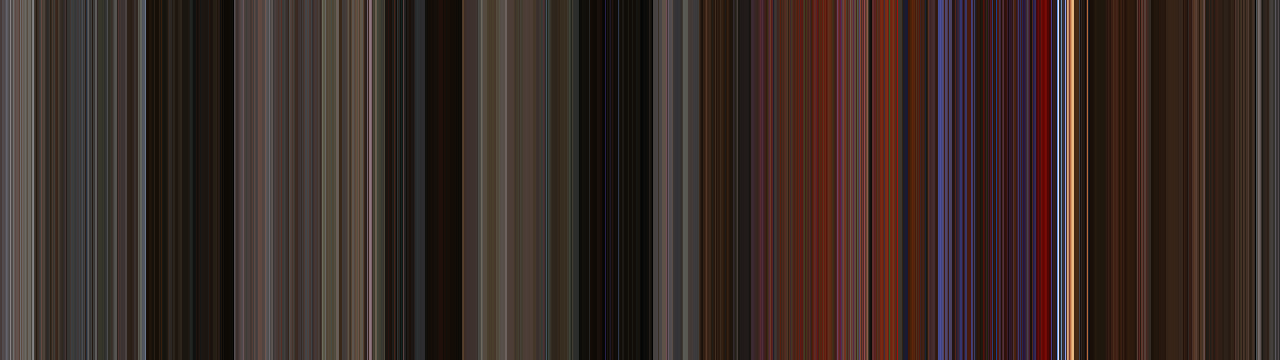
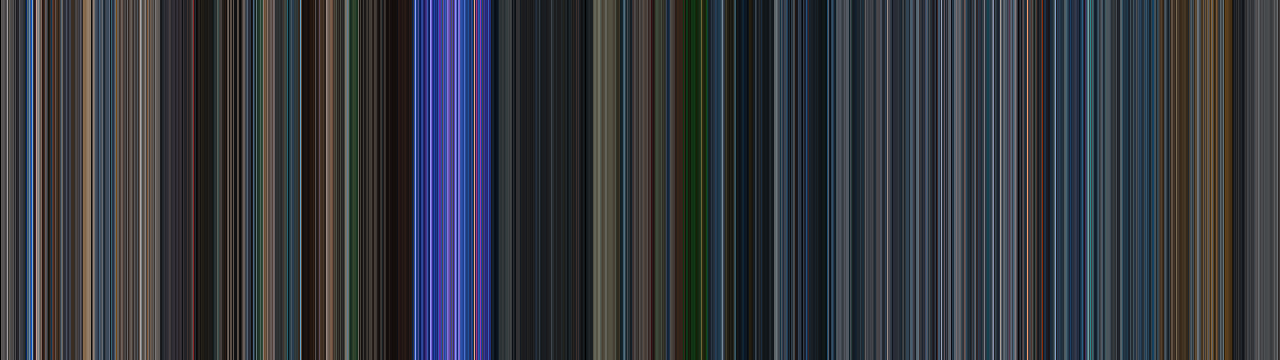
Prometheus (2012)
Ready Player One (2018)
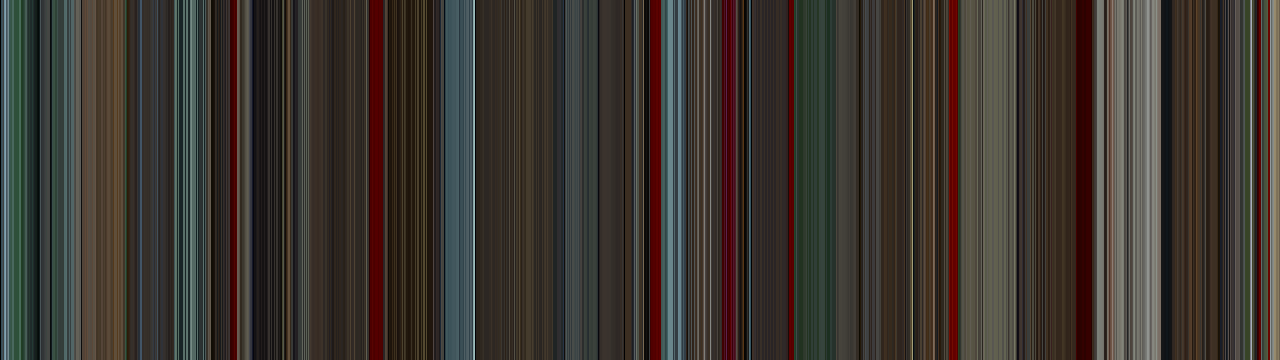
Star Trek (2009)
This section features a video tutorial on how to use the Palette Mapper plugin for After Effects.
Installing this software is easy and only requires three simple steps:
1 – Download the software by clicking on the Download Demo button located above on the software page. This will prompt you to save a .zip file on your computer.
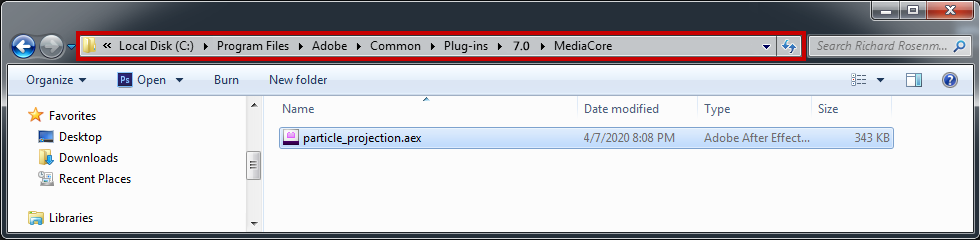
2 – Extract the contents from the .zip file and place the .aex file into your host’s plugin folder. For all Adobe After Effects versions CS6 and higher, this folder is the MediaCore folder. Place the .aex file into the location shown below. You can make a sub-folder to keep your plugins organized.
3 – Launch Adobe After Effects, create a new composition, add a new solid, and click on Effect > Richard Rosenman > Effect Name.
If you have purchased a commercial license, please review the activation section.
This software is compatible with the following Windows OS:
Windows 11 Home 64 bit
Windows 11 Pro 64 bit
Windows 11 Enterprise 64 bit
Windows 11 Education 64 bit
Windows 10 Home 64 bit
Windows 10 Pro 64 bit
Windows 10 Enterprise 64 bit
Windows 10 Education 64 bit
Windows 8 64 bit
Windows 8 Pro 64 bit
Windows 8 Enterprise 64 bit
Windows 7 Home Basic 64 bit
Windows 7 Home Premium 64 bit
Windows 7 Professional 64 bit
Windows 7 Enterprise 64 bit
Windows 7 Ultimate 64 bit
This software is compatible with the following hosts:
Adobe After Effects (Version CS6 or higher, including CC) 64 bit