DOF PRO (Depth Of Field Generator PRO) is the undisputed leader in photorealistic depth of field effects for Adobe After Effects. Backed by over a decade of research and development since its first release in 2005, DOF PRO has become the industry’s professional choice for unparalleled and sophisticated depth of field effects quickly and efficiently as a post process. DOF PRO’s state-of-the-art featureset provides innovative and cutting-edge technology not available elsewhere, resulting in one of the most powerful and advanced depth of field processors in the industry.
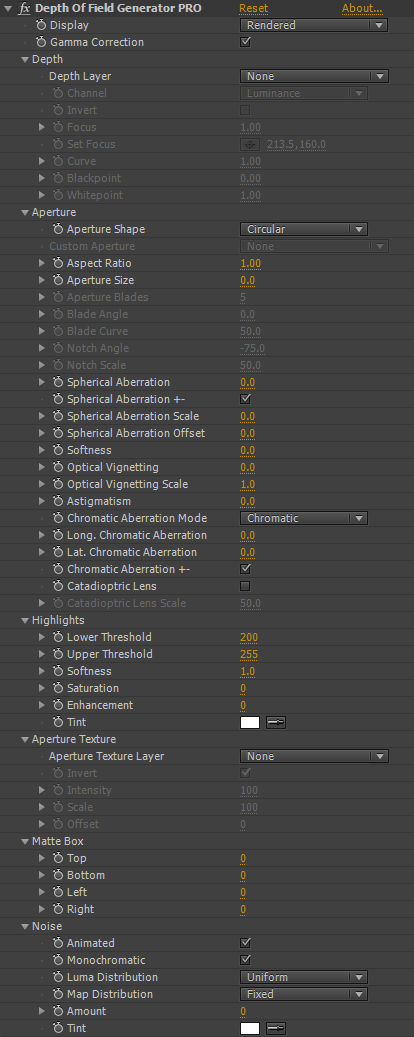
DOF PRO v1.0 GUI
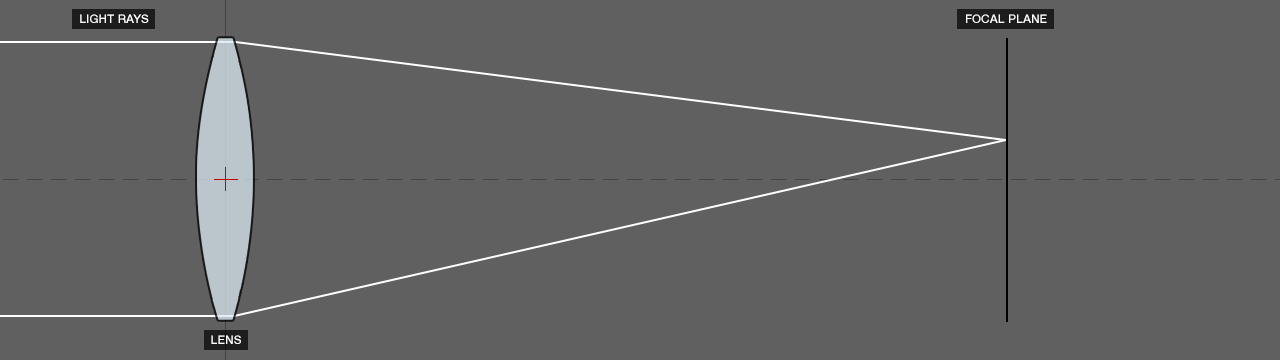
Depth of field is the amount of distance between the nearest and furthest objects that appear in acceptably sharp focus as seen by a camera lens. This field varies with the focal length of the lens, its f-stop setting, and the object distance from the camera.
Depth of field is a critical component of camera lenses. It is heavily used in photography, film and computer graphics as a creative element, in typical examples ranging from portraiture to macro photography. Depth of field is governed by three factors: aperture, lens focal length and shooting distance. Many consumer class cameras, however, do not provide sufficient and independent control of these parameters. Digital cameras, in particular, usually show a wide depth of field – i.e. they are more tolerant to defocus effects. While this may be welcome in some instances (e.g. snapshot applications), it is often a serious deficiency in others (e.g. portraiture/macro photography).
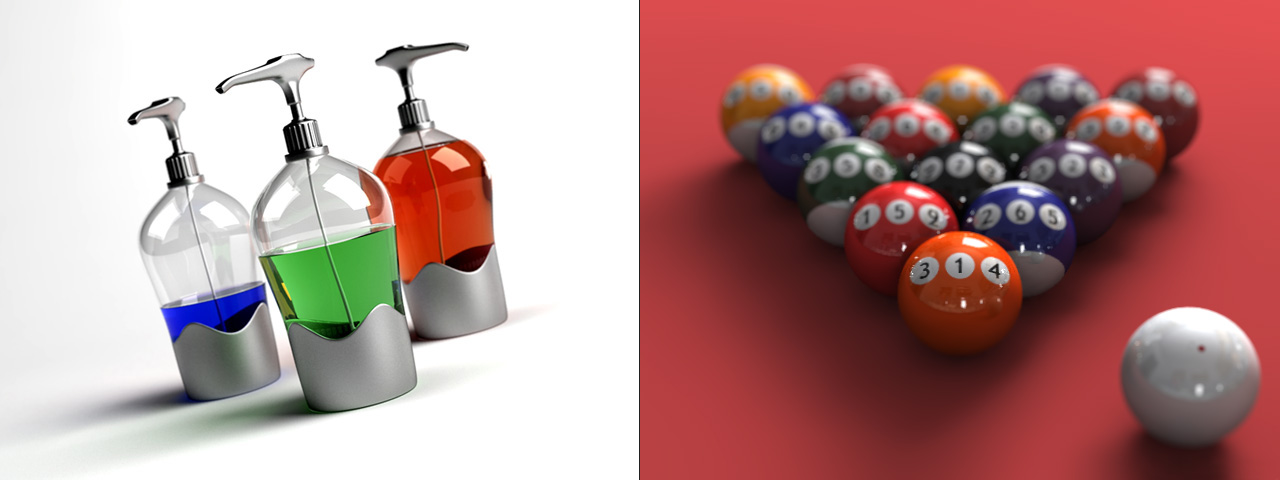
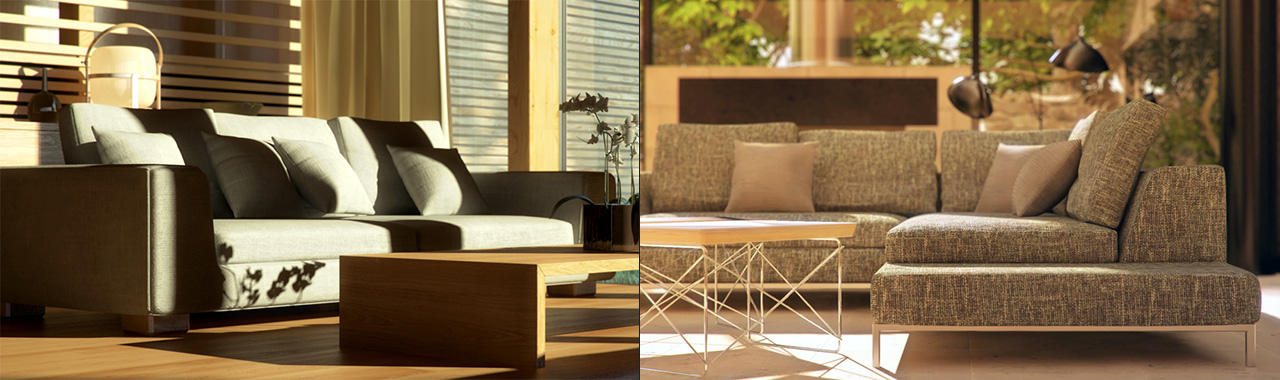
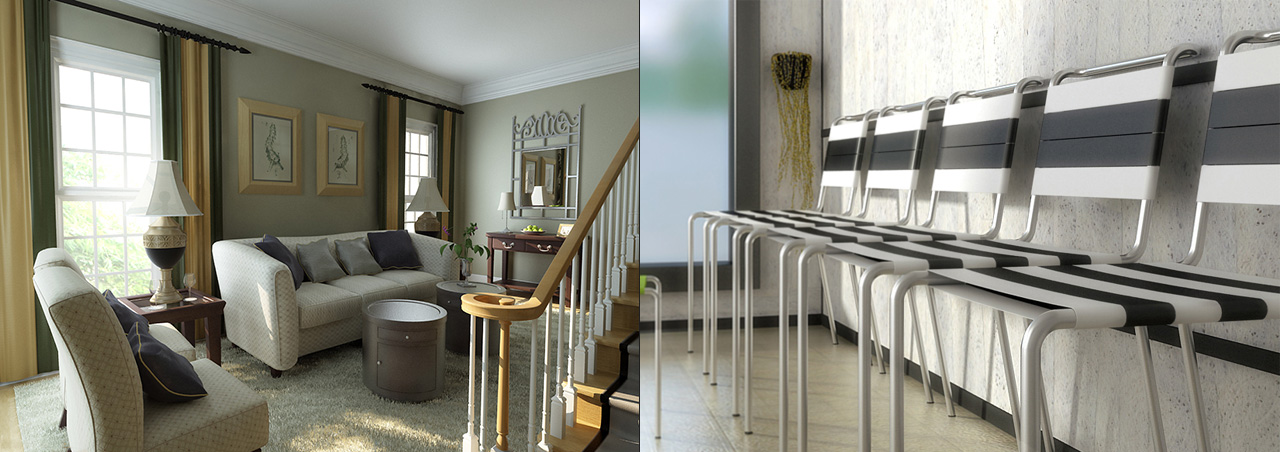
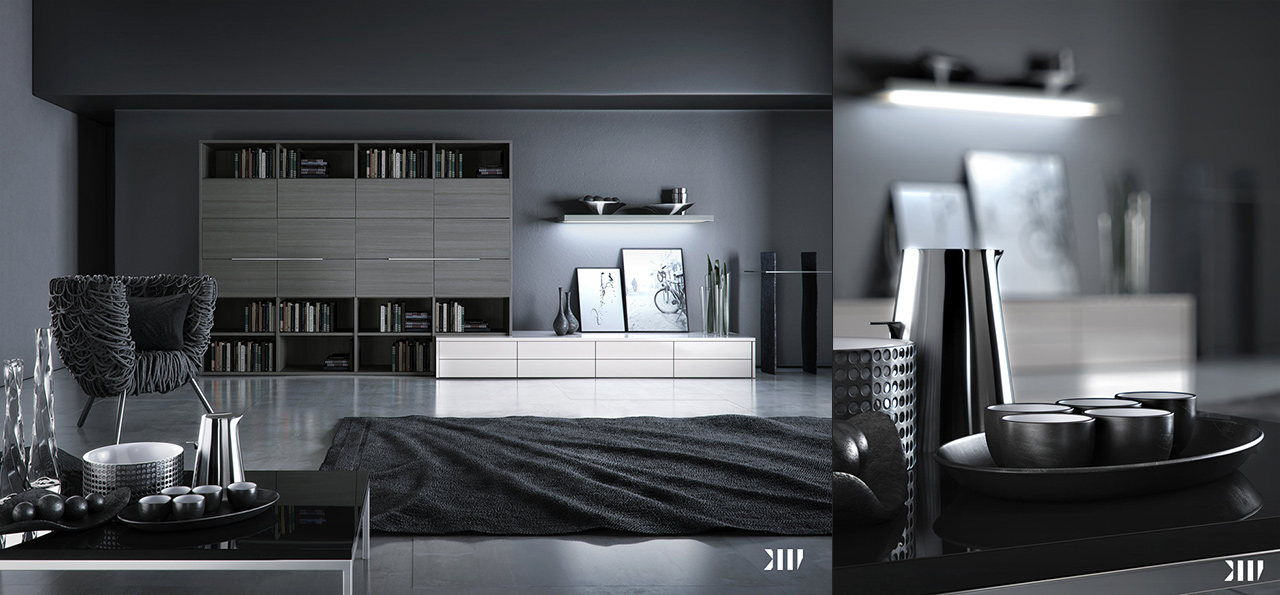
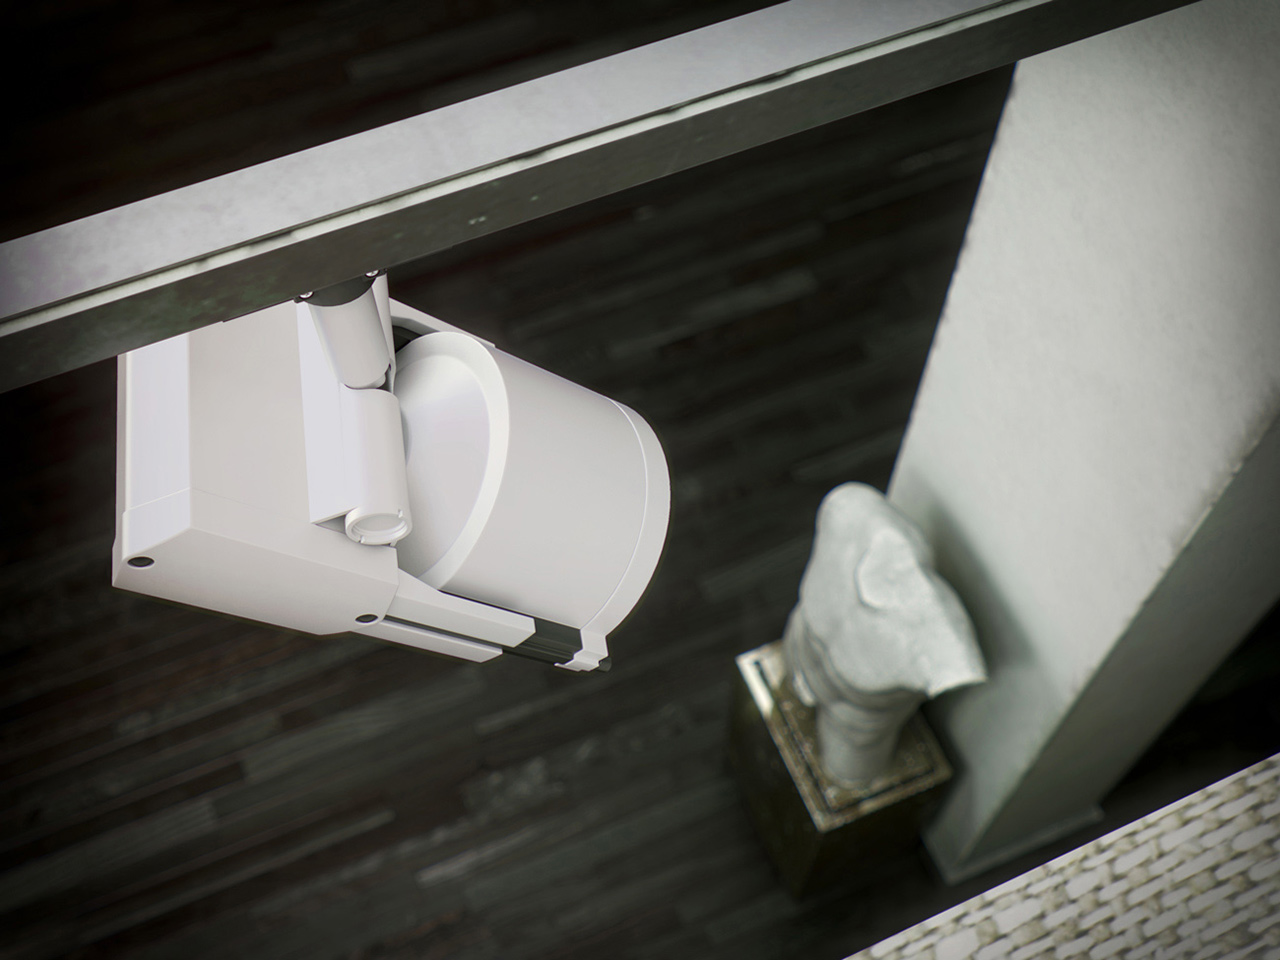
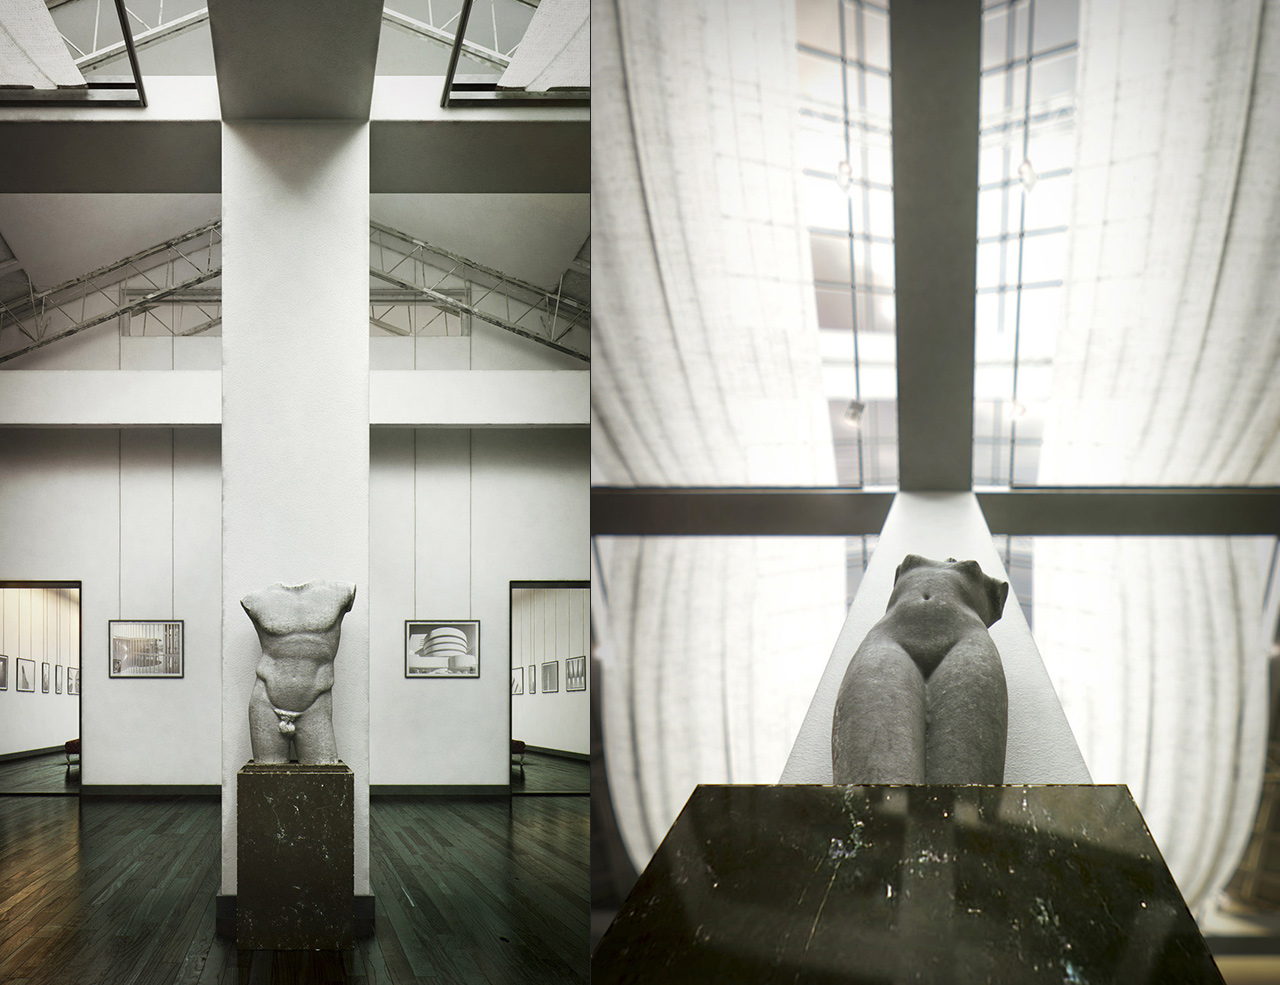
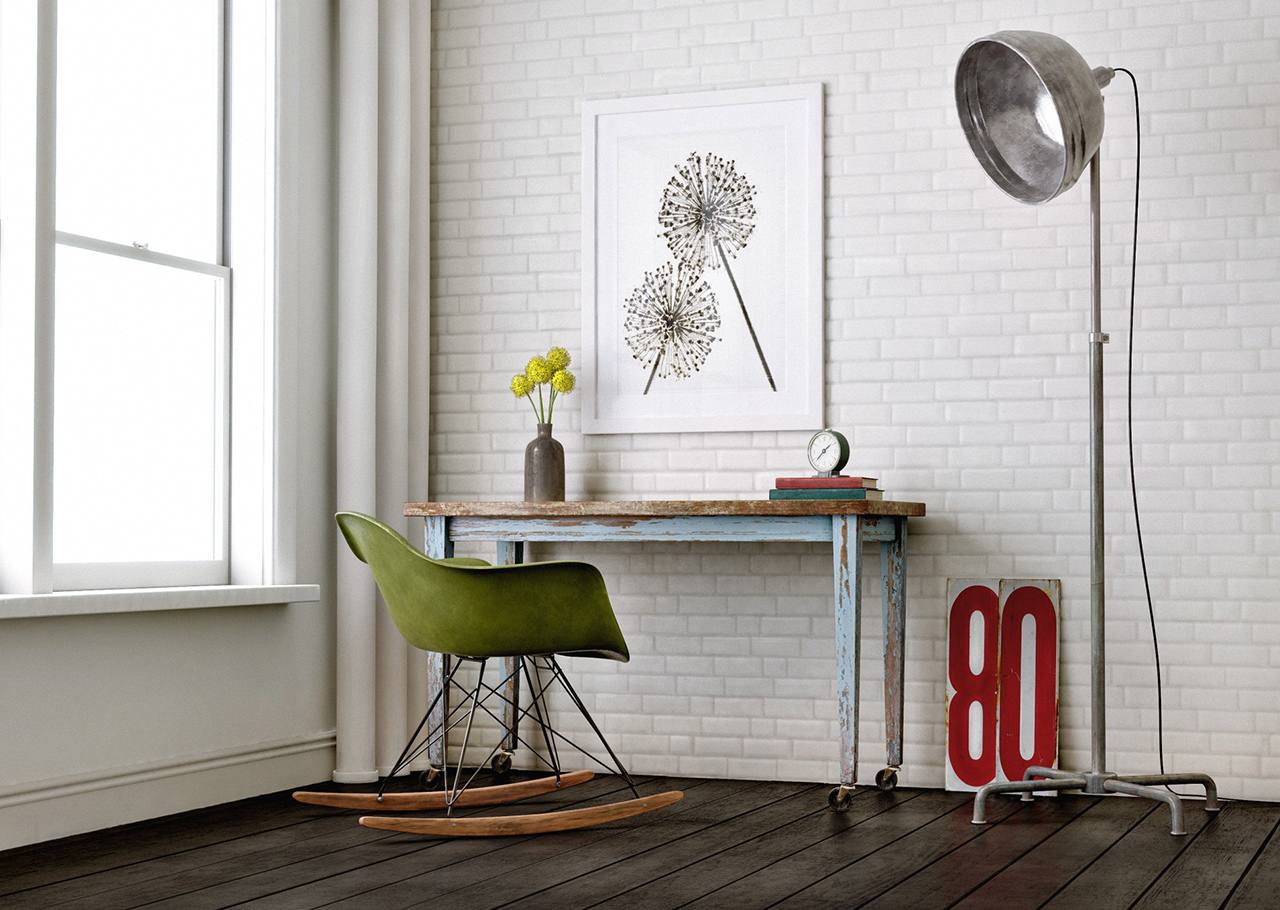
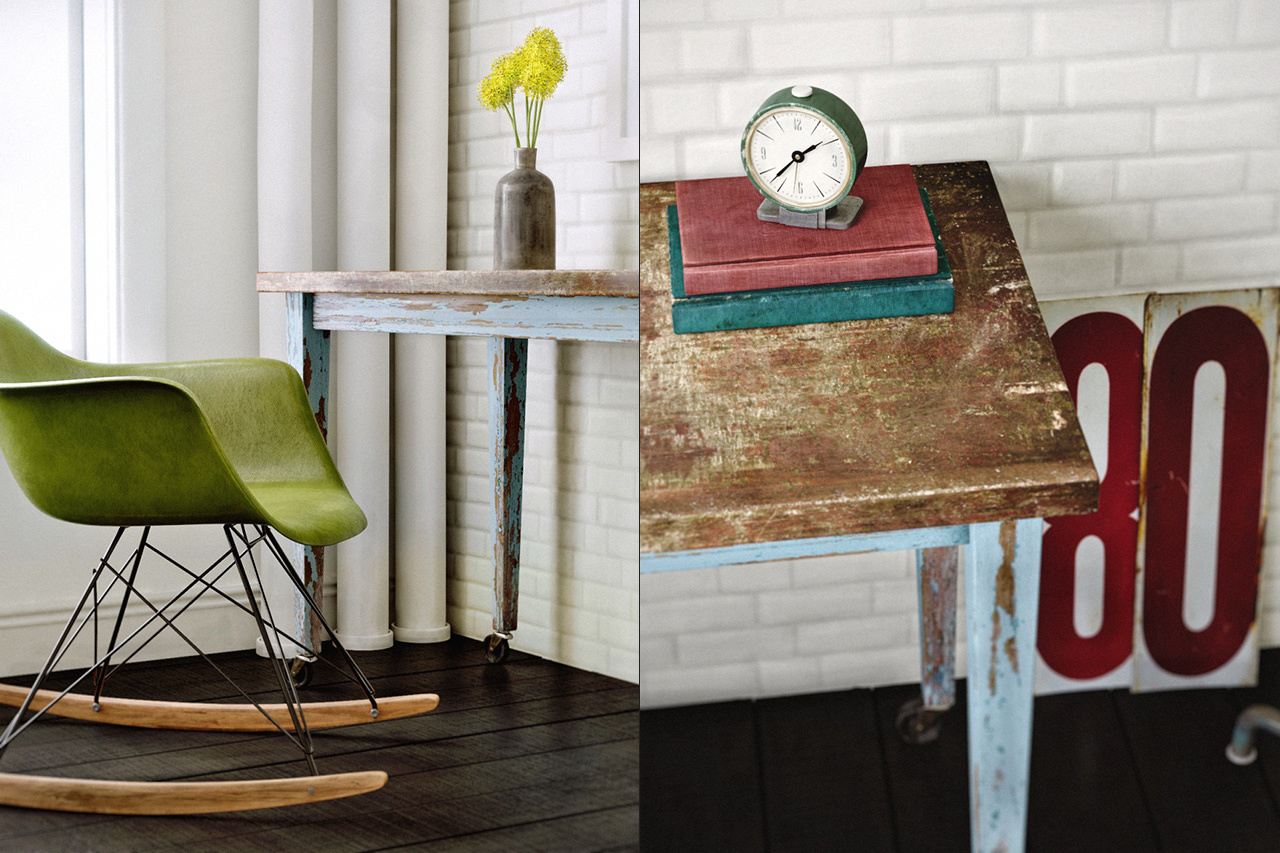
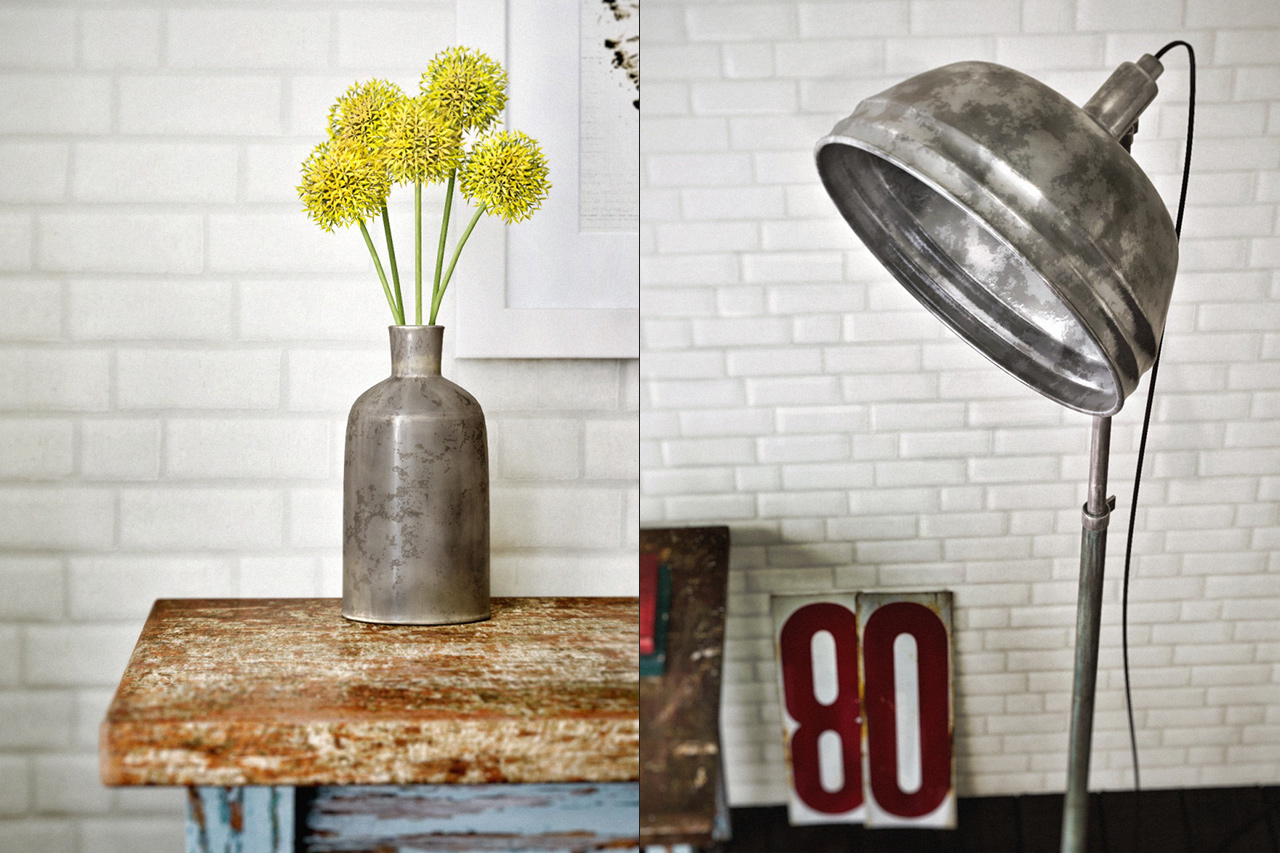
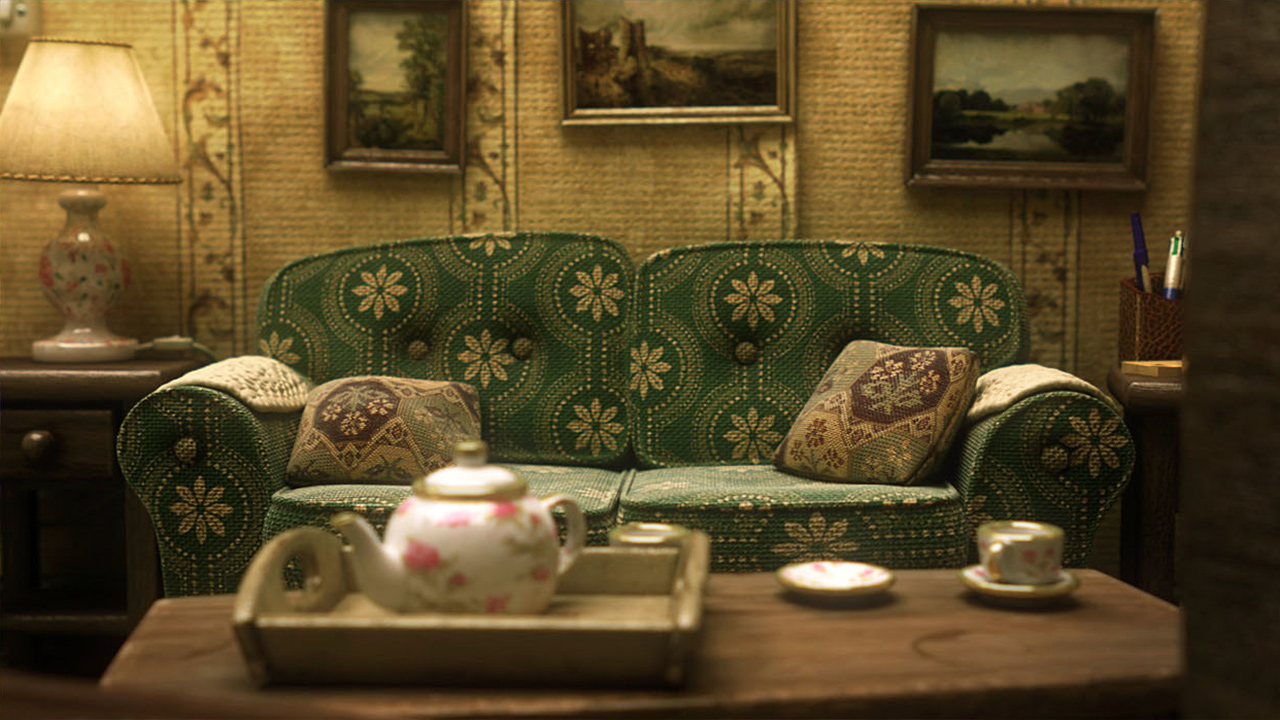
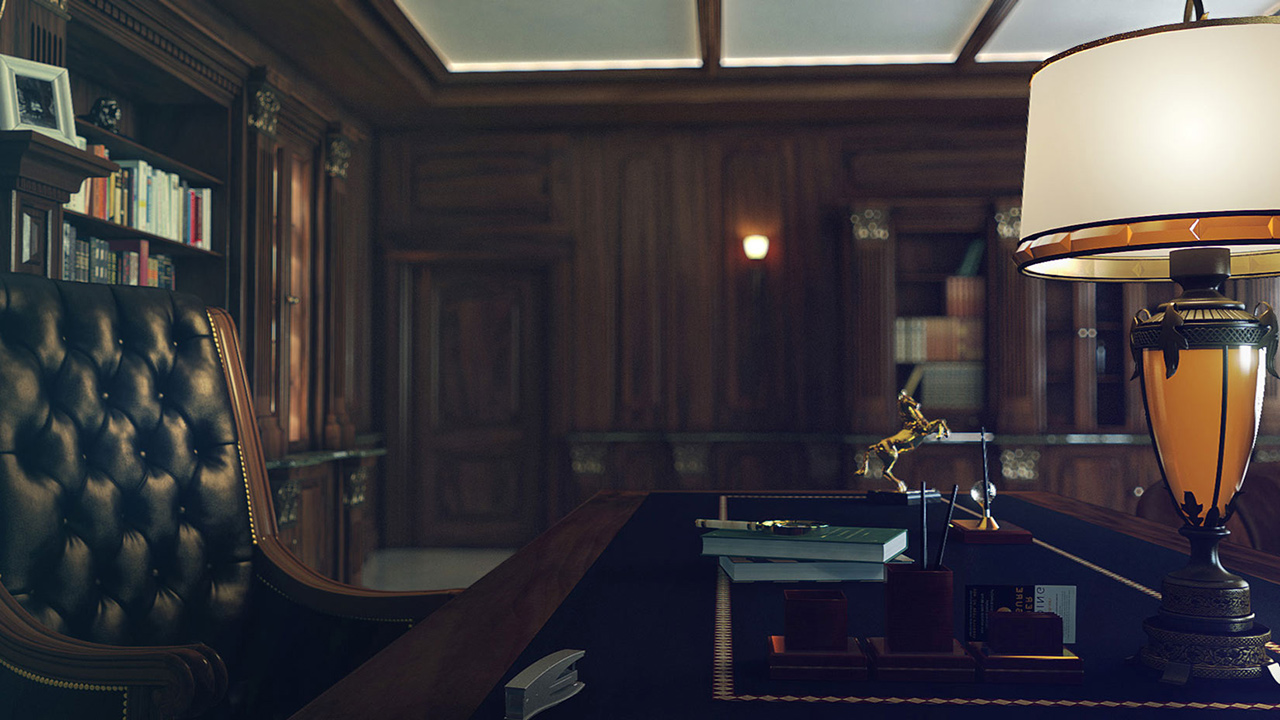
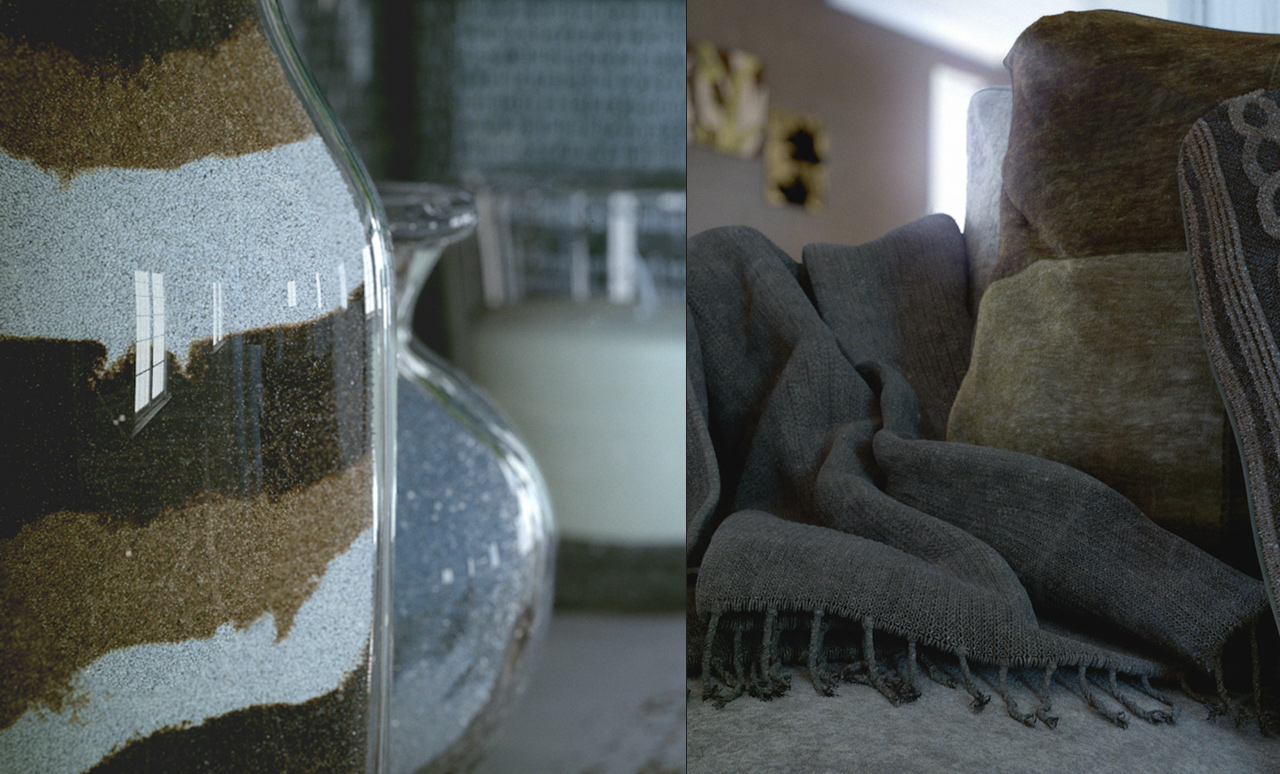
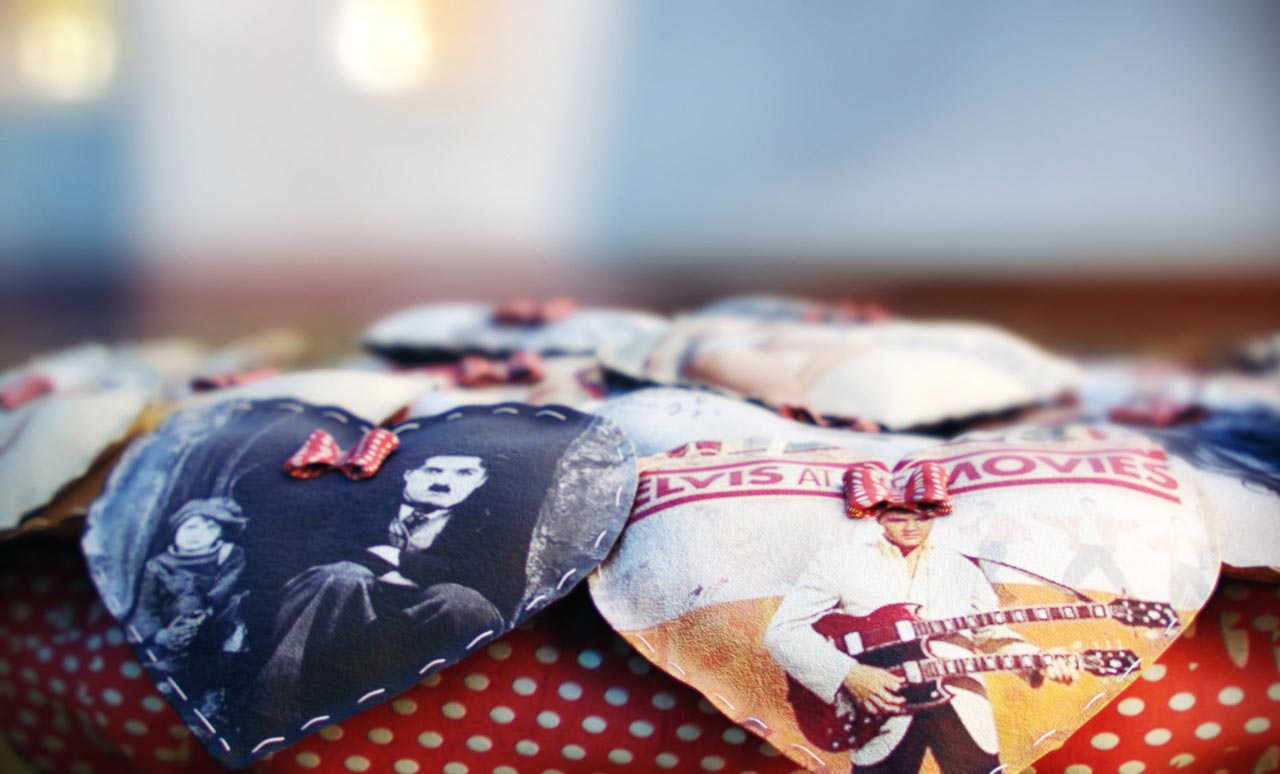
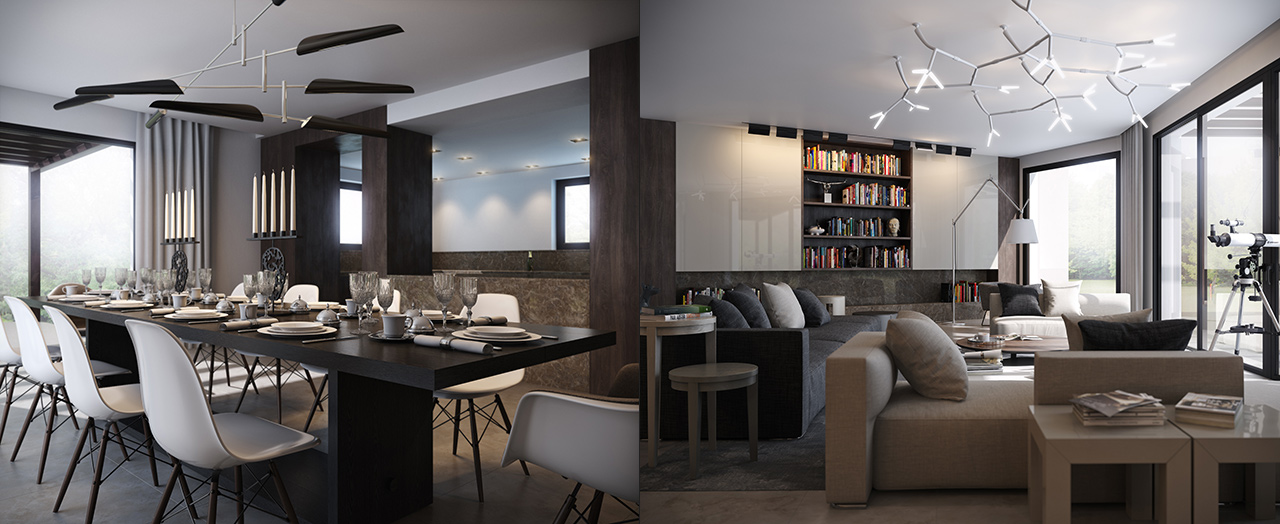
DOF PRO Artists Left: Mark LaFrenais, Right: Adrian Jackson
In 3D computer graphics, physically accurate depth of field can be generated using complex raytracing techniques that tend to increase rendering times exponentially. As a result, 3D computer generated content often lacks depth of field as a consequence of the lengthy calculation times, or it is performed as a post-process using a specialized plugin such as DOF PRO.
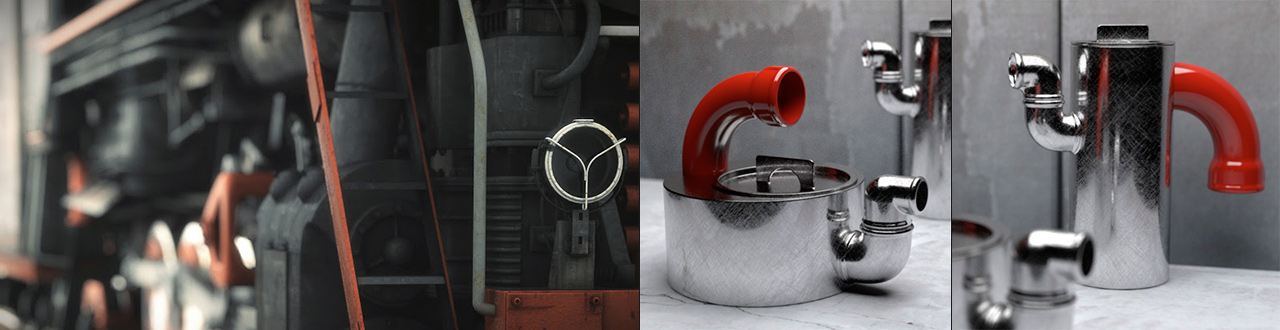
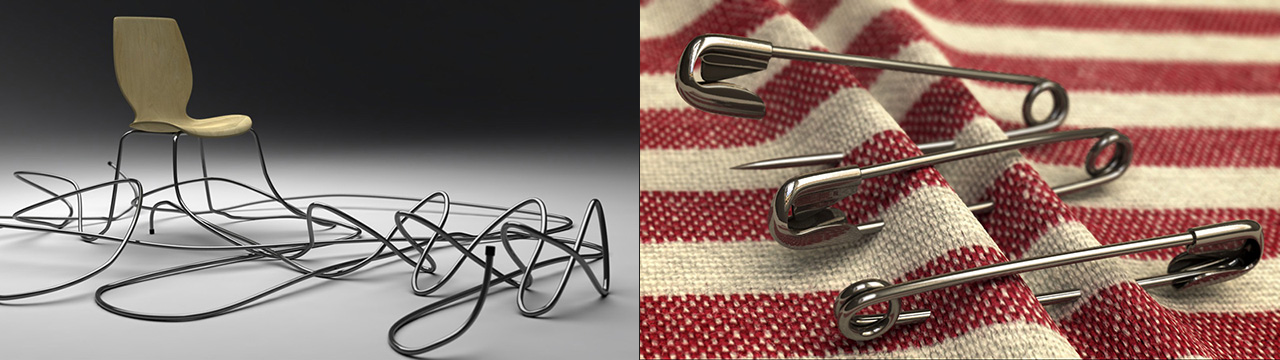
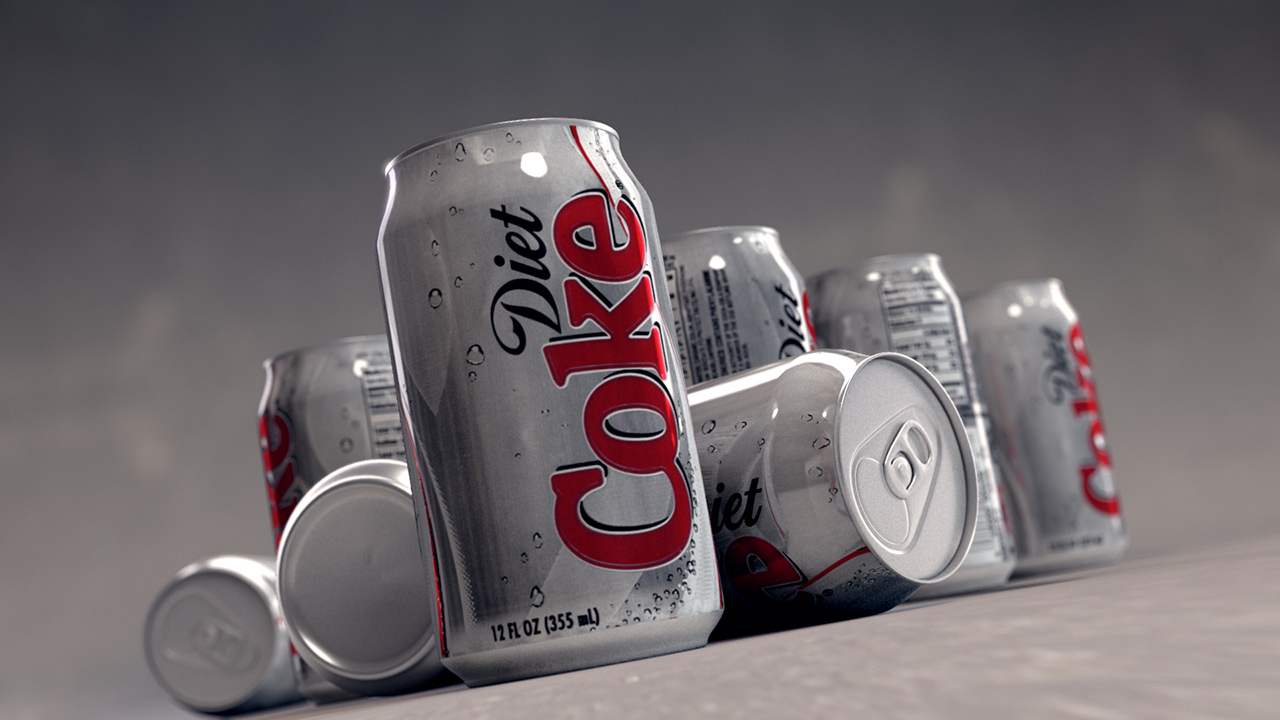
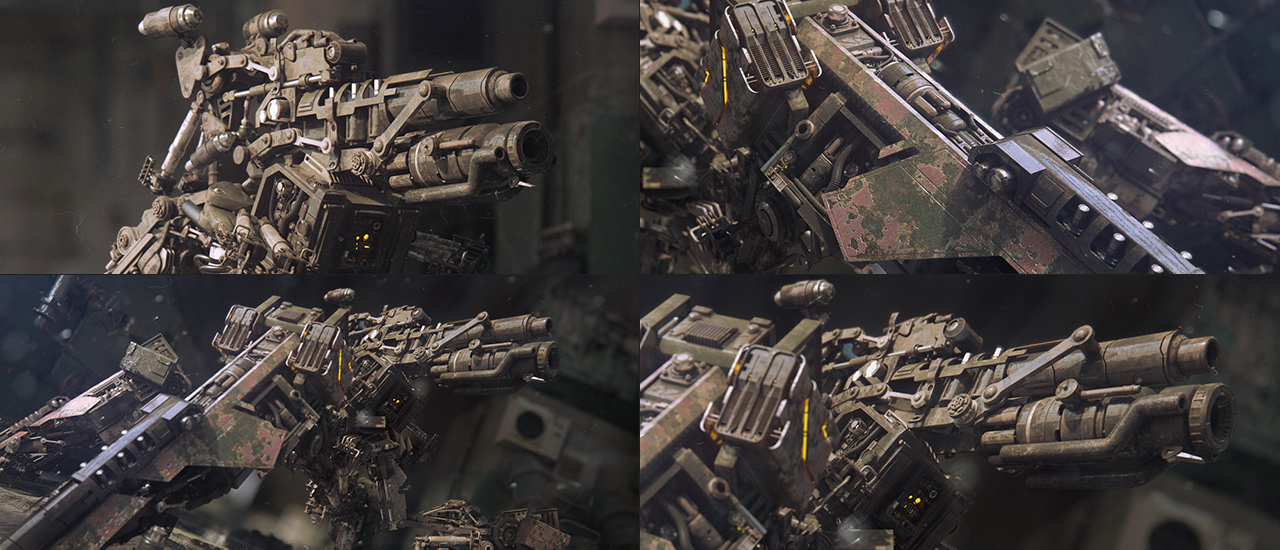
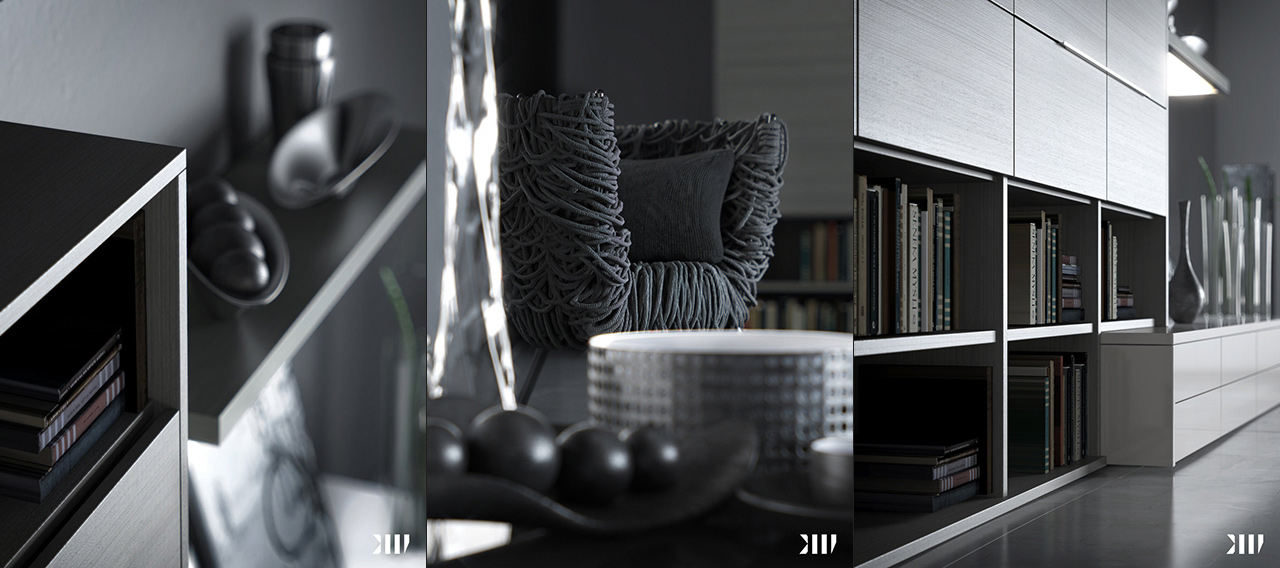
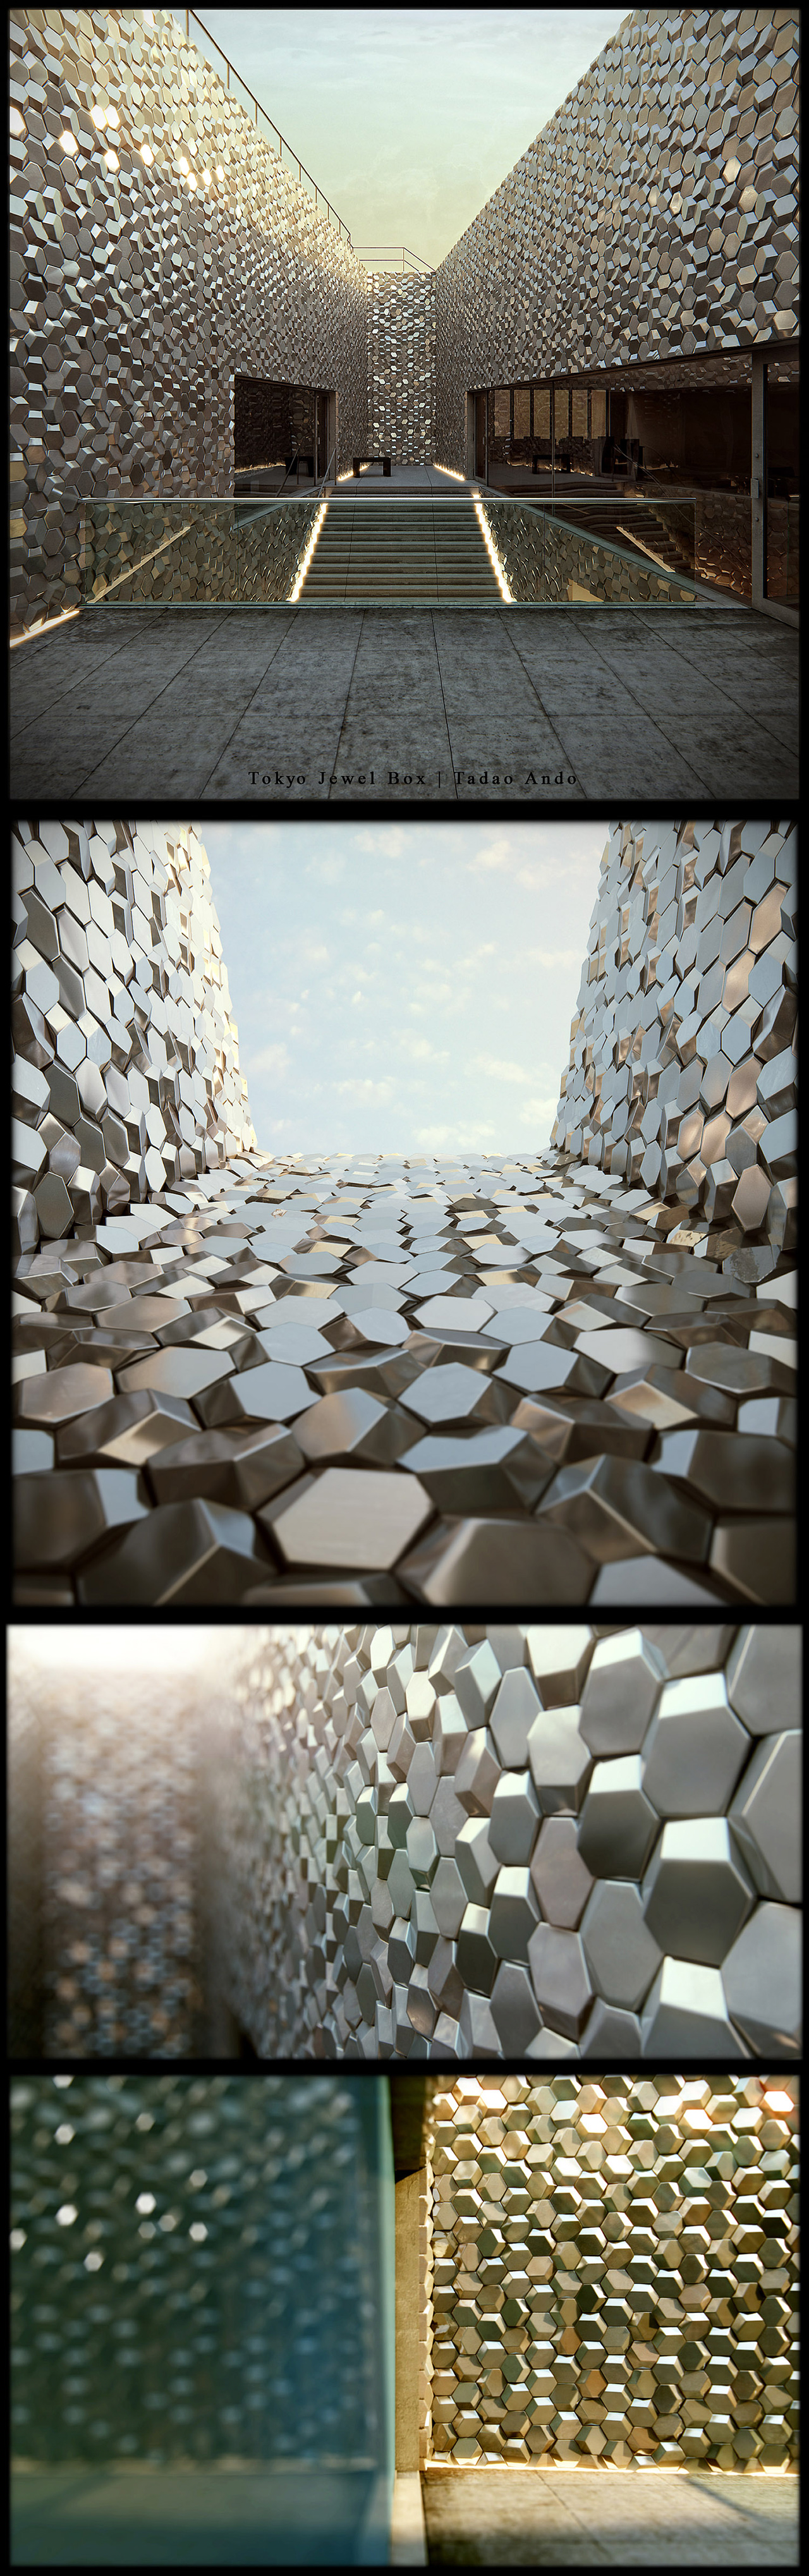
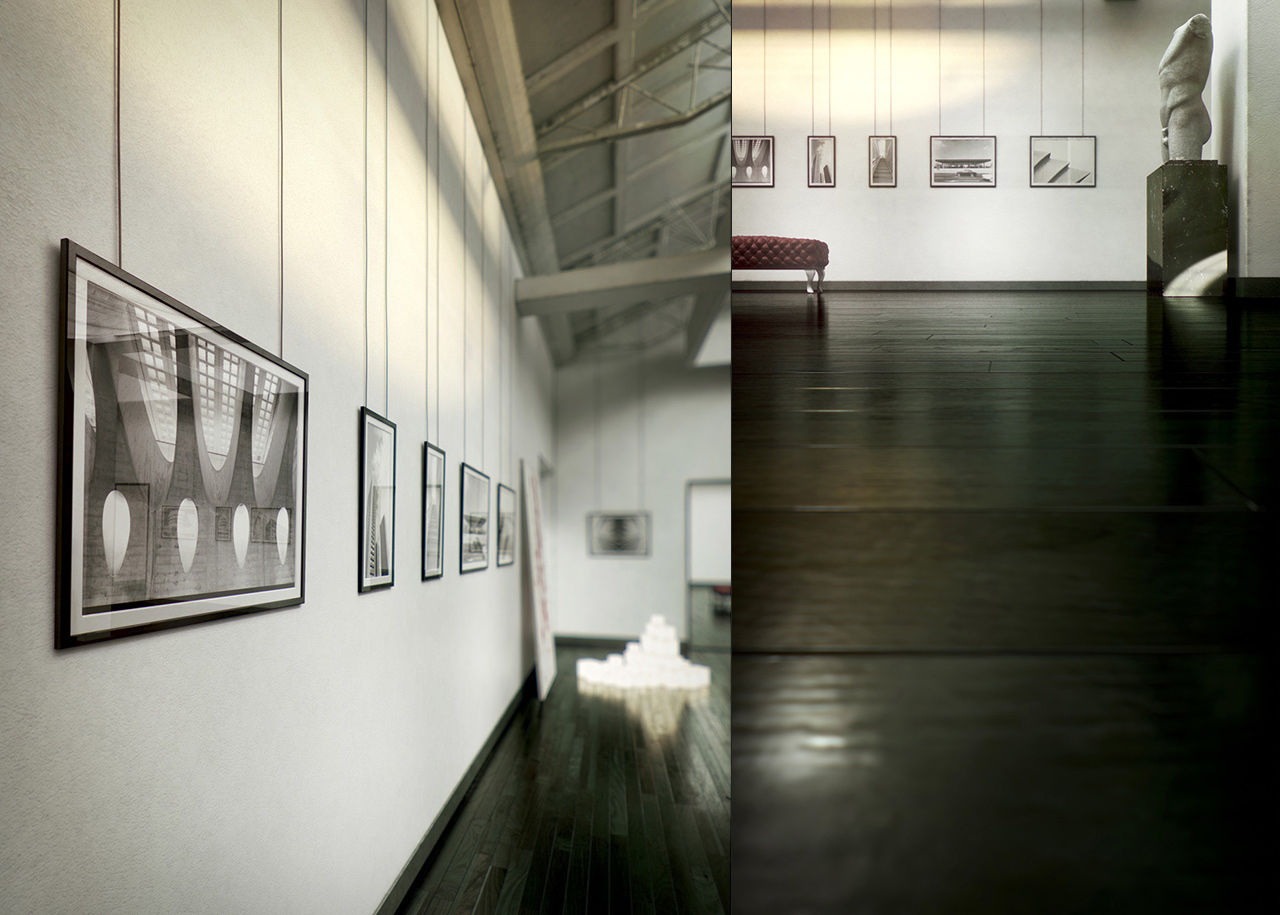
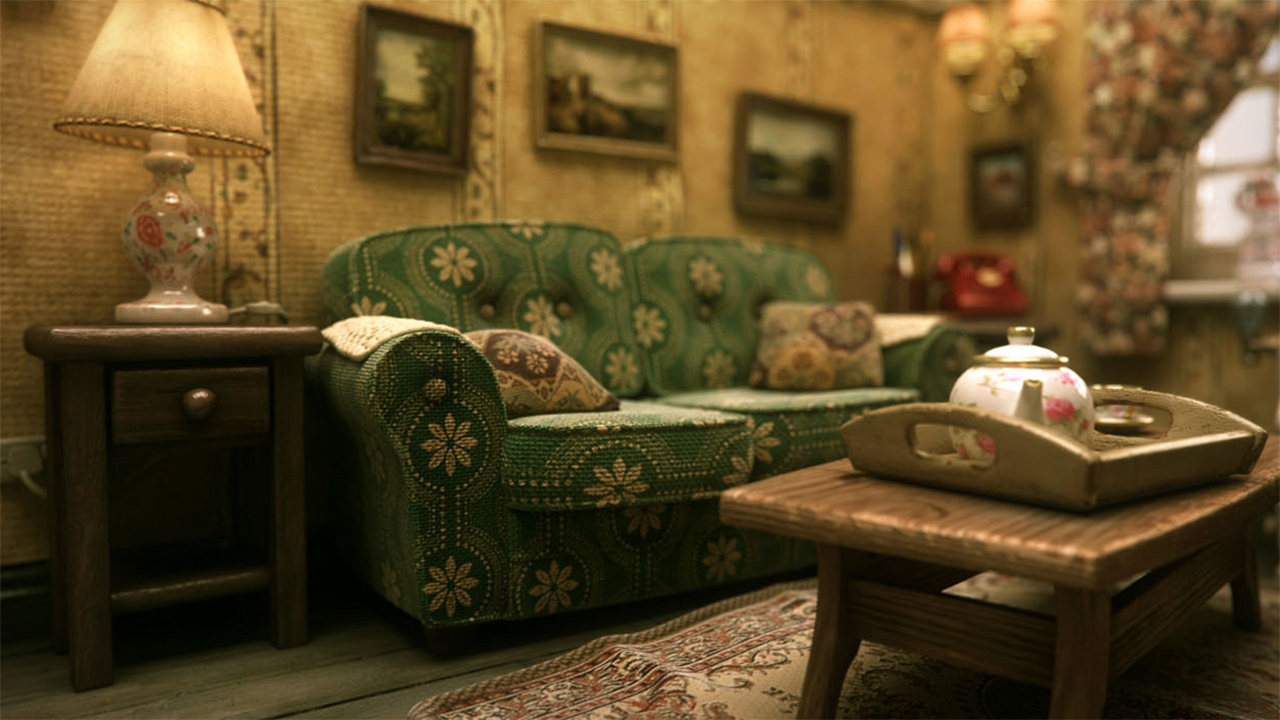
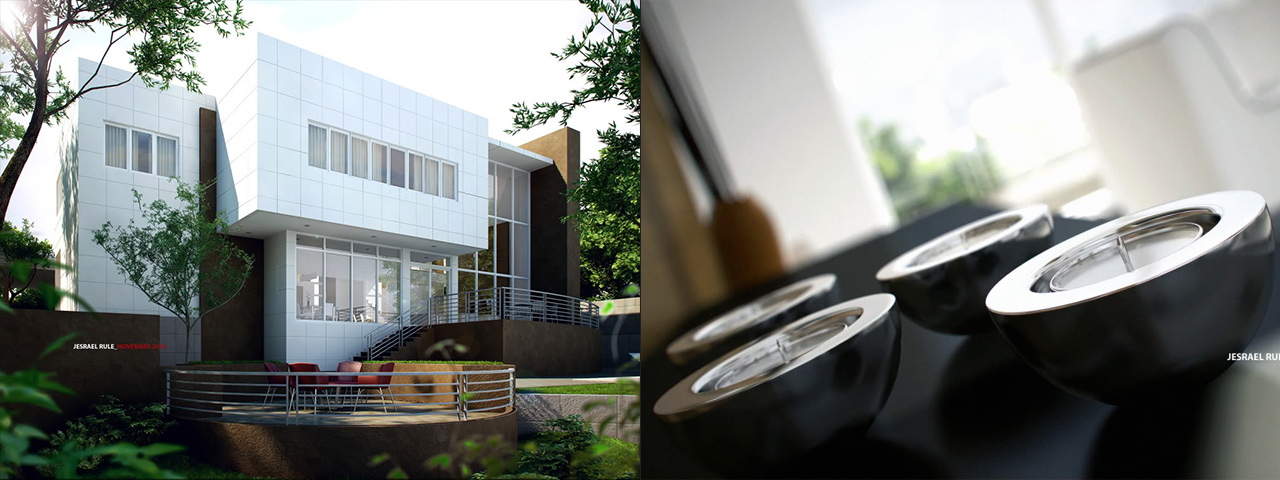
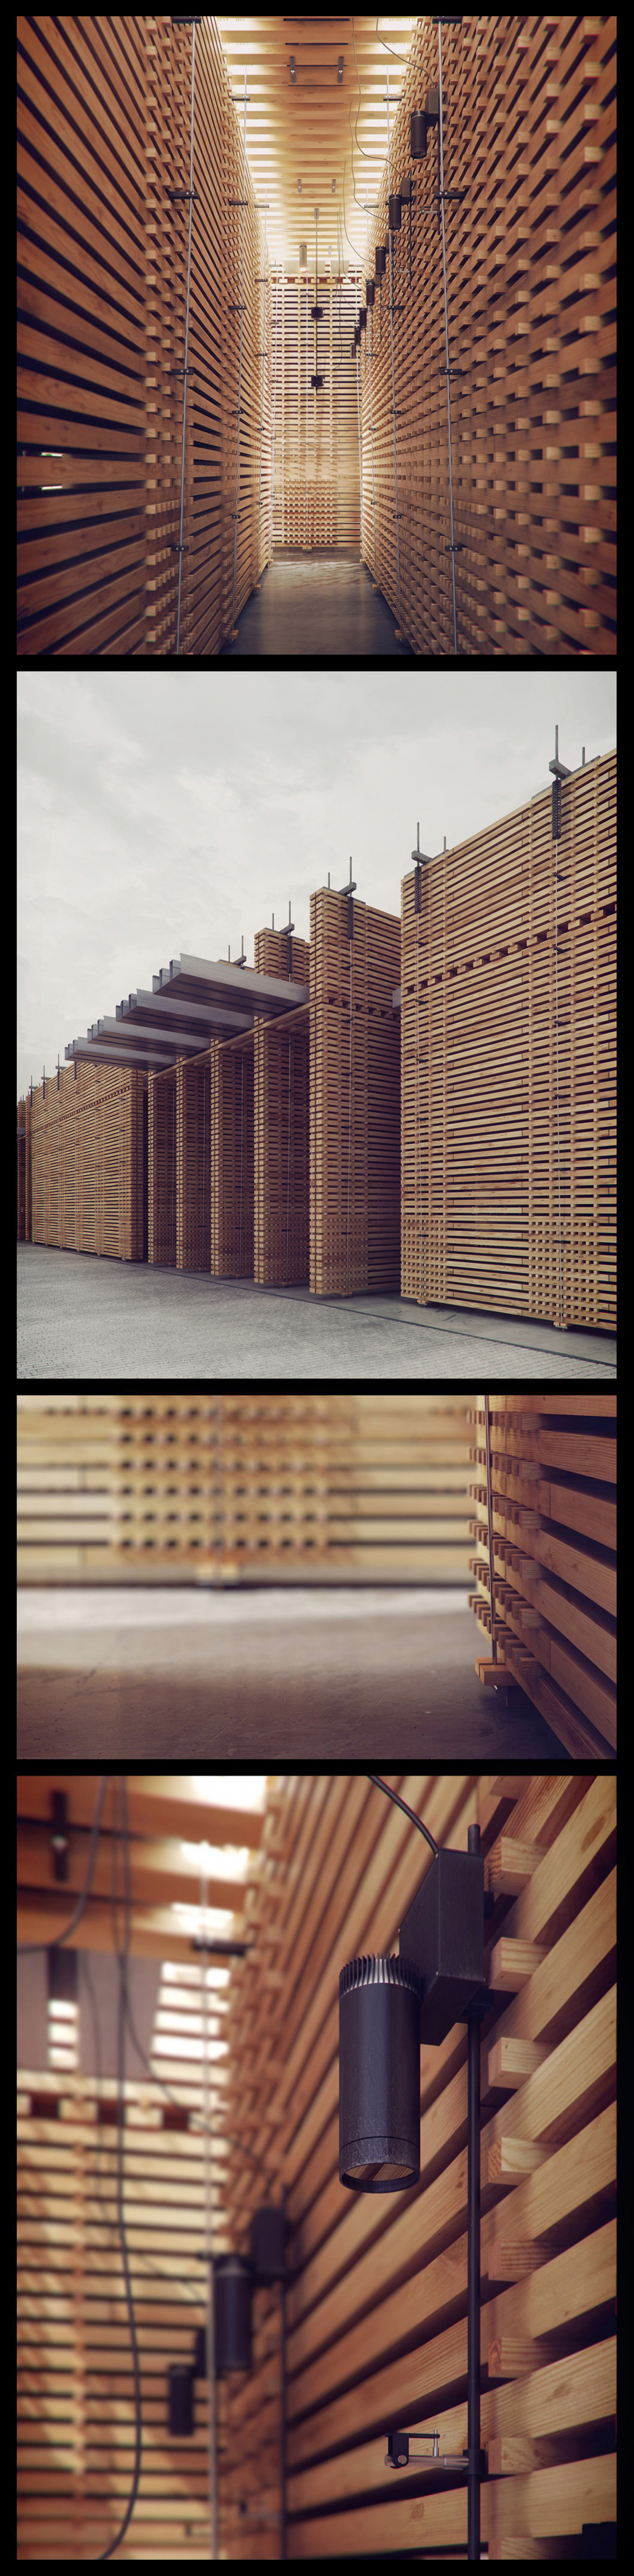
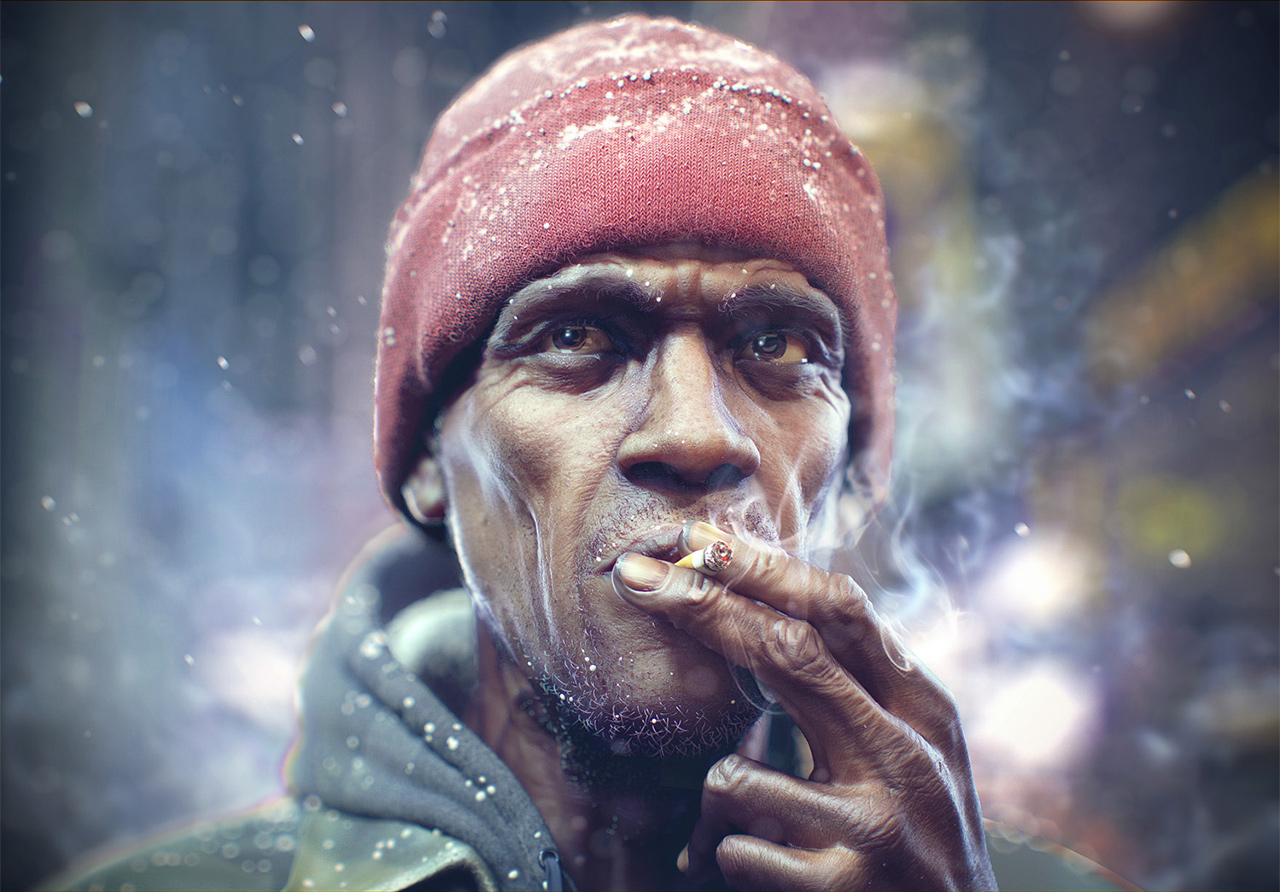
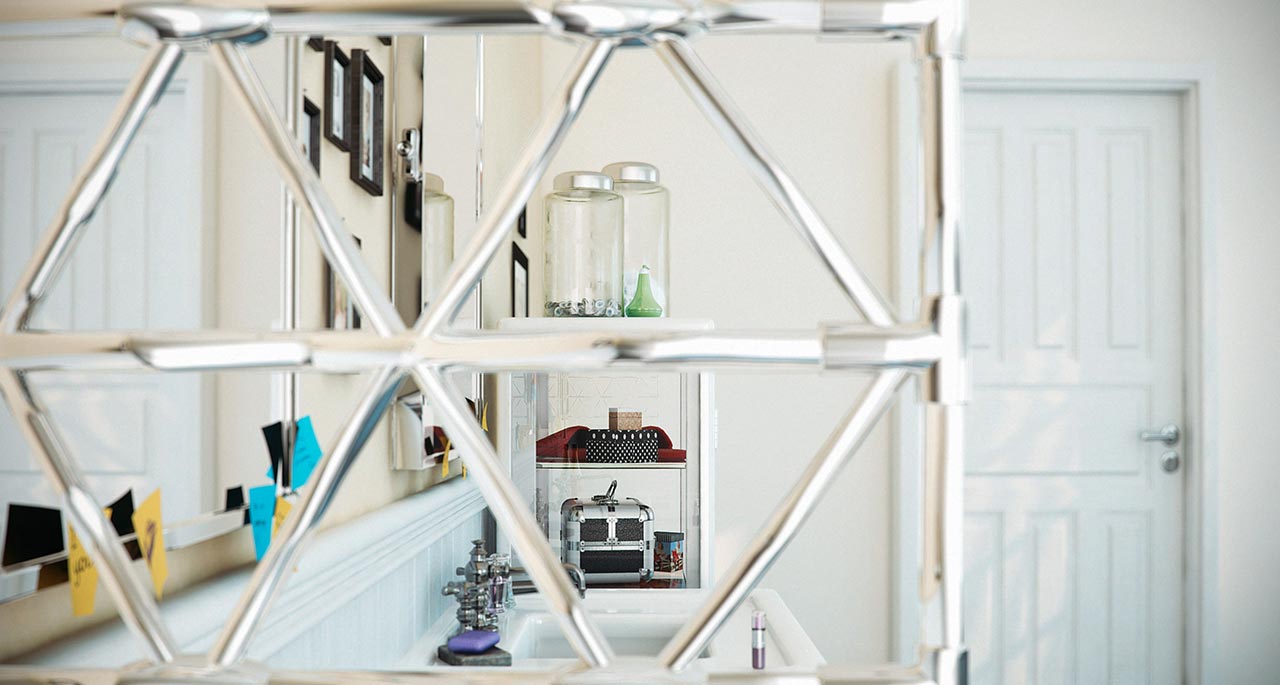
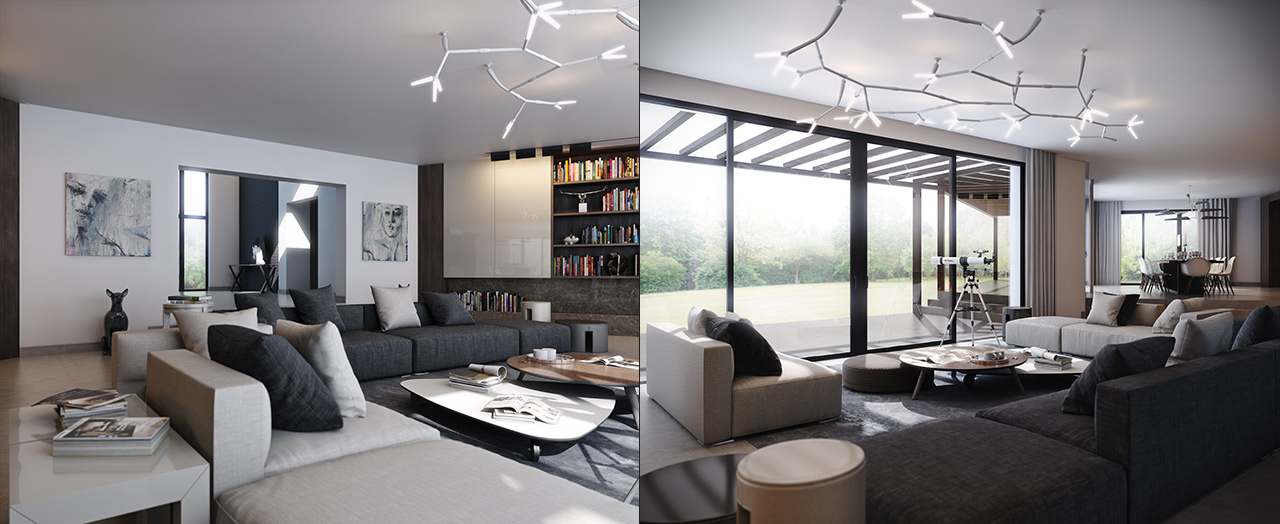
DOF PRO Artists: Daniel Danrich
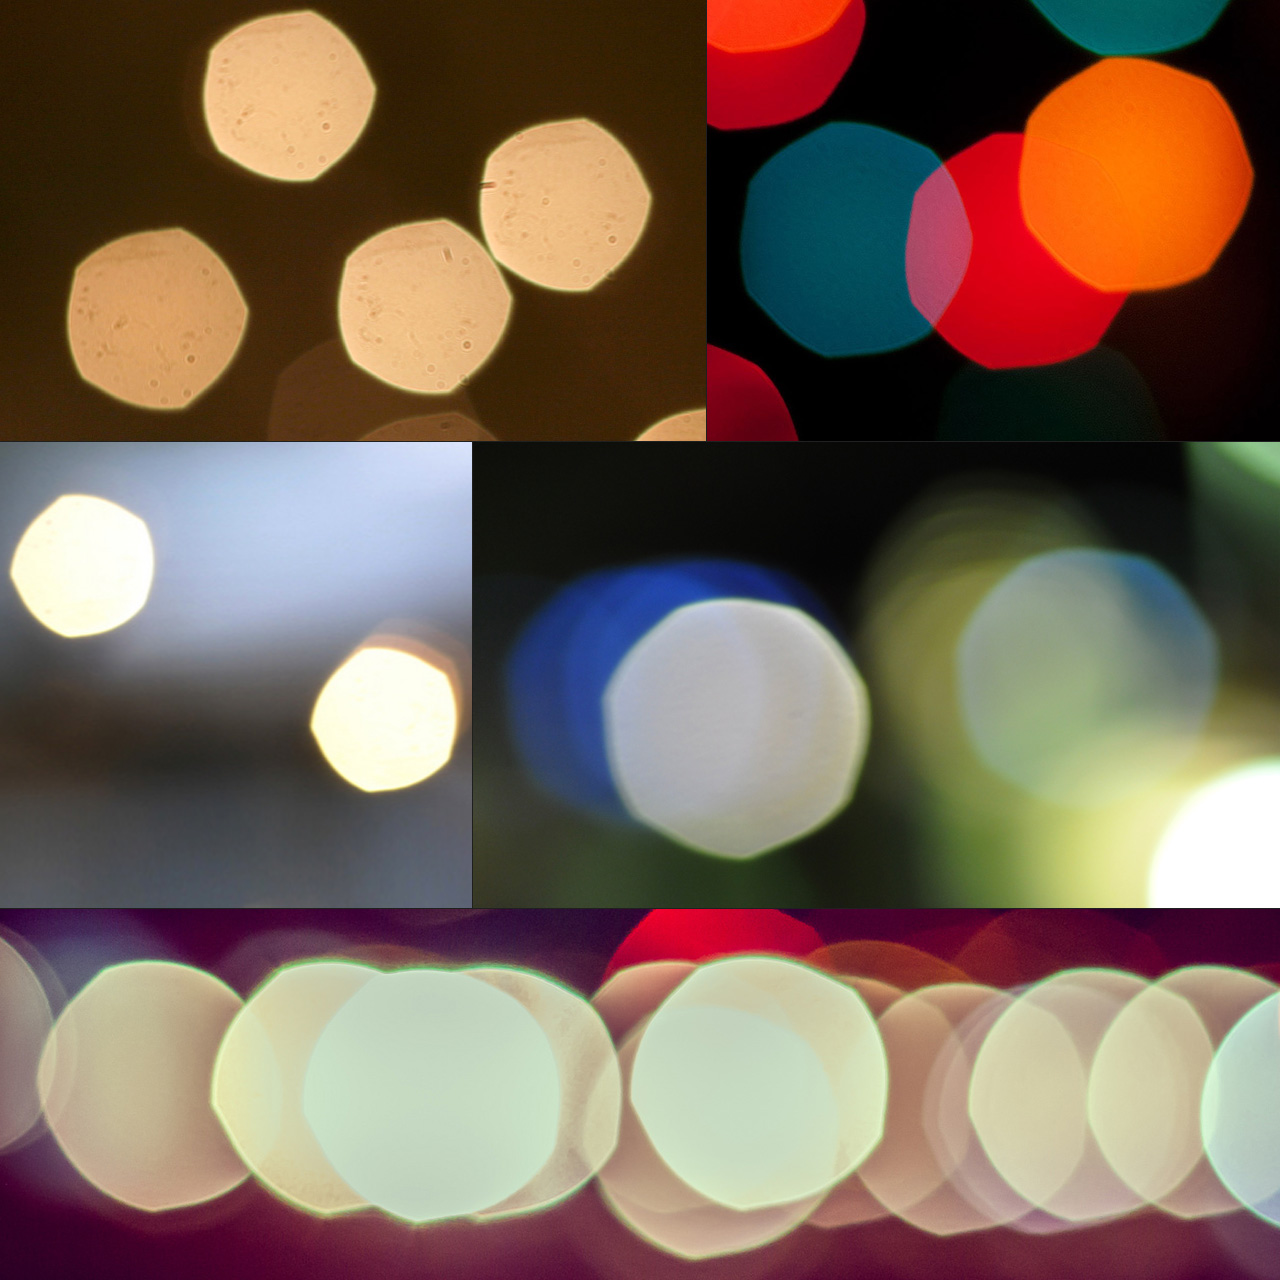
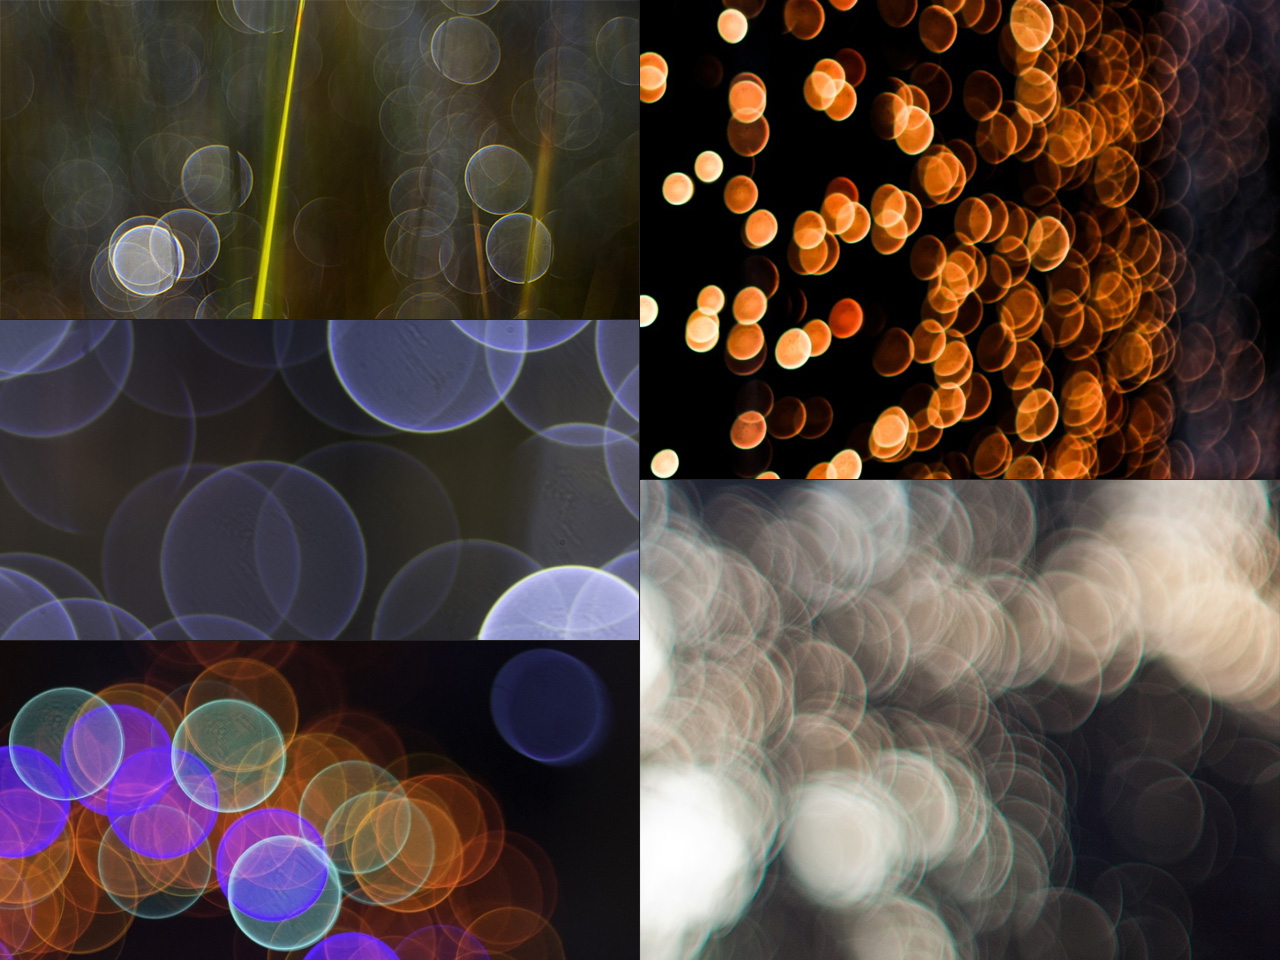
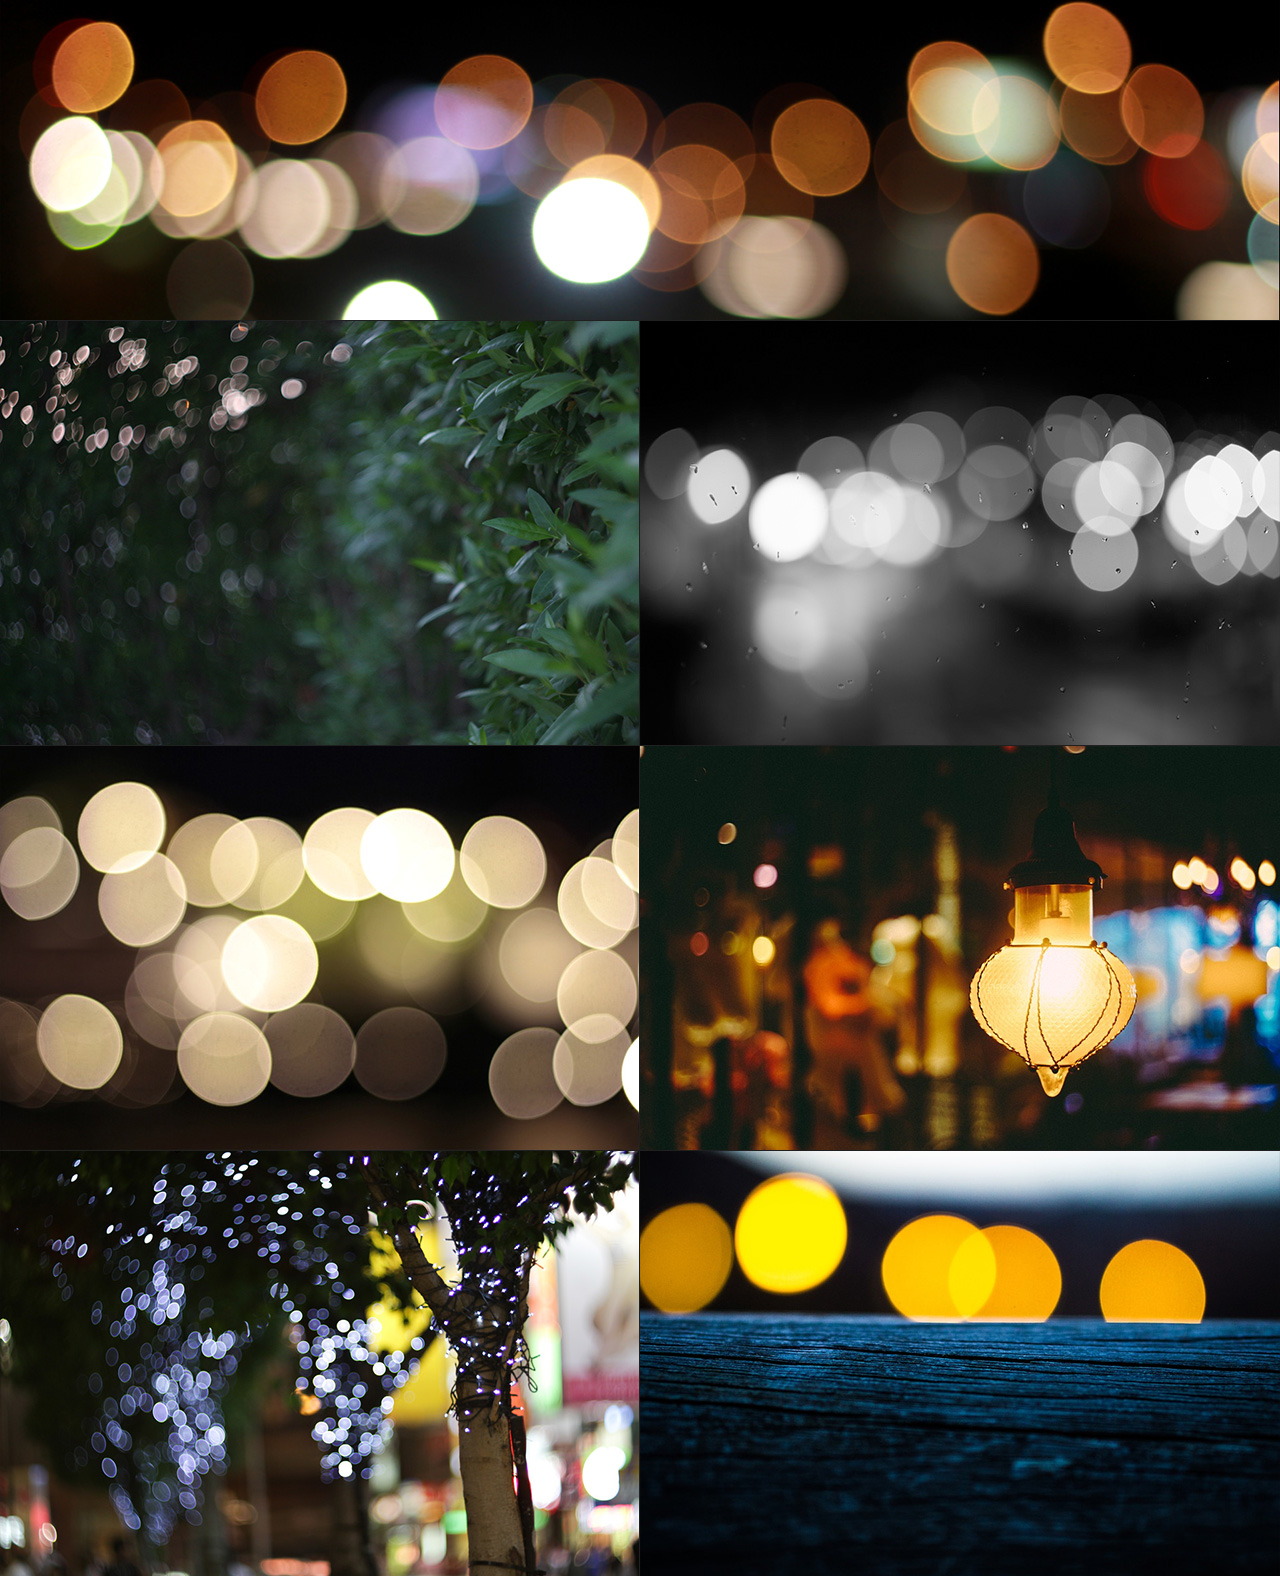
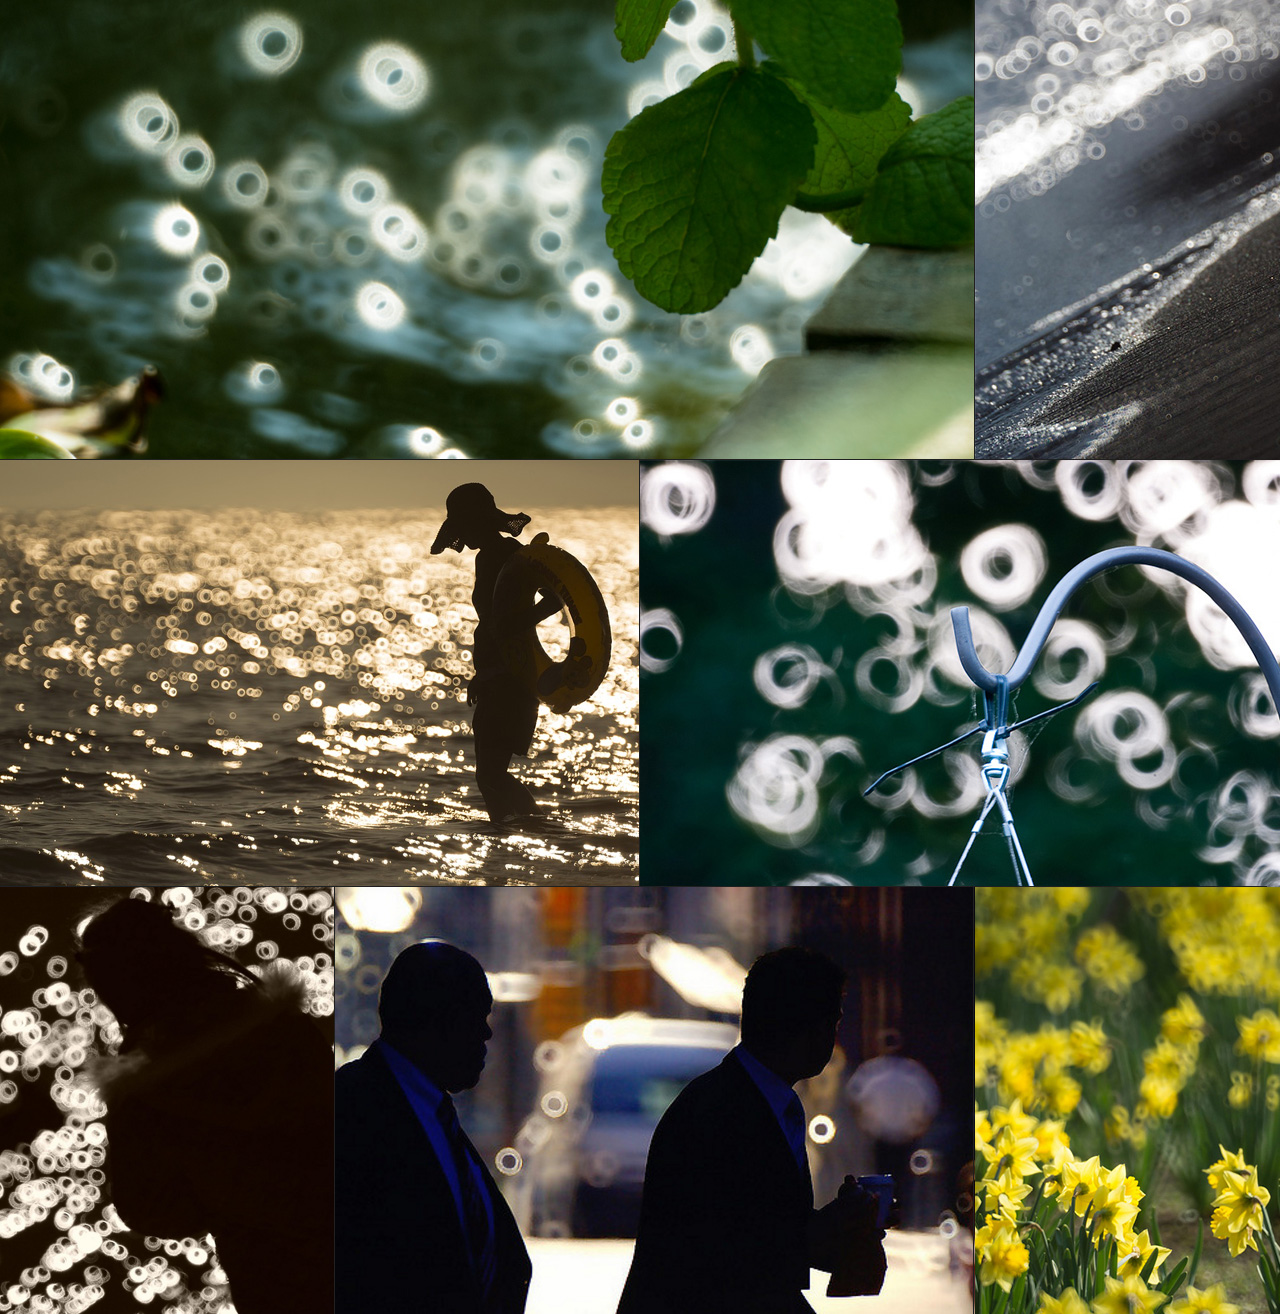
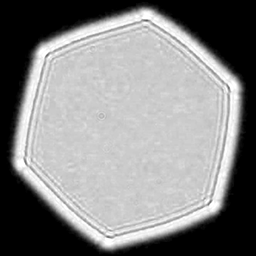
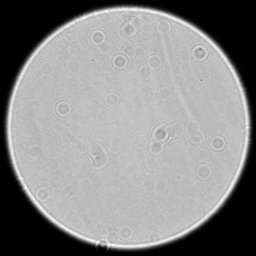
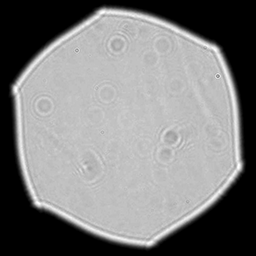
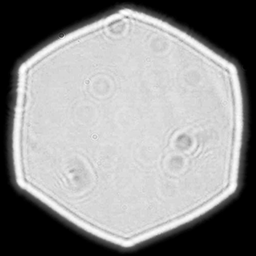
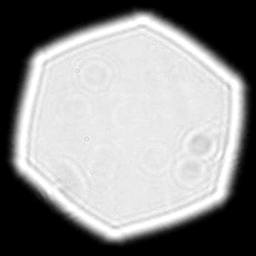
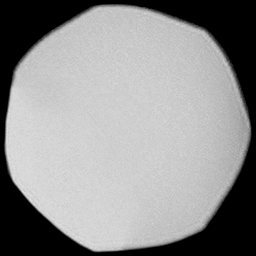
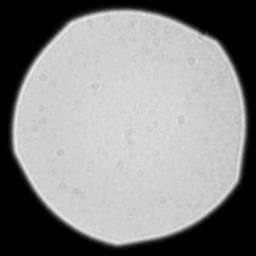
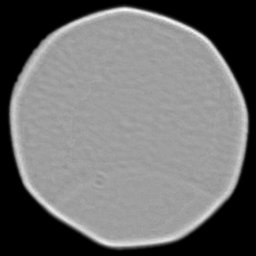
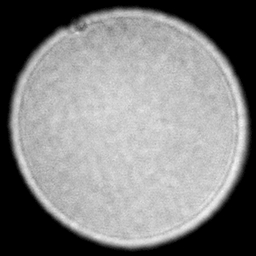
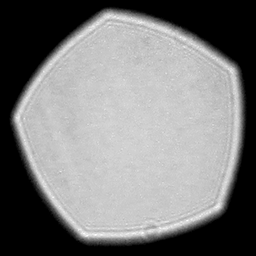
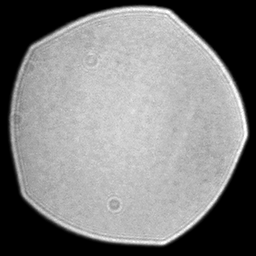
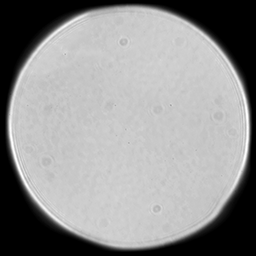
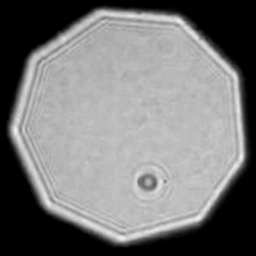
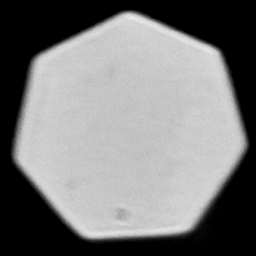
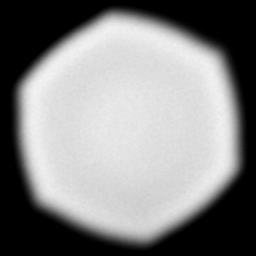
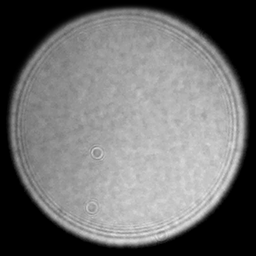
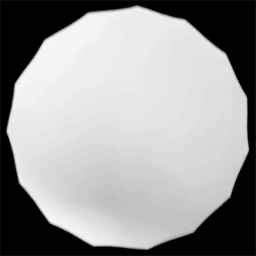
The term Bokeh, which in Japanese literally means blurring, has been introduced into the film, photography and computer graphics industries to describe these particular out-of-focus blur characteristics. It is determined mainly by the shape of the camera lens and can be best seen on out-of-focus highlights which assume the shape of the lens aperture. A lens with few aperture diaphragm blades, say 5, tends to produce pentagonal highlights, whereas a lens with more aperture blades, say 7-8, tends to produce rounder heptagonal/octagonal highlights. Ultimately, a higher number of aperture blades will produce more circular highlights.
DOF PRO features circular aperture shapes, polygonal aperture shapes ranging from 3 to 16 aperture blades, blade notching with variable notch scale and positive and negative notch angle, custom apertures that allows the loading of aperture maps, astigmatic featuring both sagittal and tangential astigmatism, aspect ratio selection including industry standard presets, optical vignetting (also known as Cat’s Eye) with vignette scale control, catadioptric (Mirror, Reflex) lenses, and much more.
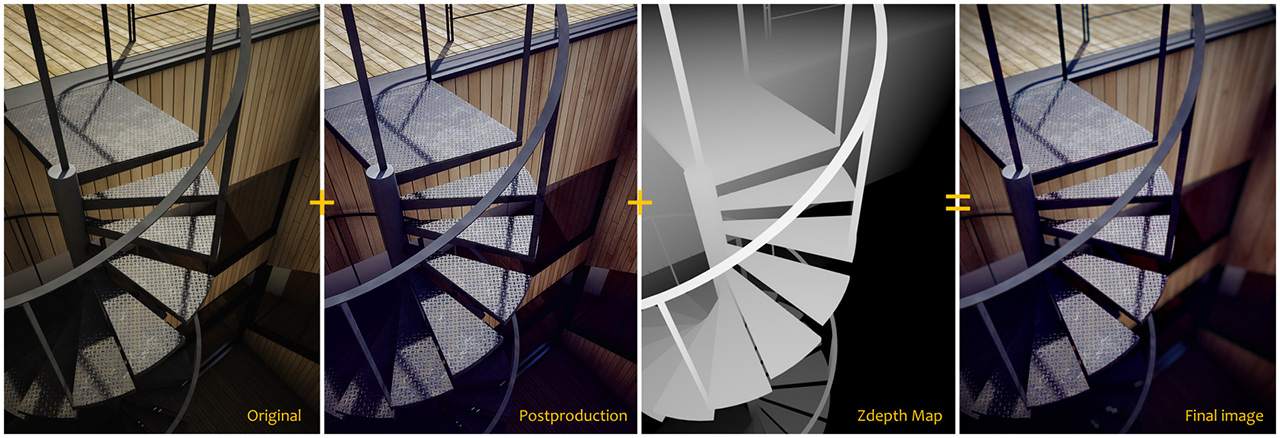
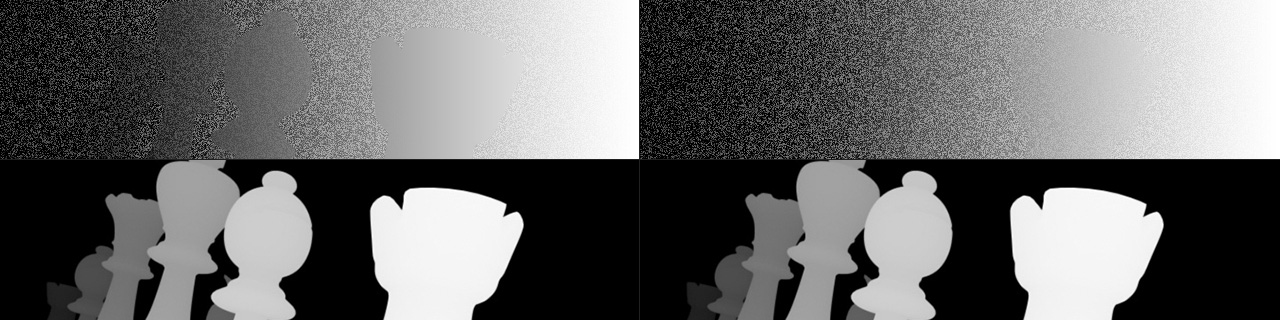
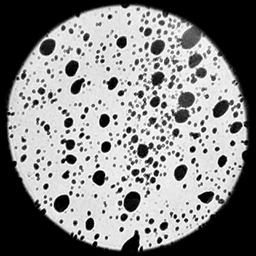
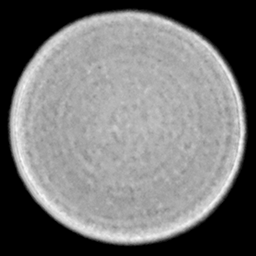
DOF PRO features various modes of operation to suit virtually any requirement. In its most powerful mode, DOF PRO uses a specified depth map to derive an accurate depth of field effect. A depth map is a greyscale image where the grey level at any given point represents the distance of the object from the camera at the same point in the original image. Most 3D computer graphics applications are easily capable of producing depth maps along with the rendered image. For photographic images, the user can create the depth map manually which can be greatly facilitated through the use of simple linear and / or radial gradients.
DOF PRO source image, Depth Map and rendered result
Why DOF PRO? Naturally occurring depth of field has extremely complex optical characteristics. It cannot be simply simulated through the use of a standard blur filter. Lens size, subject distance, aperture shape, lens curvature, film grain, spherical aberration, chromatic aberration, vignetting, transparency, light refraction, motion blur and much more must be taken into account in order to achieve an accurate and convincing depth of field effect. In addition, a capable depth of field filter must also provide additional features for dealing with unavoidable post-processing artefacts such as edge management controls, depth map aliasing tools, and highlight enhancement functions. DOF PRO carefully takes into consideration all of these aspects in order to produce the highest quality depth of field output possible.
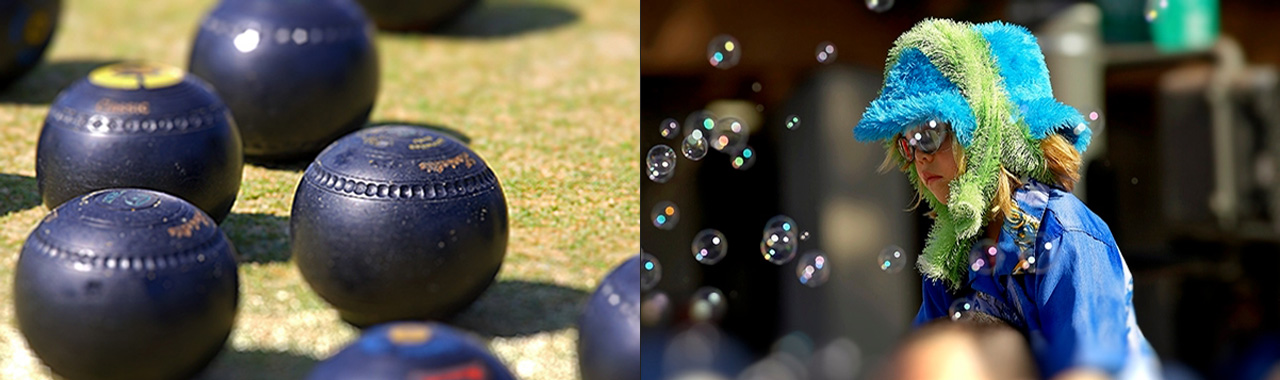
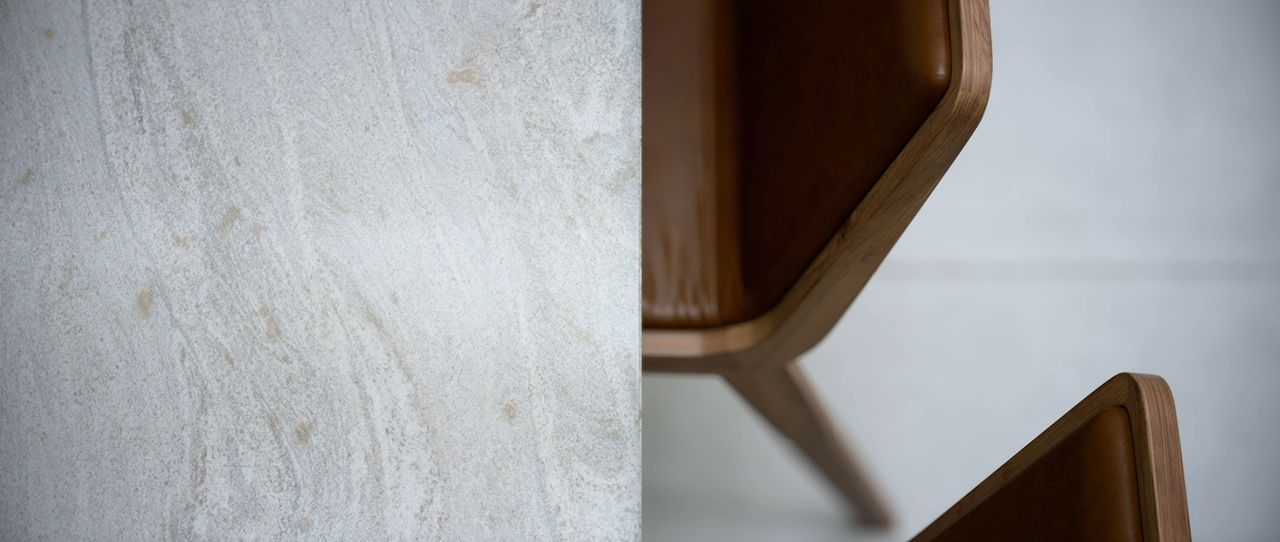
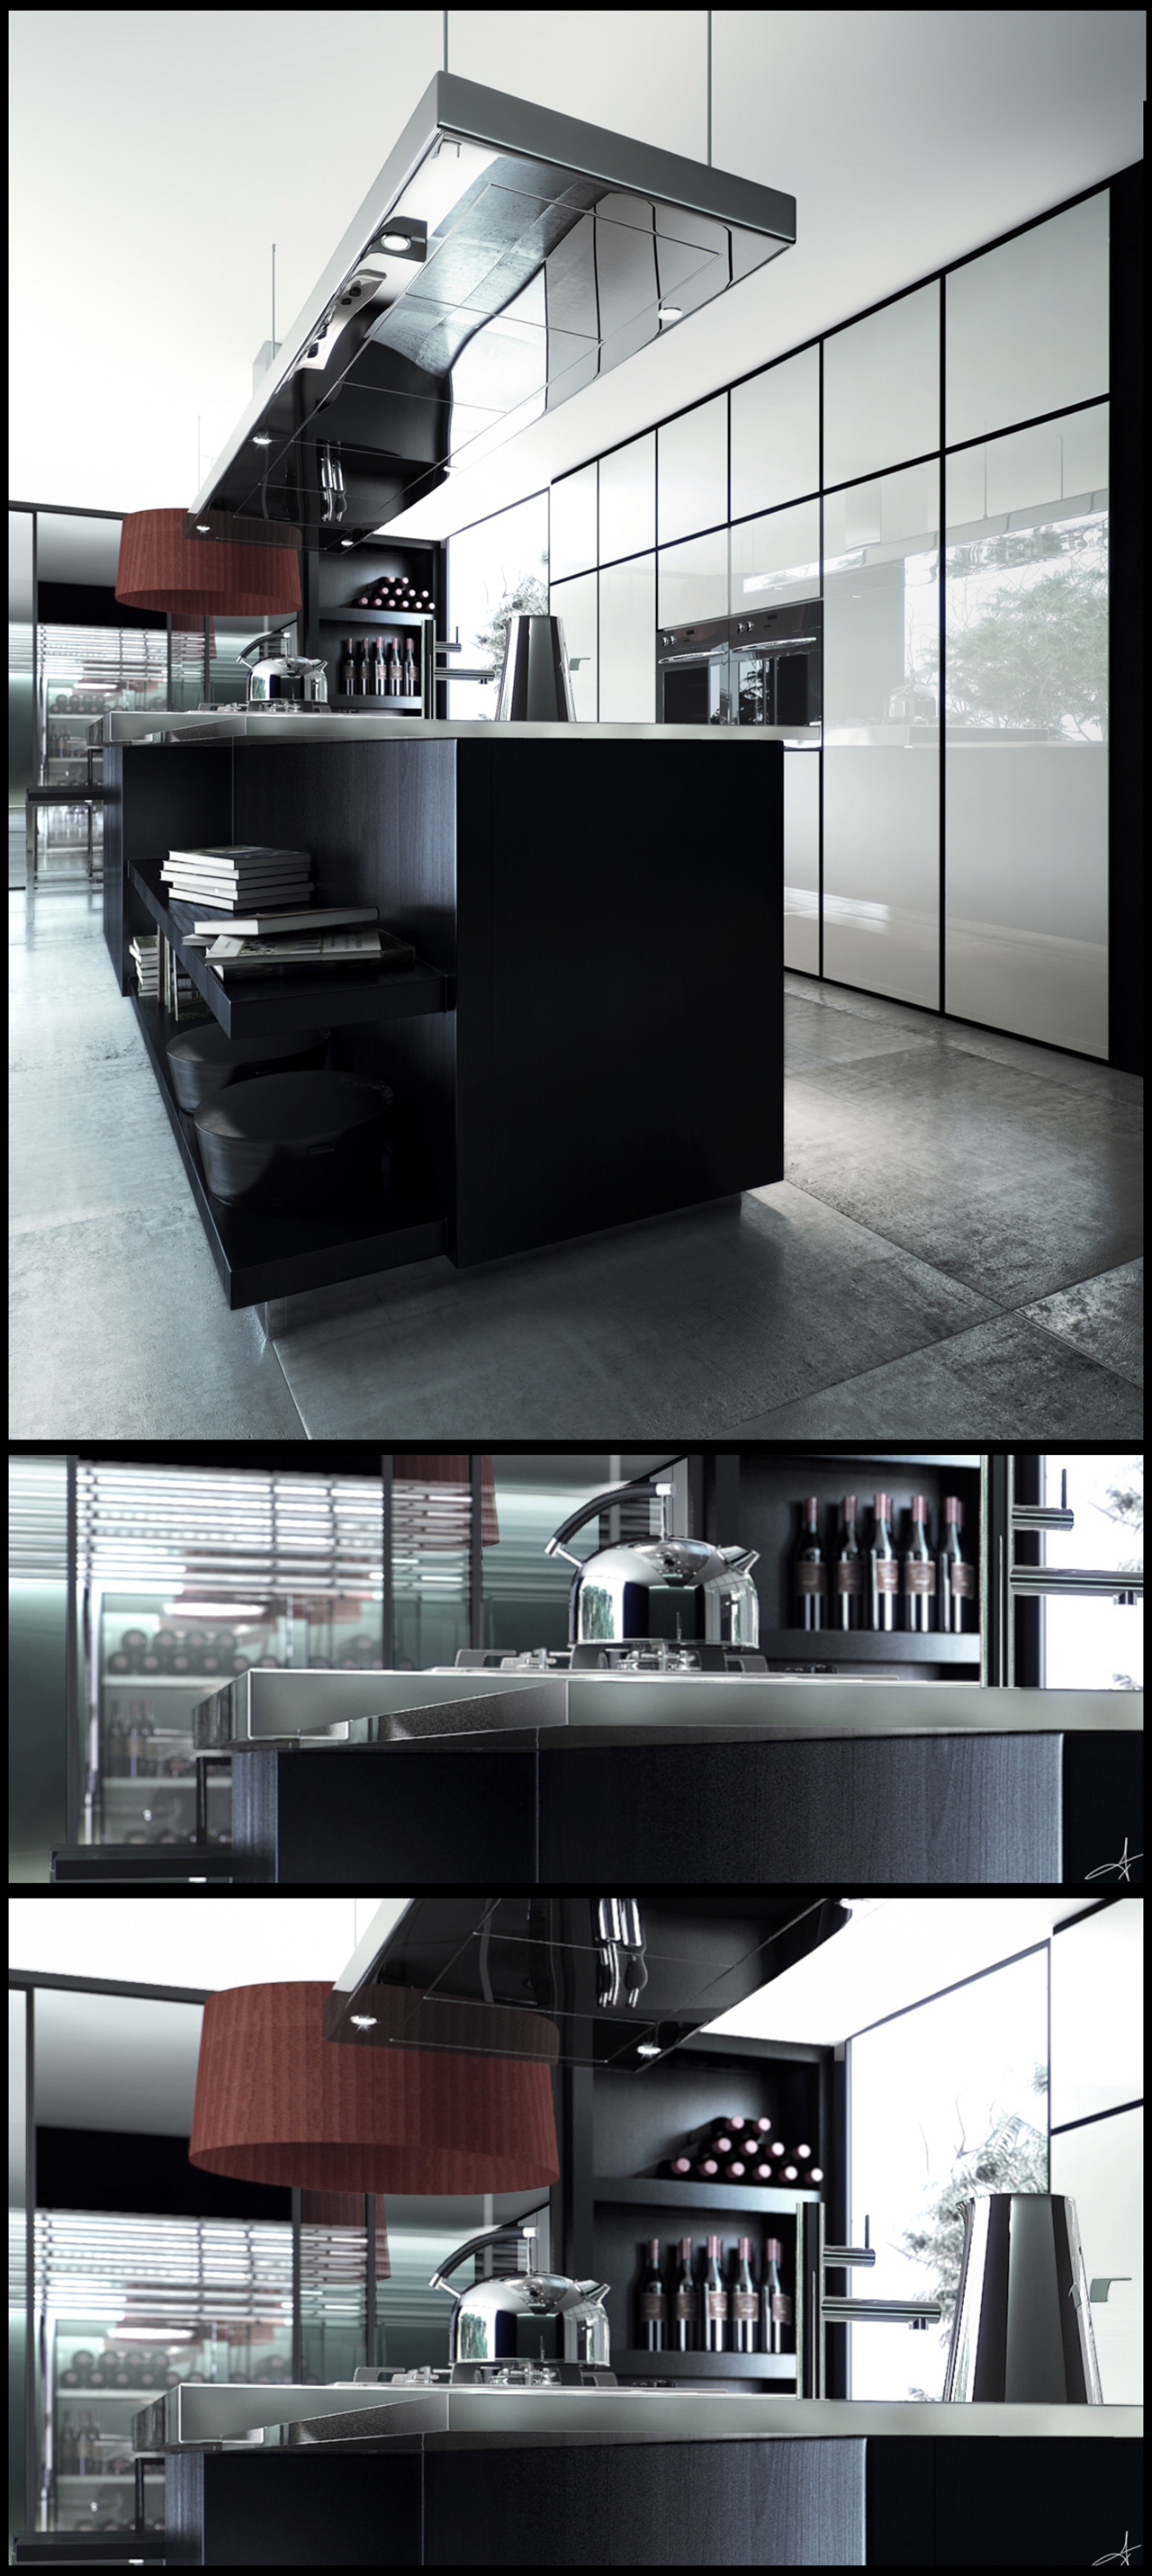
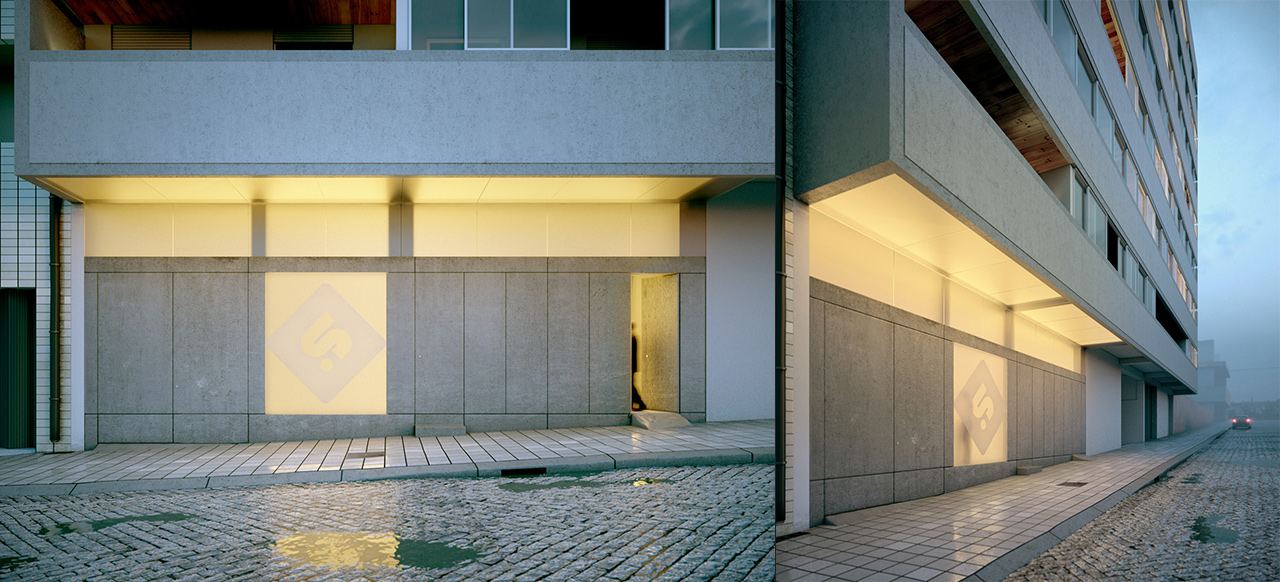
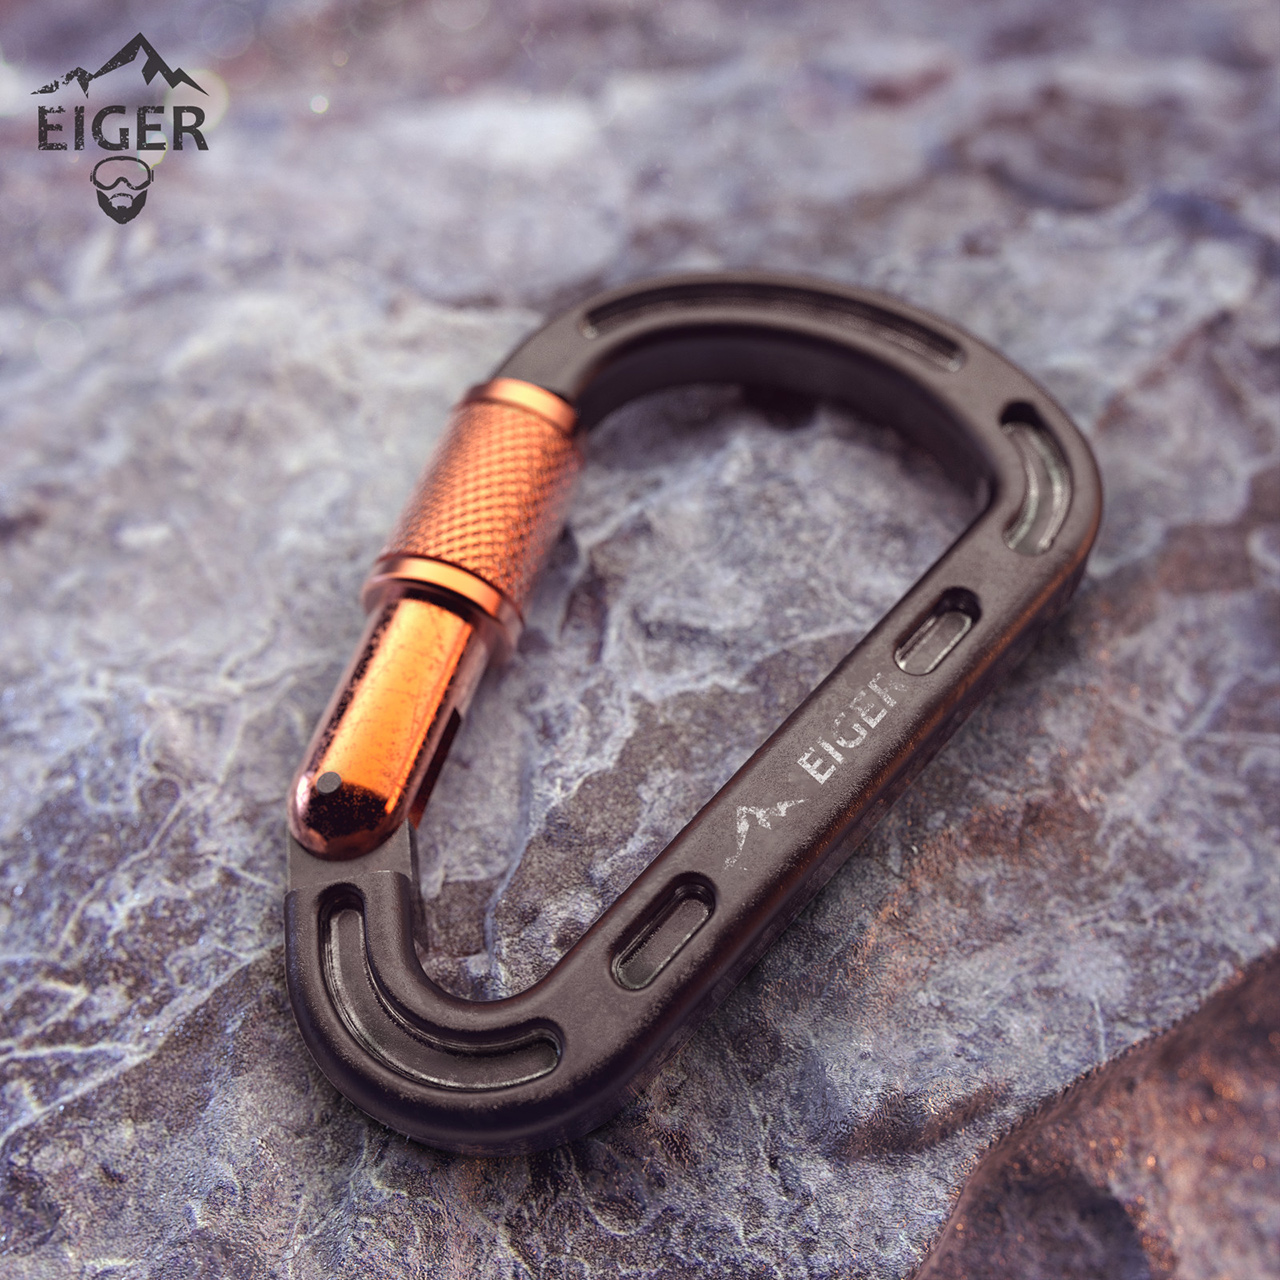
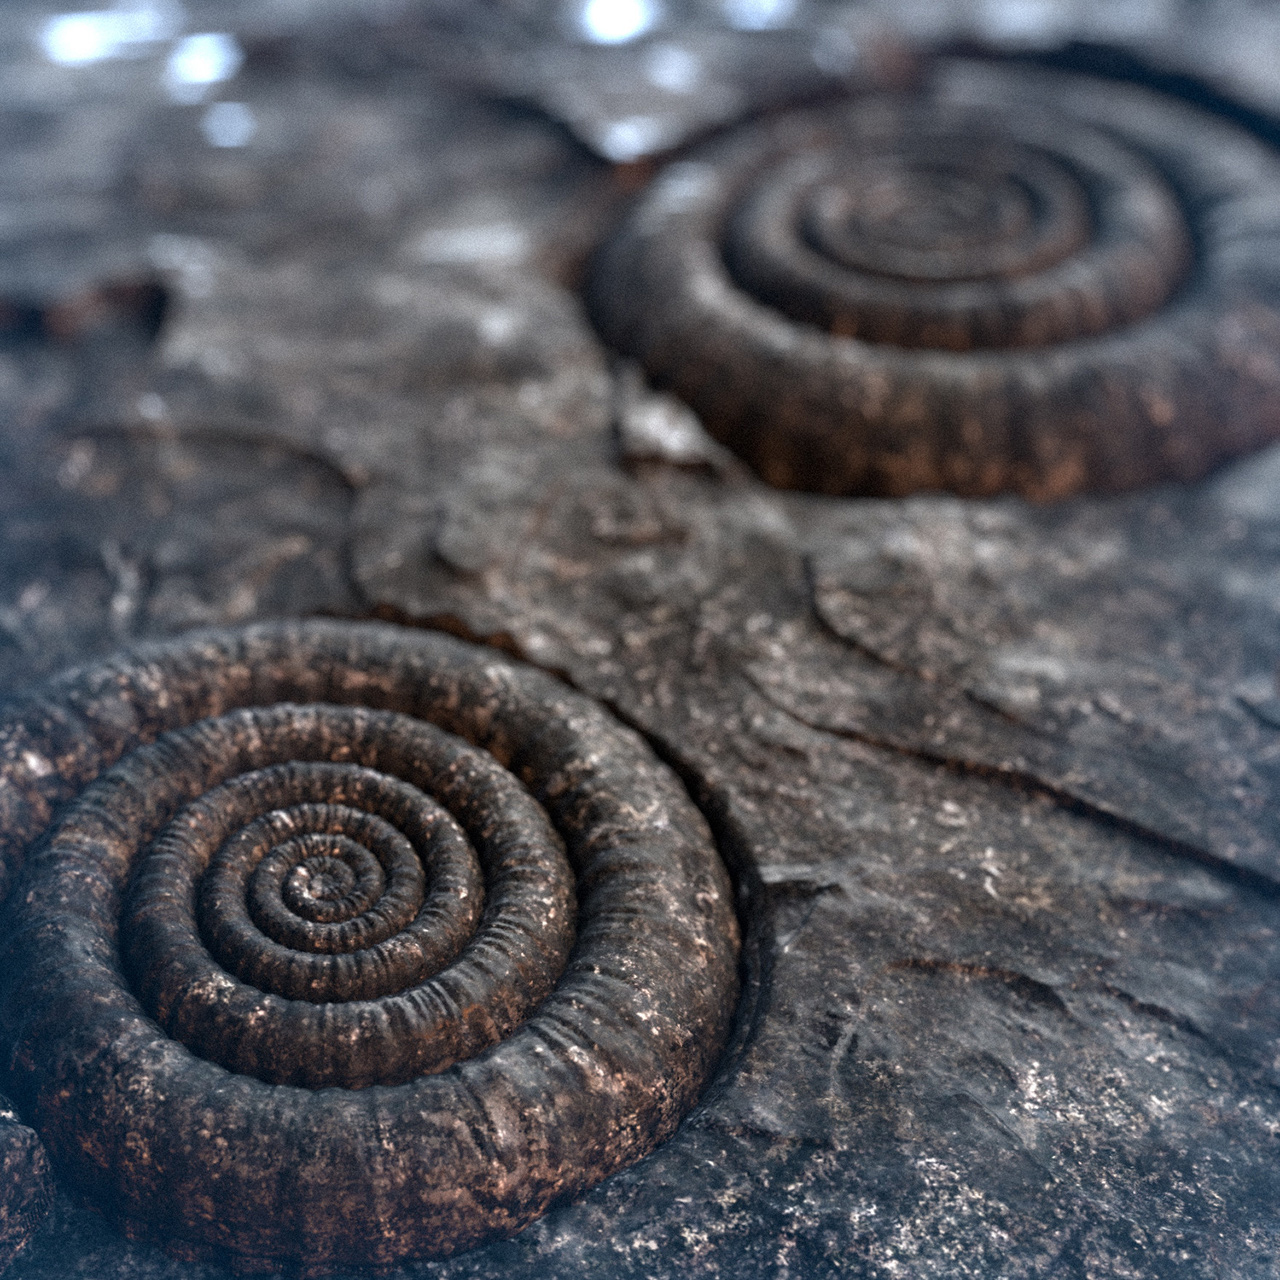
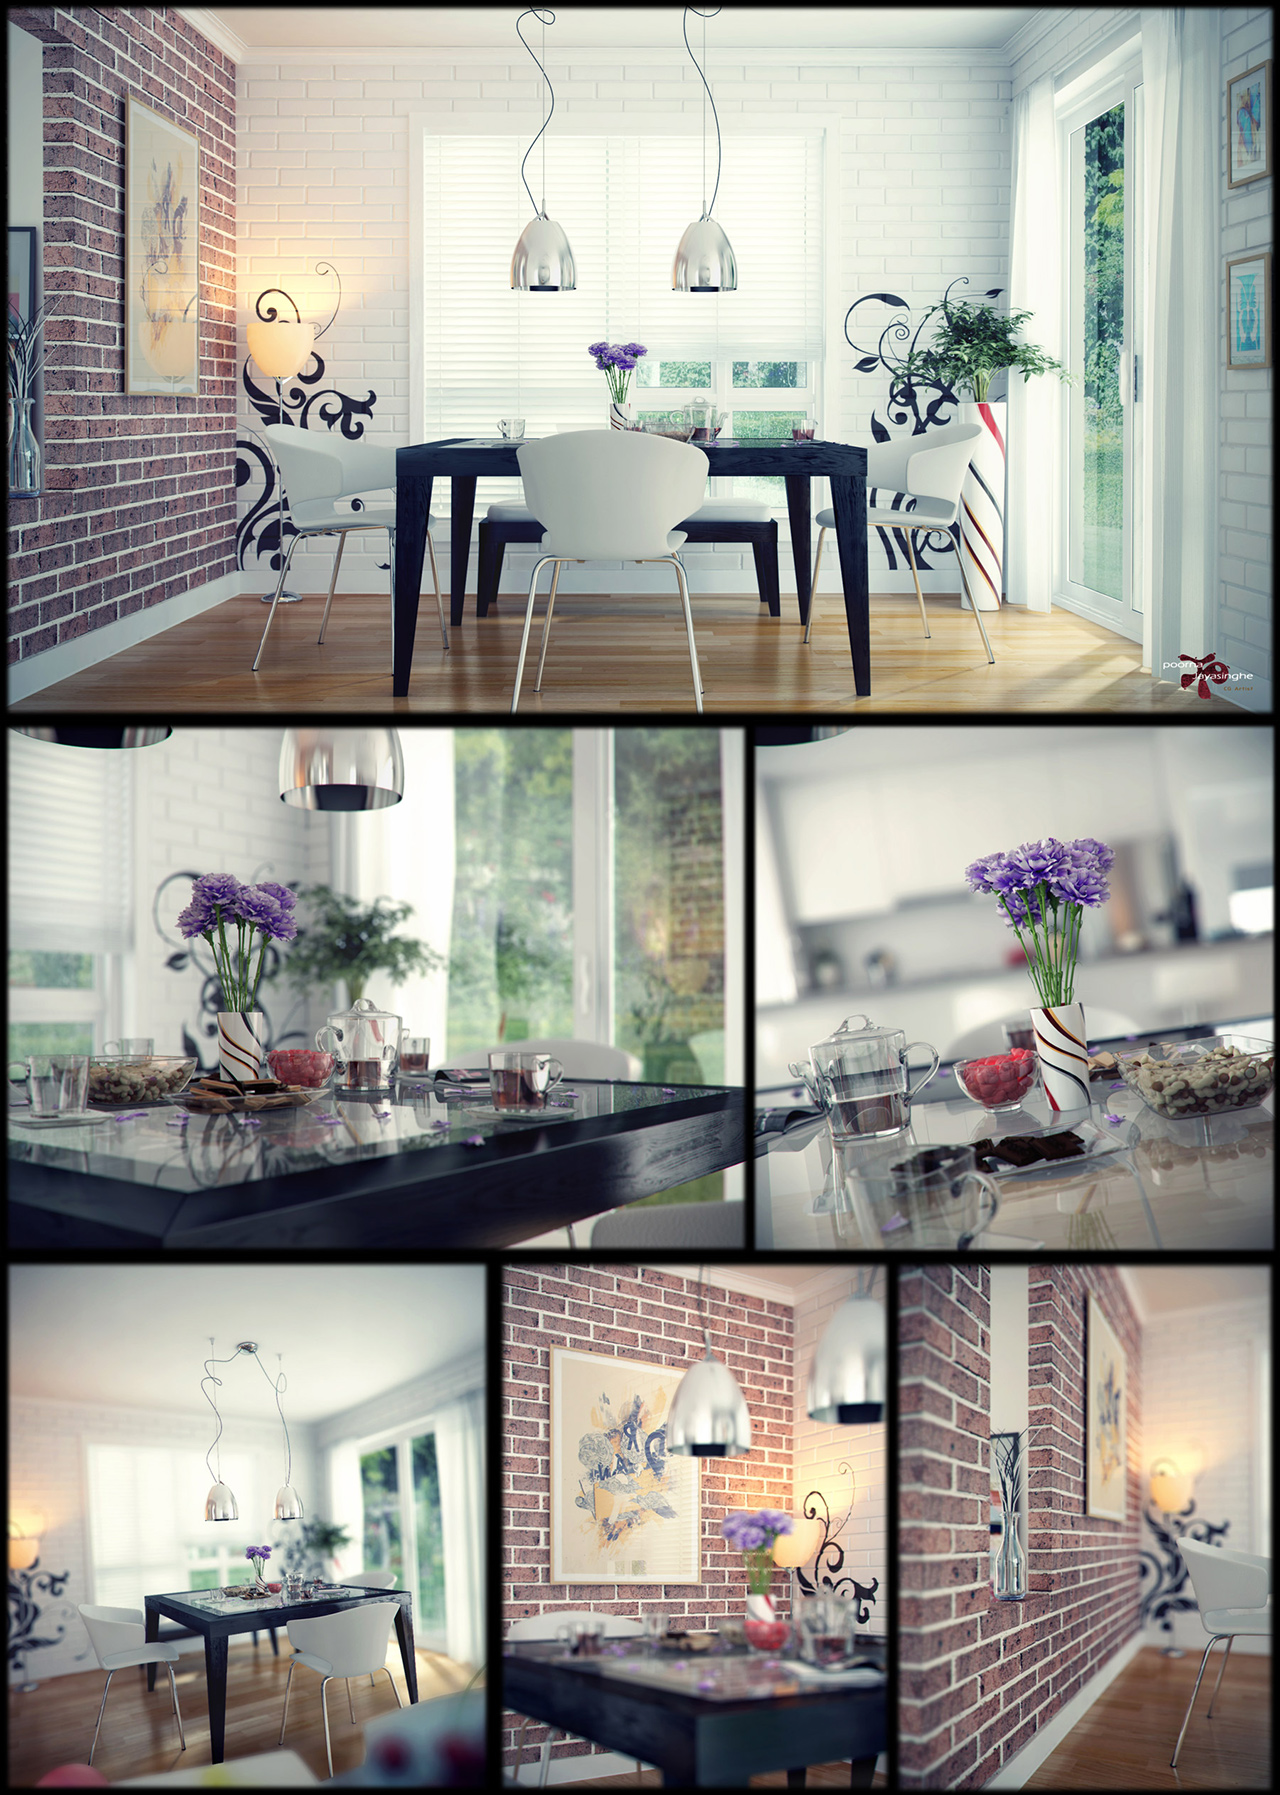
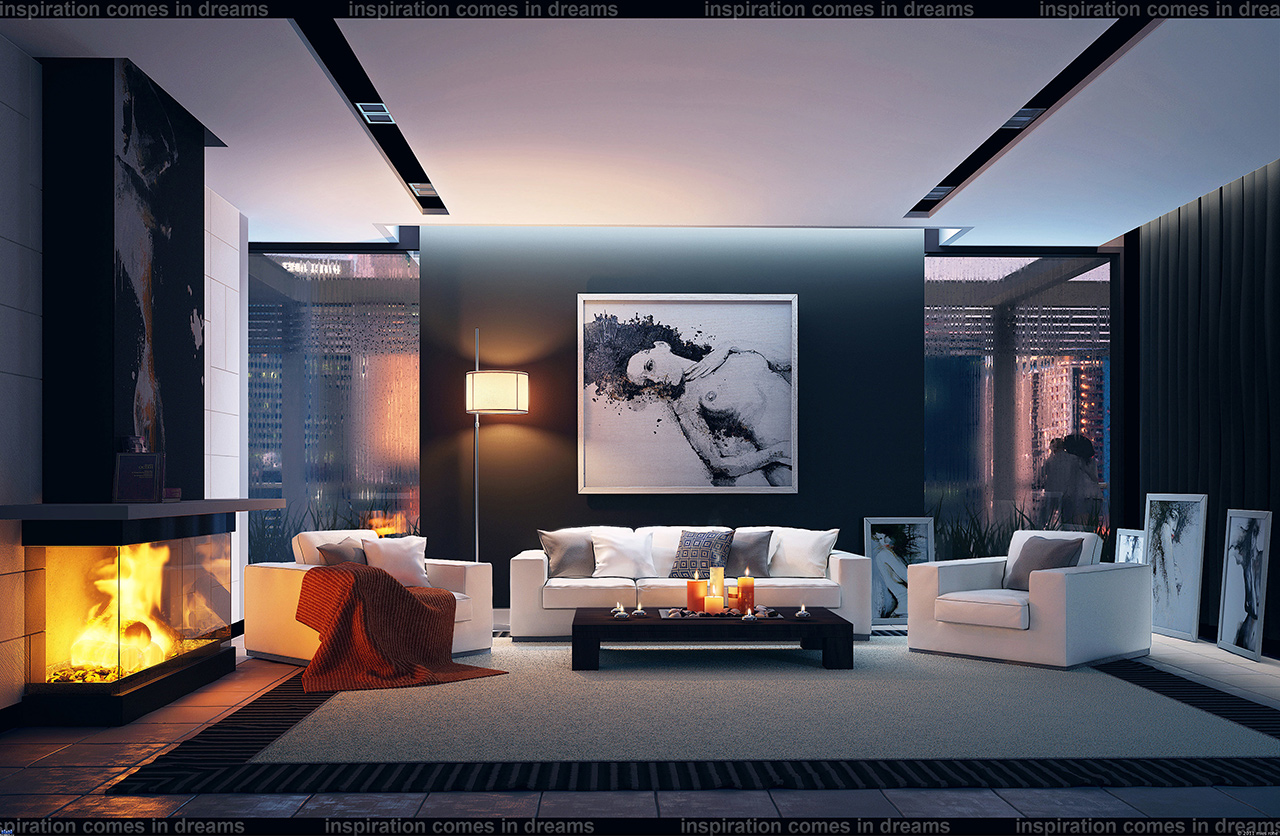
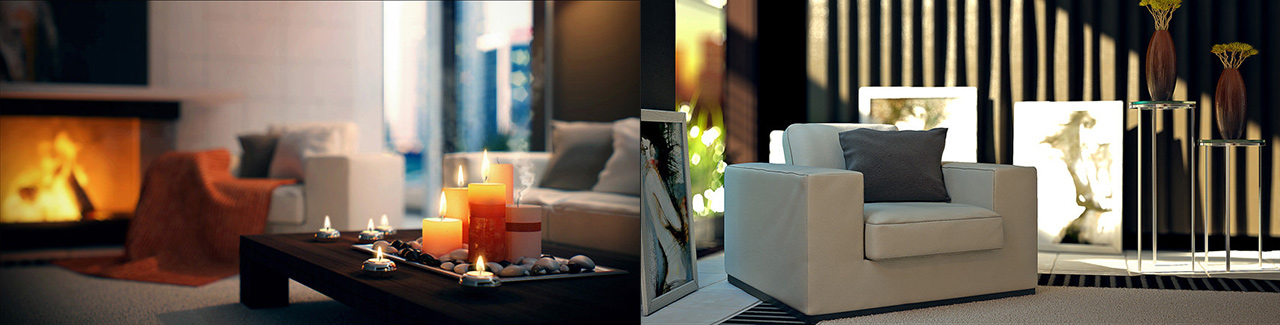
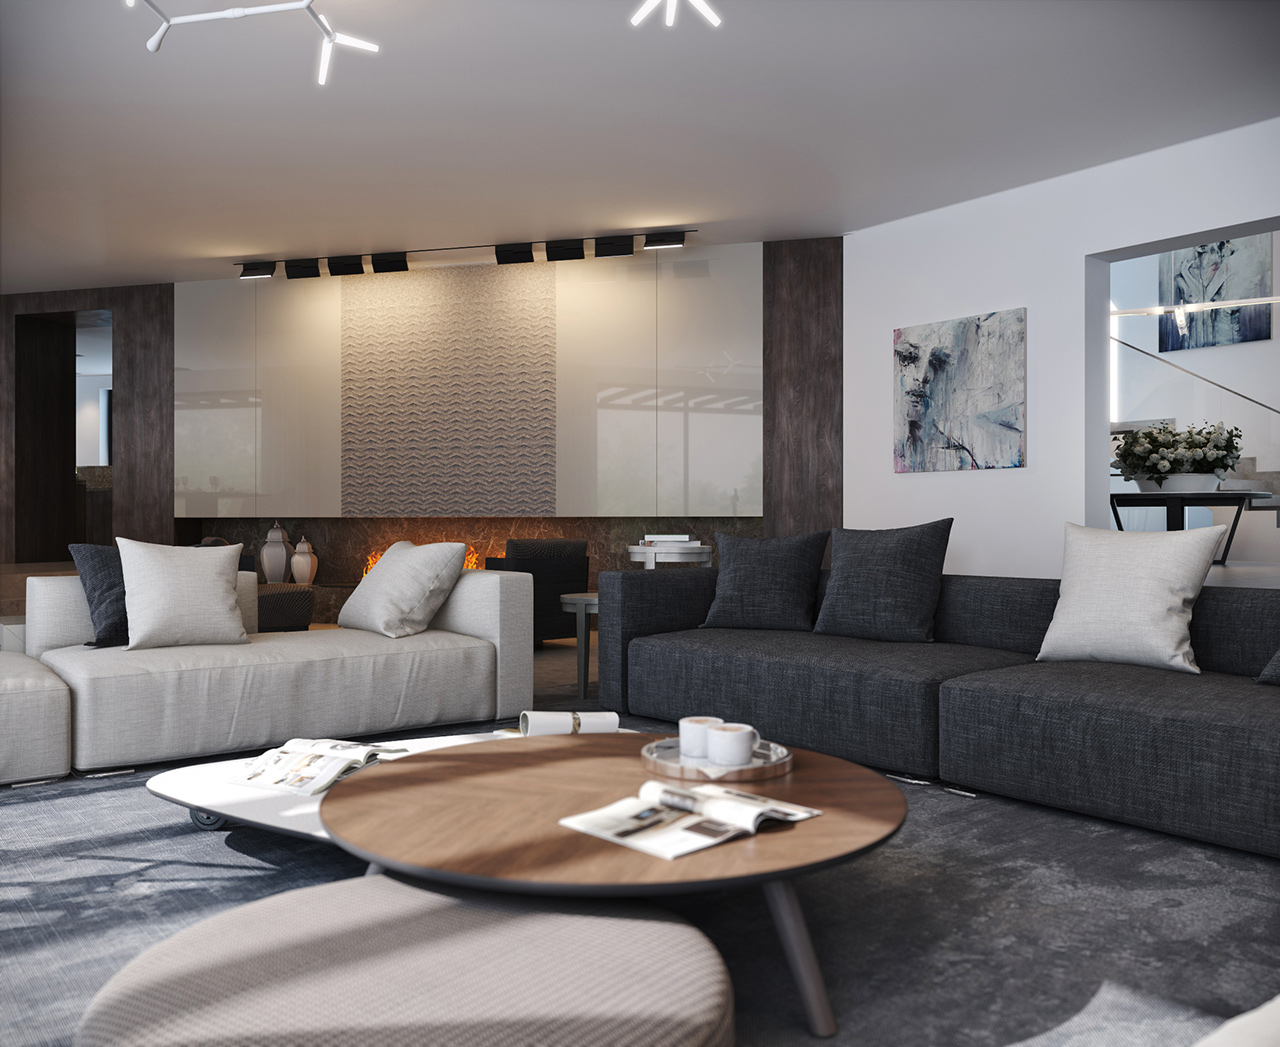
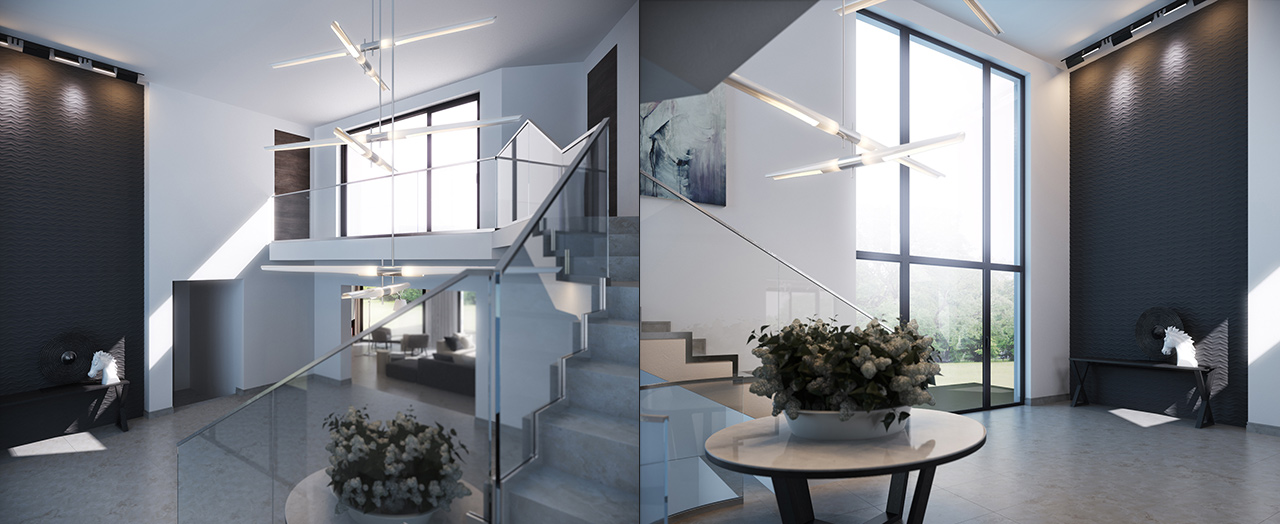
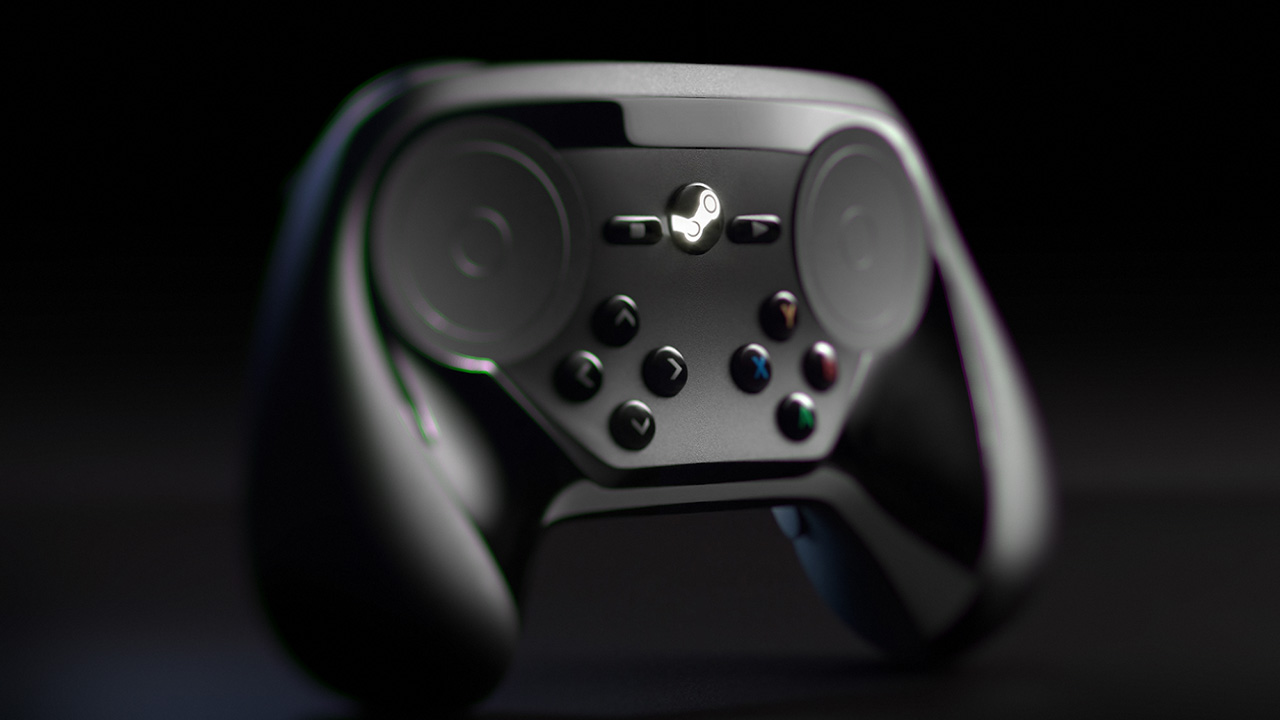
DOF PRO Artists Left: Hatch Studios, Right: Redrover Studios
DOF PRO comes with an impressive featureset ready to meet today’s demanding creative industry requirements. Highlight preservation and bokeh visibility enhancement algorithms deliver cutting-edge output. Numerous aperture shapes are available (including the Cat’s Eye), each with the ability to control its size, angle, curvature and even aberration characteristics such as spherical and chromatic aberrations combined with edge offset, thickness and softness control. Custom aperture maps have been implemented in DOF PRO (along with a massive online aperture map library) allowing artists to create his or her own aperture shapes thus providing unlimited flexibility and control over the bokeh appearance. Aspect ratios can be set to accommodate a wide variety of broadcast standards such as NTSC, PAL, IMAX, widescreen, anamorphic and more. A powerful noise generation engine has been developed to assist in the realistic simulation of today’s digital imaging pixel noise effects often present in both photographic and 3D raytraced images. The DOF PRO interface has been redesigned for After Effects, featuring a new iris and iris array real-time display. Faster preview updates can be produced by adjusting After Effect’s preview window resolution. Multicore rendering technology and gigabyte memory management boasts significantly improved performance. 8 bits / channel, 16 bits / channel and 32 bits / channel color support is now available for professional high color workflows, especially crucial for photographers, retouchers and visual effects artists. All of these code implementations produce depth of field camera effects that are extremely accurate and precise in simulating real-world phenomena.
DOF PRO offers fully adjustable aspect ratio features, allowing for precision matching to any existing film format. DOF PRO ships with presets for commonly used aspect ratios such as NTSC, PAL, IMAX, PARAMOUNT, WIDESCREEN, CINEMA, ANAMORPHIC and PANAVISION. In addition, a custom aspect ratio value can be entered for matching to non-standardized formats.
DOF PRO Aspect Ratio
Custom Aperture Maps
DOF PRO features the ability to use custom aperture maps thereby offering unlimited bokeh customization. Any bokeh can be cropped from any image, easily prepped and quickly loaded into DOF PRO. Additionally, the DOF PRO homepage provides a large database of custom aperture maps for quick and easy access.
DOF PRO can use custom aperture maps – Matthew Gunn
Custom aperture maps opens an entire new world of possibilities for creative aperture design where heart shaped apertures, for instance, can be easily created and applied to any image.
Depending on the shape of the aperture blades and the f-stop, blade notching may become visible. If the aperture is opened wide enough so that the ends of the blades come into view, notching will become apparent in the shape of the bokeh. The shape is dependent on the lens and how the blades have been designed.
Left: Lens with visible blade notching – Wikipedia, Right: DOF PRO blade notching
DOF PRO fully supports blade notching. The amount of blade notching is adjustable, as is the angle. The notching angle can be negative or positive, thereby providing the ability to match virtually any possible real-world blade notching example.
DOF PRO’s blade notching features are 100% integrated with all other features and will therefore work with any number of aperture blades specified and will respect all other features such as spherical and chromatic aberration, optical vignetting, etc.
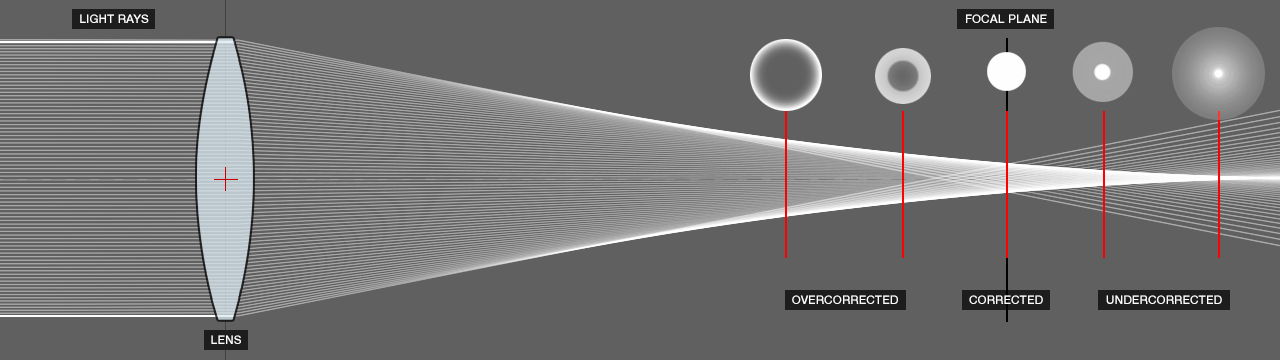
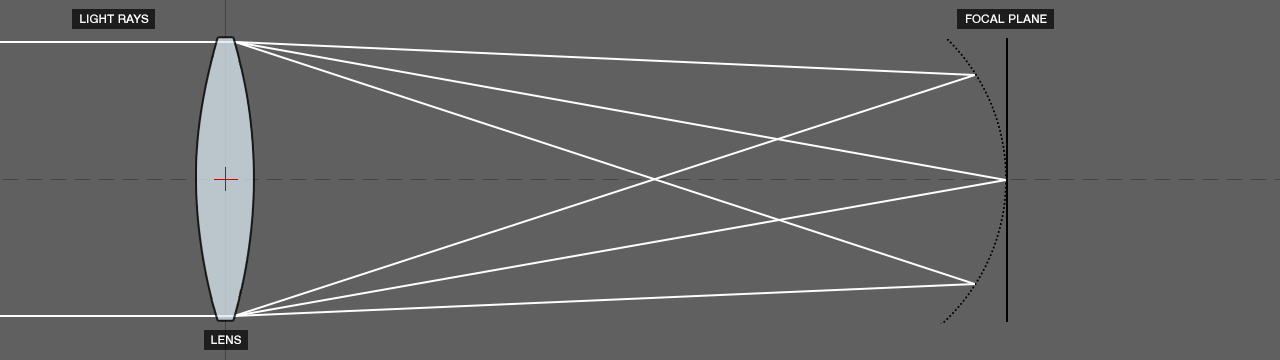
Spherical Aberration is a common optical problem that occurs when light rays passing through the spherical lens ends up focusing at different points.
Spherical Aberration Diagram
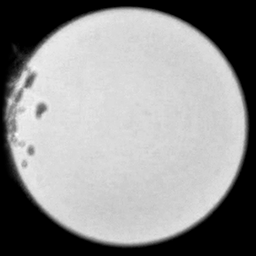
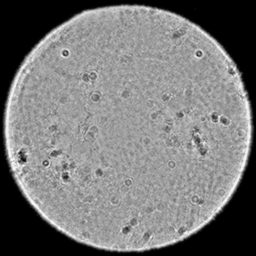
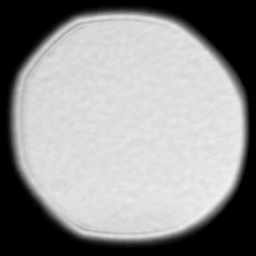
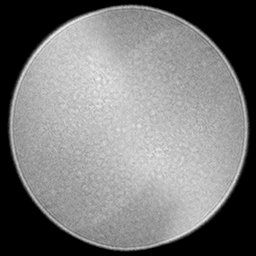
DOF PRO fully supports spherical aberrations, a particular effect that occurs when an increased refraction of light strikes the lens edge as opposed to the center. While a perfect lens focuses all incoming rays to a point on the optical axis, a real lens with spherical surfaces suffers from spherical aberration: it focuses rays more tightly if they enter further from the optical axis than if they enter closer to the axis, thereby not producing a perfect focal point. When the focus is closer to the lens than the axial focus, it is called over-corrected spherical aberration and is often exhibited by a brighter halo around the focus point. Conversely, when the focus is located further than the axial focus, it is called under-corrected spherical aberration and is often exhibited by a brighter core and faint halo around the focus point.
Focused beam with Left: Negative Spherical Aberration, Center: None Spherical Aberration, Right: Positive Spherical Aberration – Wikipedia
Spherical aberration is widely seen in photography and is inherent in all kinds of aperture shapes, including circular, polygonal, vignetted and notched. Spherical aberration will vary from over-corrected to under-corrected when in front of the focal plane vs the back.
DOF PRO can handle positive and negative spherical aberration for any of the predefined aperture shapes. It supports aberration scale and offset in order to achieve precise and stunningly realistic bokeh effects. DOF PRO also provides an impressive and unique feature that allows the use of positive or negative spherical aberration for foreground bokeh and its inverse spherical aberration for background bokeh, thereby differentiating between foreground and background bokeh, and simulating exactly how a real lens behaves (see Spherical Aberration in Front vs Back Bokeh).
Left: DOF PRO without spherical aberration, Right: DOF PRO with positive spherical aberration
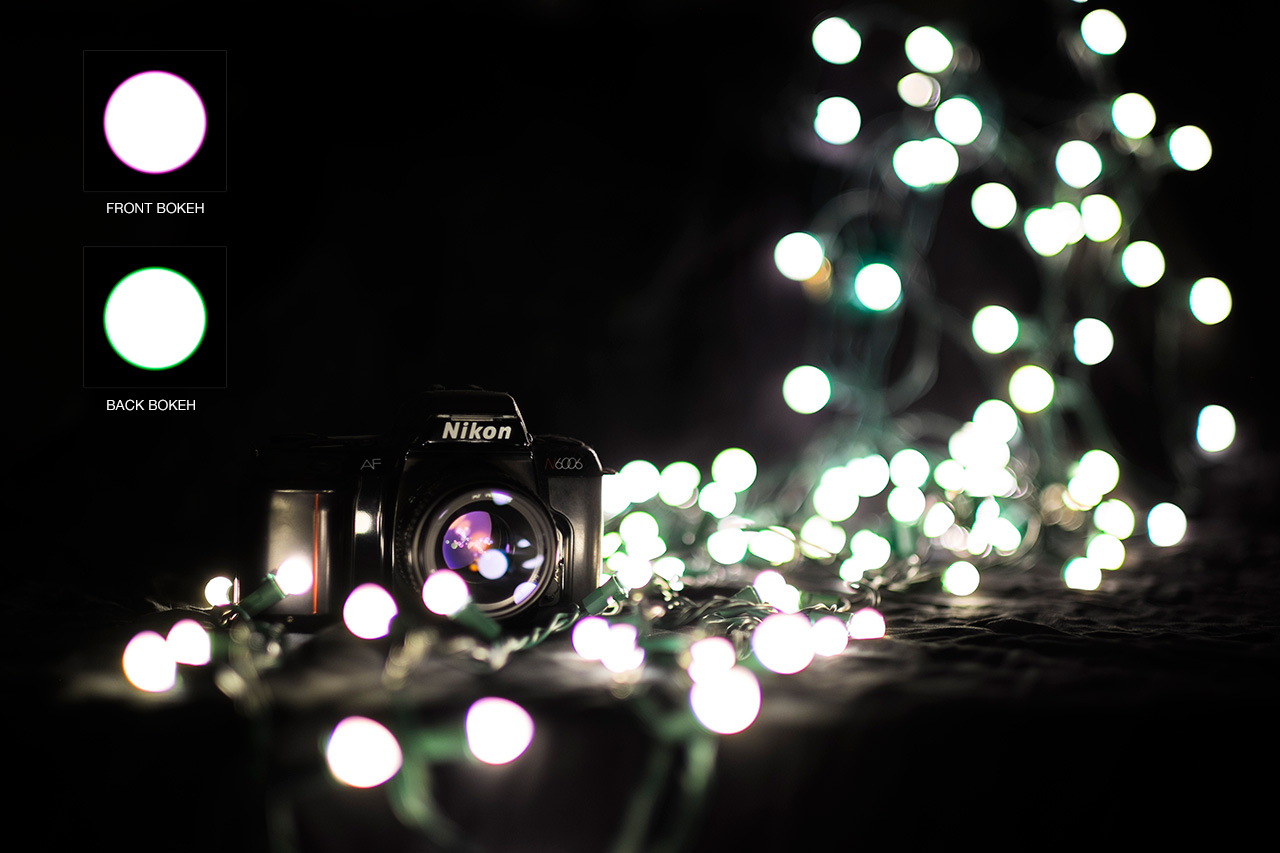
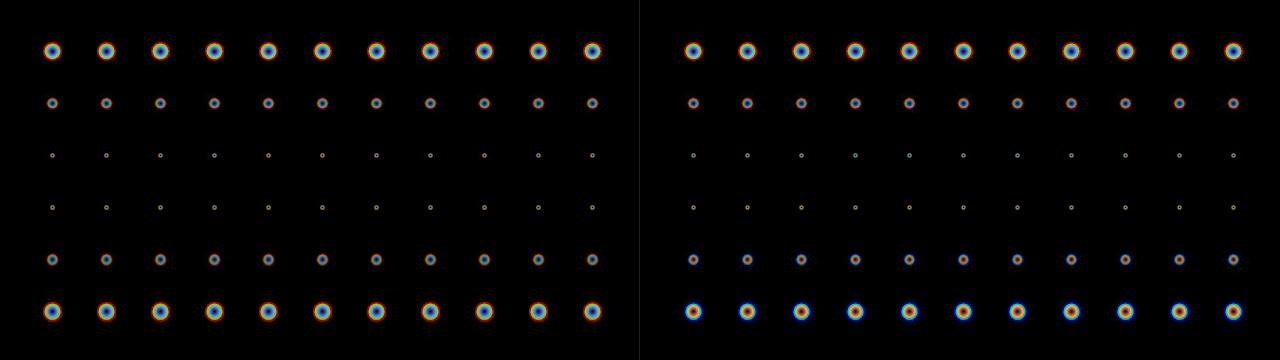
Spherical Aberration in Front vs Back Bokeh
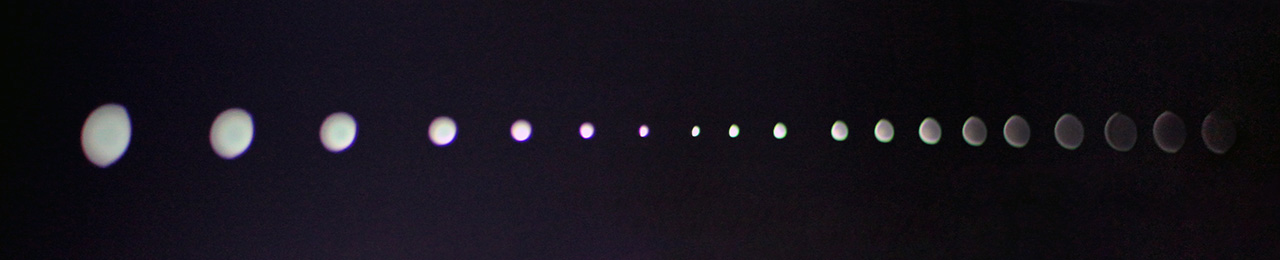
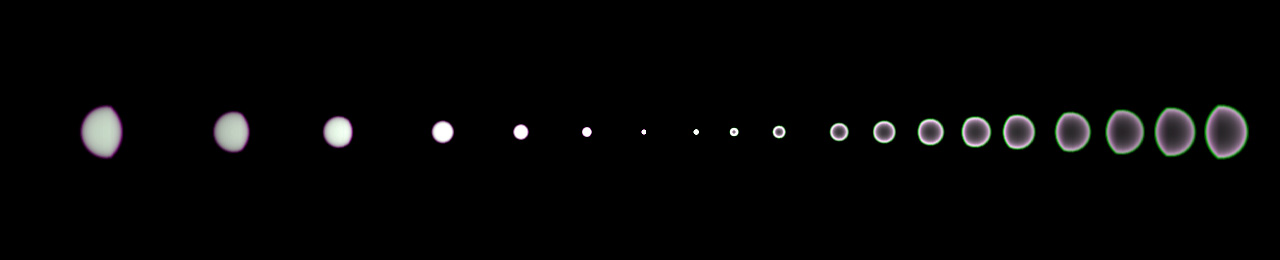
Due to the nature of spherical aberration, bokeh are influenced differently in front of the focal plane vs behind the focal plane. Since the wavelengths traverse the focal point and flip, the spherical aberration also inverses. If a bokeh is under-corrected in front of the focal plane, it will be over-corrected behind it. Likewise, if a bokeh is over-corrected in front of the focal plane, it will be under-corrected behind it. DOF PRO takes this into account and correctly handles spherical aberration differently in front of the focal plane than behind the focal plane.
Real-world example of under-corrected bokeh on the front of focal plane vs over-corrected bokeh in back of focal plane
DOF PRO example of under-corrected bokeh on the front of focal plane vs over-corrected bokeh in back of focal plane
Left: DOF PRO without spherical aberration front vs back bokeh differentiation, Right: DOF PRO with spherical aberration front vs back bokeh differentiation
Additionally, this feature can be easily disabled so as to feature the same spherical aberration in front and behind the focal plane.
DOF PRO supports chromatic & achromatic aberration
Chromatic Aberration
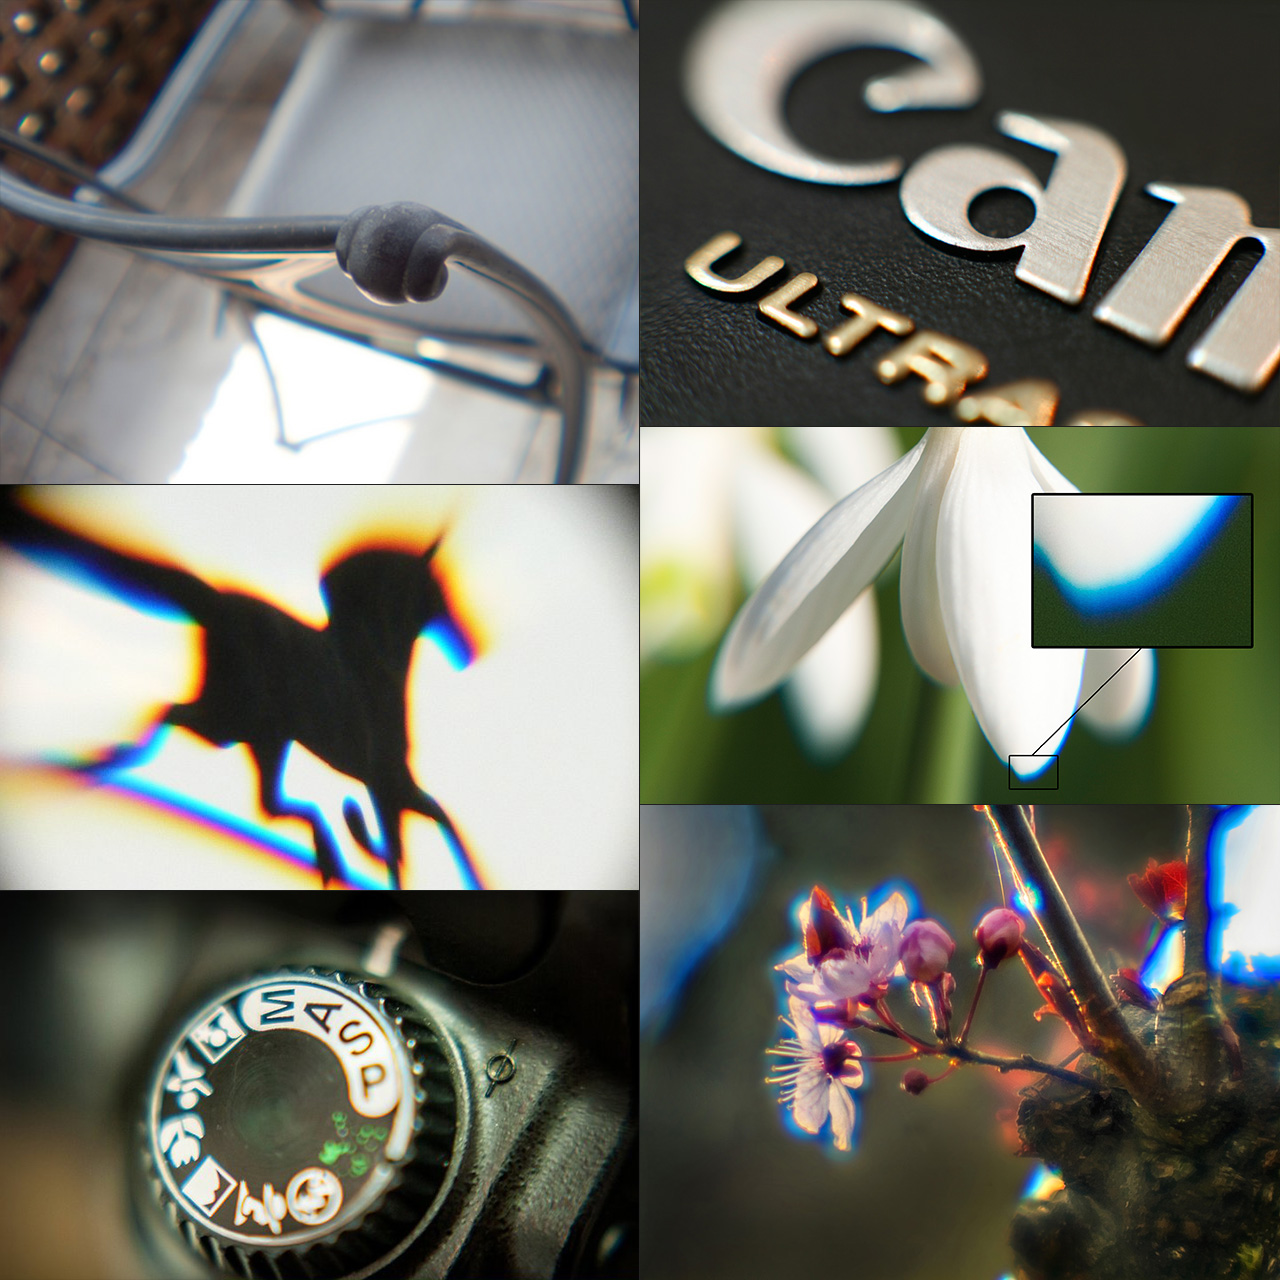
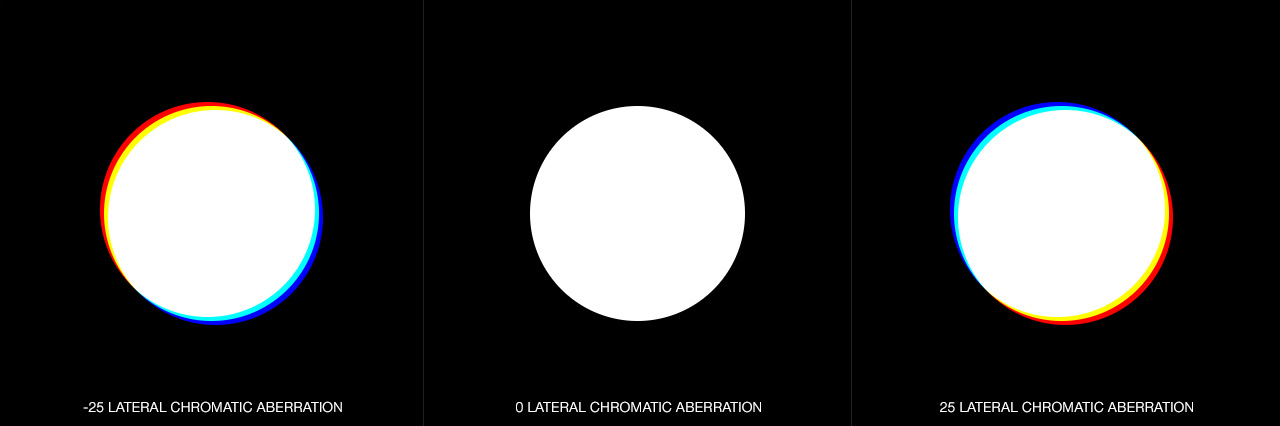
Chromatic Aberration is the result of the inability of a lens to focus all wavelengths to the same convergent point. The result is visible red, green and blue color fringing. Chromatic aberration can occur longitudinally, laterally or both.
In many instances, color fringing isn’t caused by the lens but rather by the sensor’s inability to correctly capture high-contrast areas. This is why it is often seen on the edges of intense white.
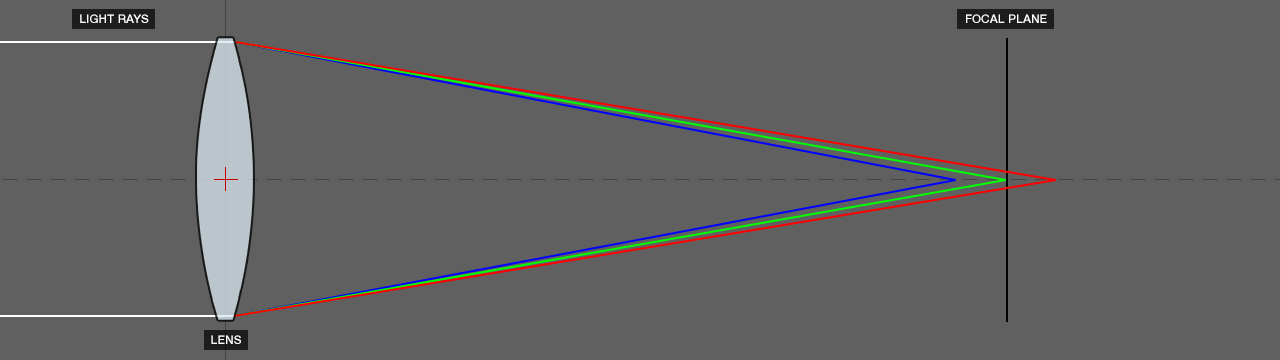
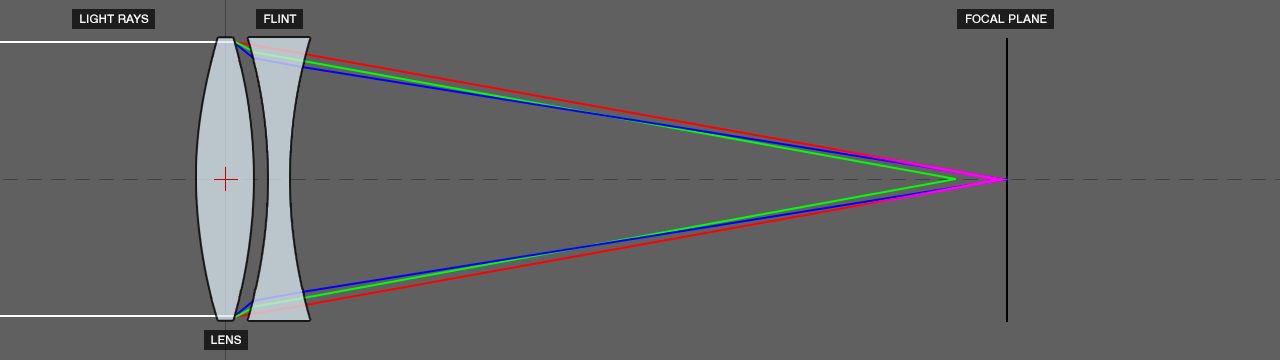
Longitudinal (axial) Chromatic Aberration Diagram
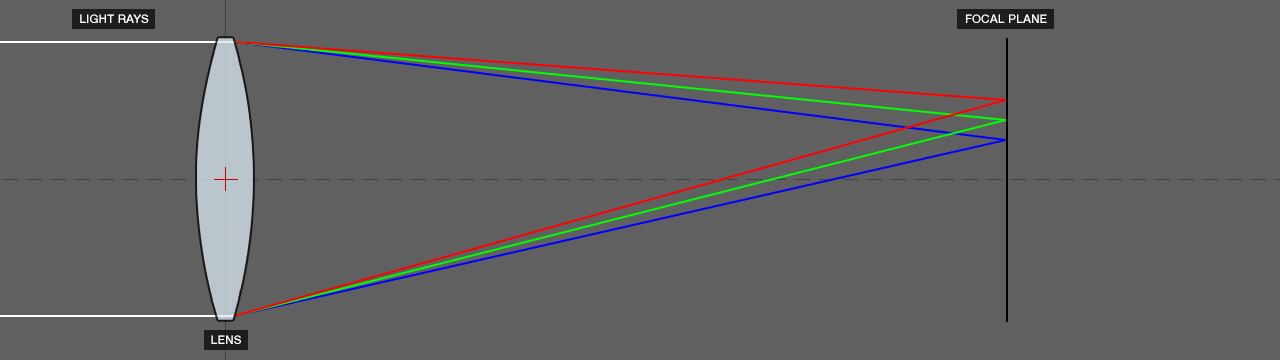
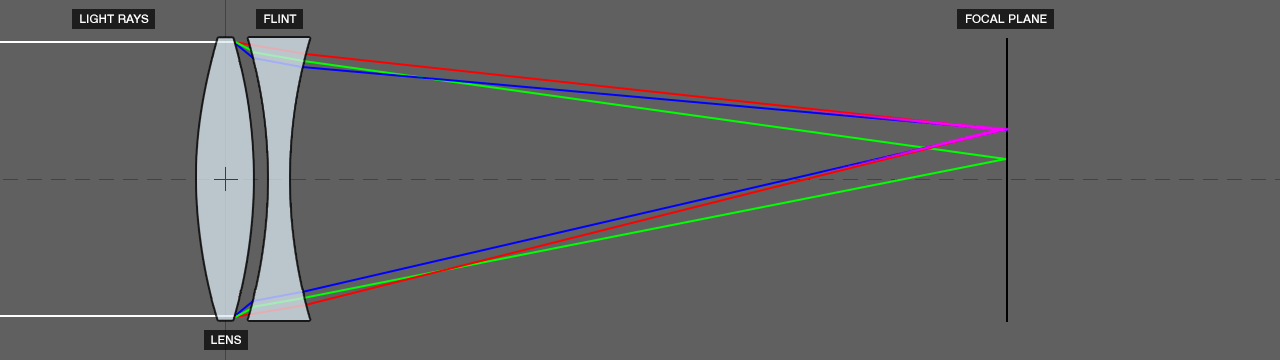
Lateral (transverse) Chromatic Aberration Diagram
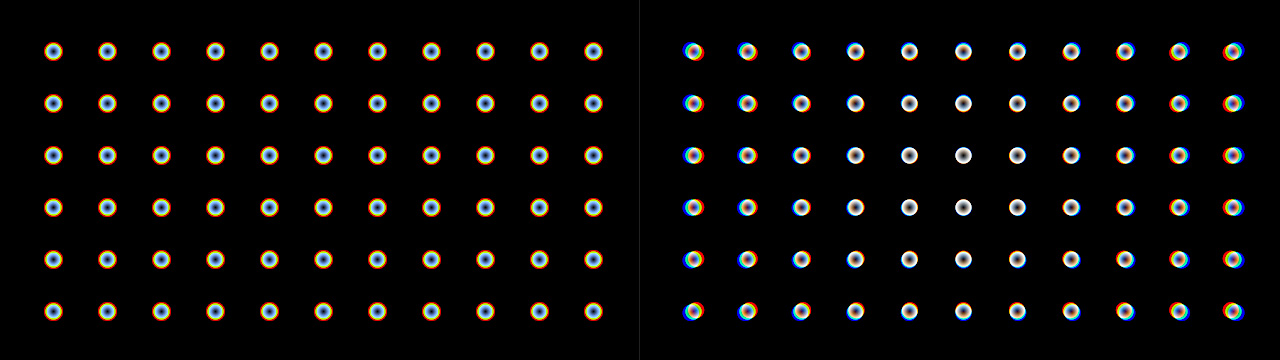
Longitudinal and lateral chromatic aberration of a lens is seen as ‘fringes’ of color around the subject since each color in the optical spectrum cannot be focused at a single point on the optical axis.
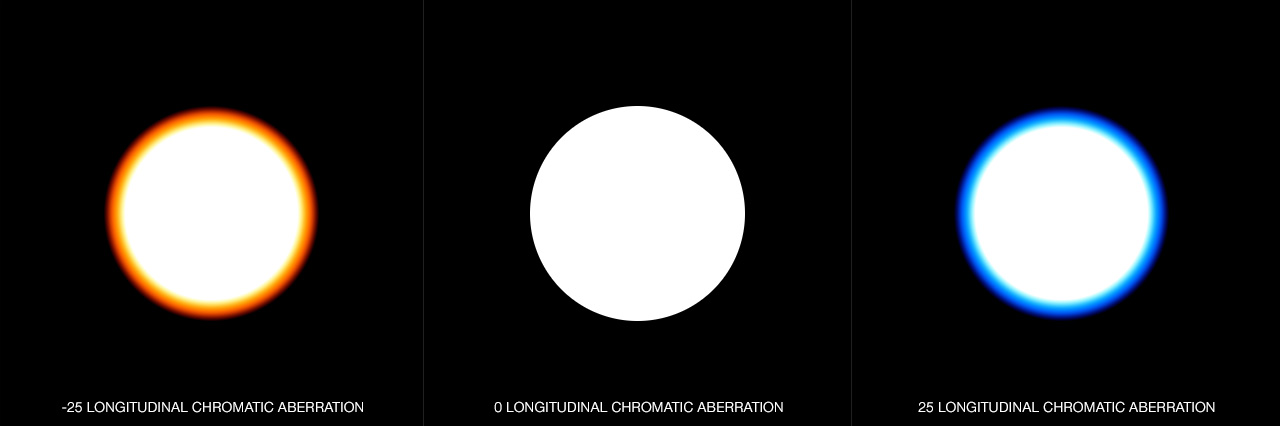
DOF PRO fully supports both longitudinal (axial) and lateral (transverse) chromatic aberration, a unique effect caused by a lens having a different refractive index for different wavelengths of light.
DOF PRO allows both types of chromatic aberration to be used independently or together, just like real-world chromatic aberration phenomena. Chromatic aberration can be applied positively or negatively, thereby providing full control over the effect. DOF PRO also provides an impressive and unique feature that allows the use of positive or negative chromatic aberration for foreground bokeh and its inverse for background bokeh, thereby differentiating between foreground and background bokeh, and simulating exactly how a real lens behaves. DOF PRO’s chromatic aberration features produce spectacular optical imperfections rarely seen in any commercial depth of field filter.
Left: DOF PRO Longitudinal Chromatic Aberration, Right: DOF PRO Lateral Chromatic Aberration
Achromatic Aberration
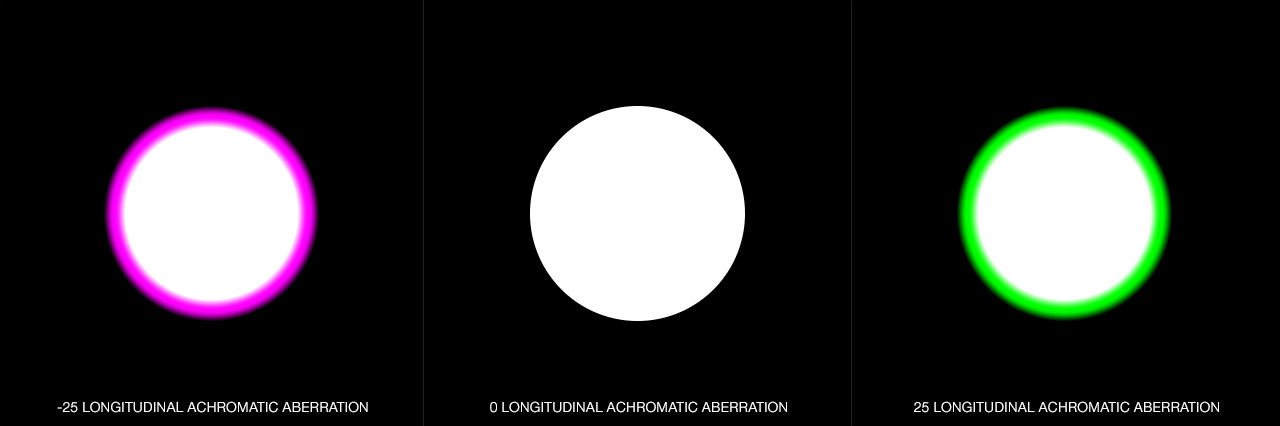
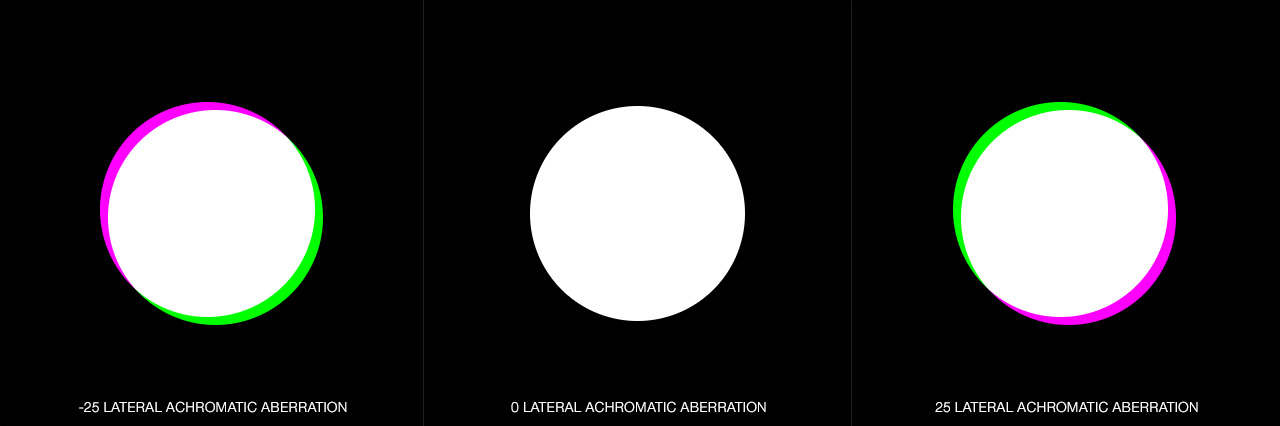
Achromatic Aberration is the result of using an achromatic lens to focus two of the three (typically red and blue) wavelengths to the same convergent point. This minimizes the effects of chromatic aberration. Because the red and blue wavelengths are corrected, the result is visible magenta and green color fringing. Achromatic aberration can occur longitudinally, laterally or both.
The most common type of achromat is the achromatic doublet, which is composed of two individual lenses made from glasses with different amounts of dispersion. One element is usually a concave (negative) element constructed from flint glass which tends to have relatively high dispersion values. The other is a convex (positive) element made of crown glass, which has lower dispersion. Both lens elements are mounted beside each other and shaped so that the chromatic aberration of one is counterbalanced by that of the other.
Longitudinal and lateral achromatic aberration of a lens is seen as ‘fringes’ of magenta and green color around the subject since each color in the optical spectrum cannot be focused at a single point on the optical axis. In many instances, color fringing isn’t caused by the lens but rather by the sensor’s inability to correctly capture high-contrast areas. This is why it is often seen on the edges of intense white.
DOF PRO fully supports both longitudinal (axial) and lateral (transverse) achromatic aberration.
DOF PRO allows both types of achromatic aberration to be used independently or together, just like real-world achromatic aberration phenomena. Achromatic aberration can be applied positively or negatively, thereby providing full control over the effect. DOF PRO also provides an impressive and unique feature that allows the use of positive or negative achromatic aberration for foreground bokeh and its inverse for background bokeh, thereby differentiating between foreground and background bokeh, and simulating exactly how a real lens behaves (See Longitudinal Chromatic / Achromatic Aberration in Front vs Back Bokeh).
DOF PRO’s achromatic aberration features produce spectacular optical imperfections rarely seen in any commercial DOF filter.
Left: DOF PRO Longitudinal Achromatic Aberration, Right: DOF PRO Lateral Achromatic Aberration
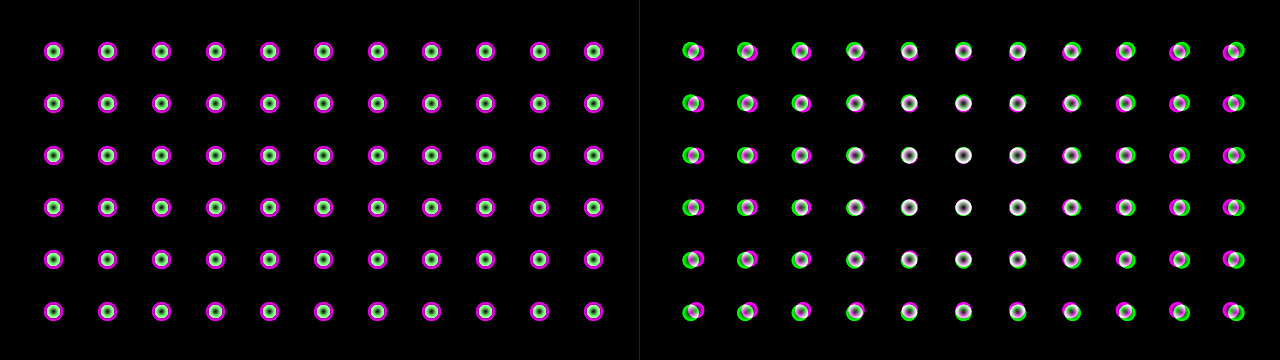
Longitudinal Chromatic / Achromatic Aberration in Front vs Back Bokeh
Just like spherical aberration, chromatic and achromatic aberration are also influenced differently in front of the focal plane vs behind the focal plane. Since the wavelengths traverse the focal point and flip, the color fringing also inverses. DOF PRO takes this into account and correctly handles chromatic / achromatic aberration differently in front of the focal plane than behind the focal plane.
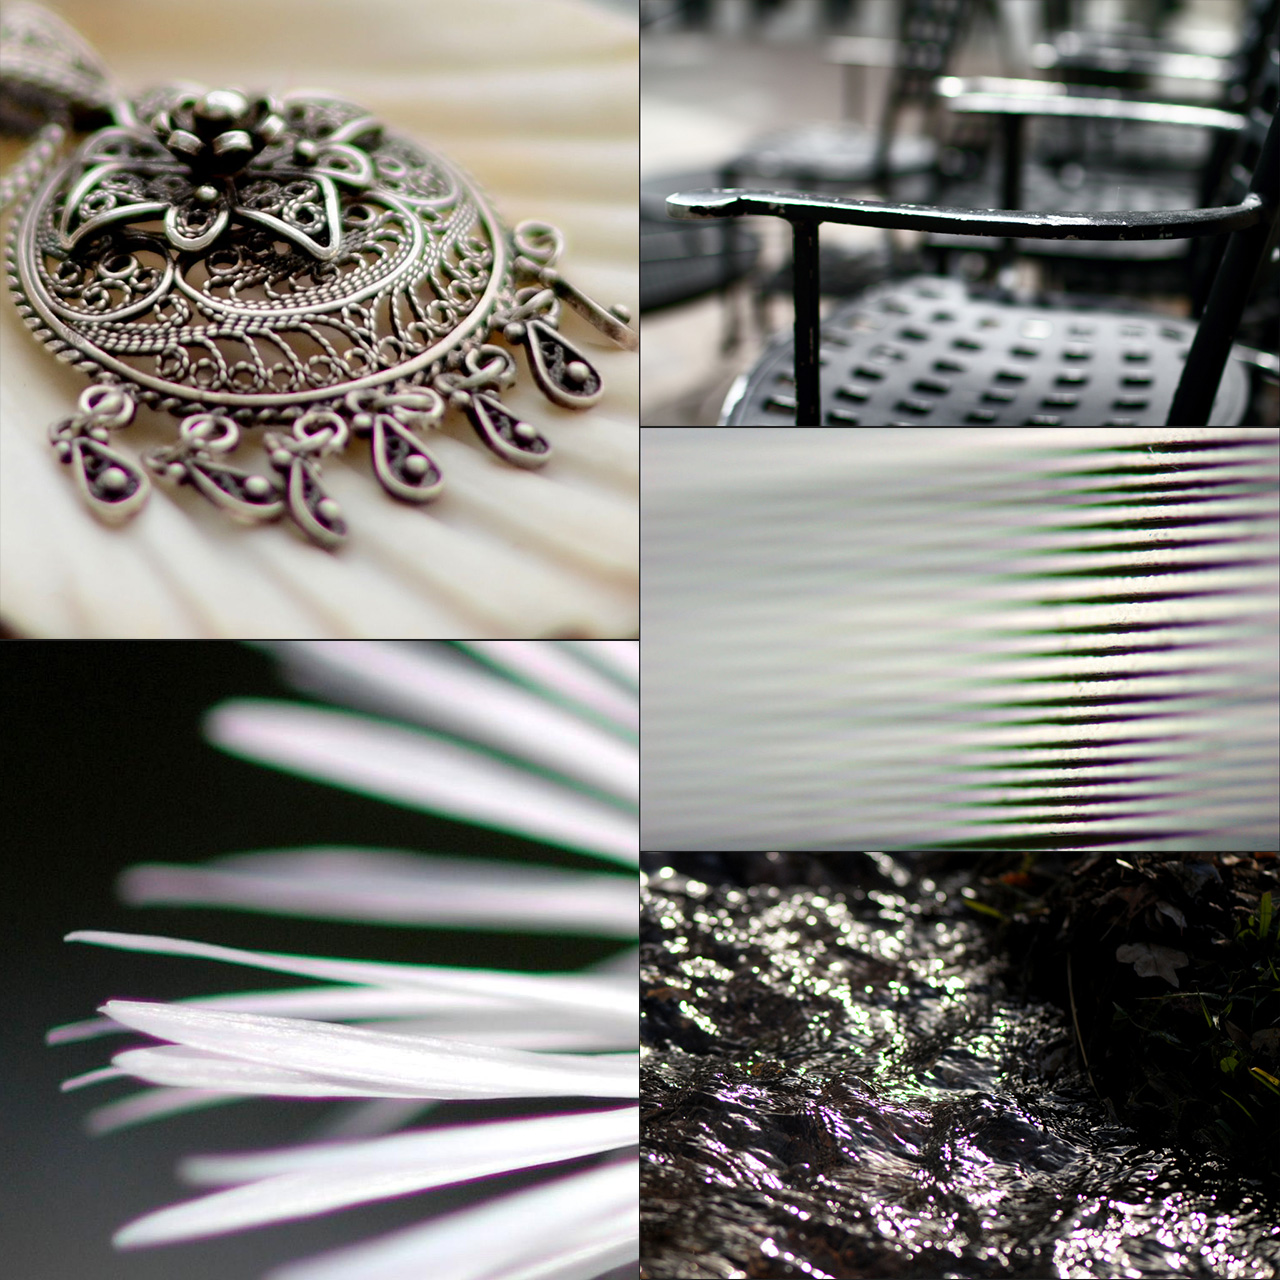
Real-world example of achromatic aberration influencing front vs back bokeh differently – Todd Vorenkamp
Left: DOF PRO without chromatic aberration front vs back bokeh differentiation, Right: DOF PRO with chromatic aberration front vs back bokeh differentiation
Additionally, this feature can be easily disabled so as to feature the same chromatic / achromatic aberration in front and behind the focal plane.
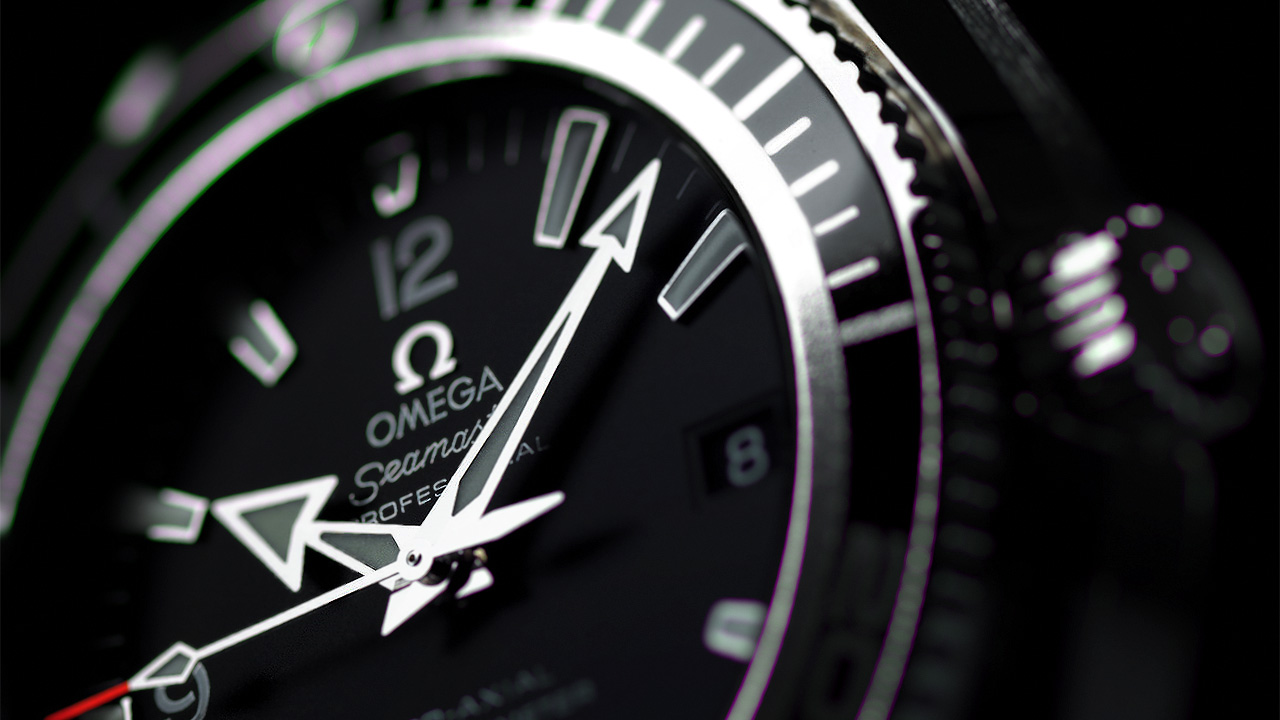
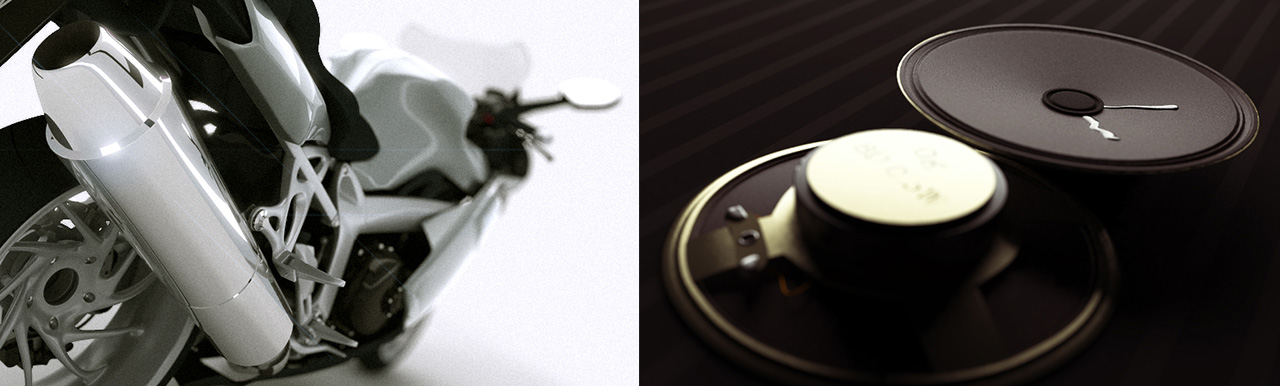
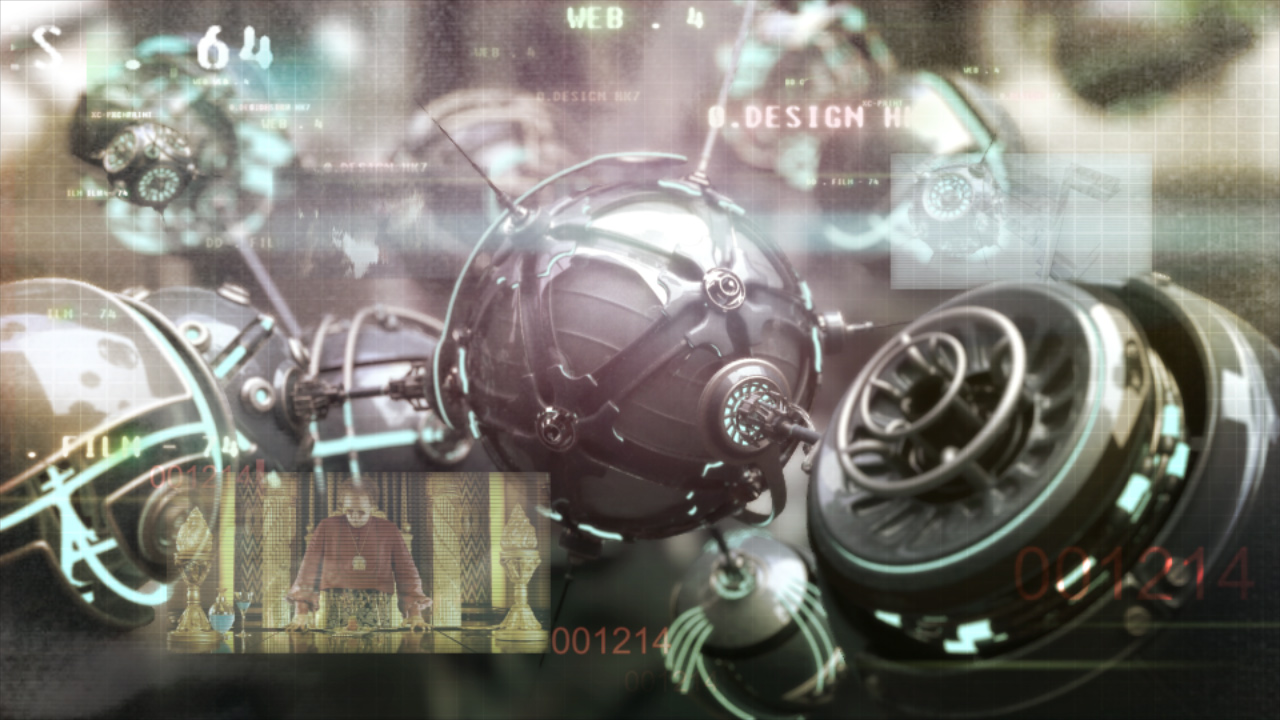
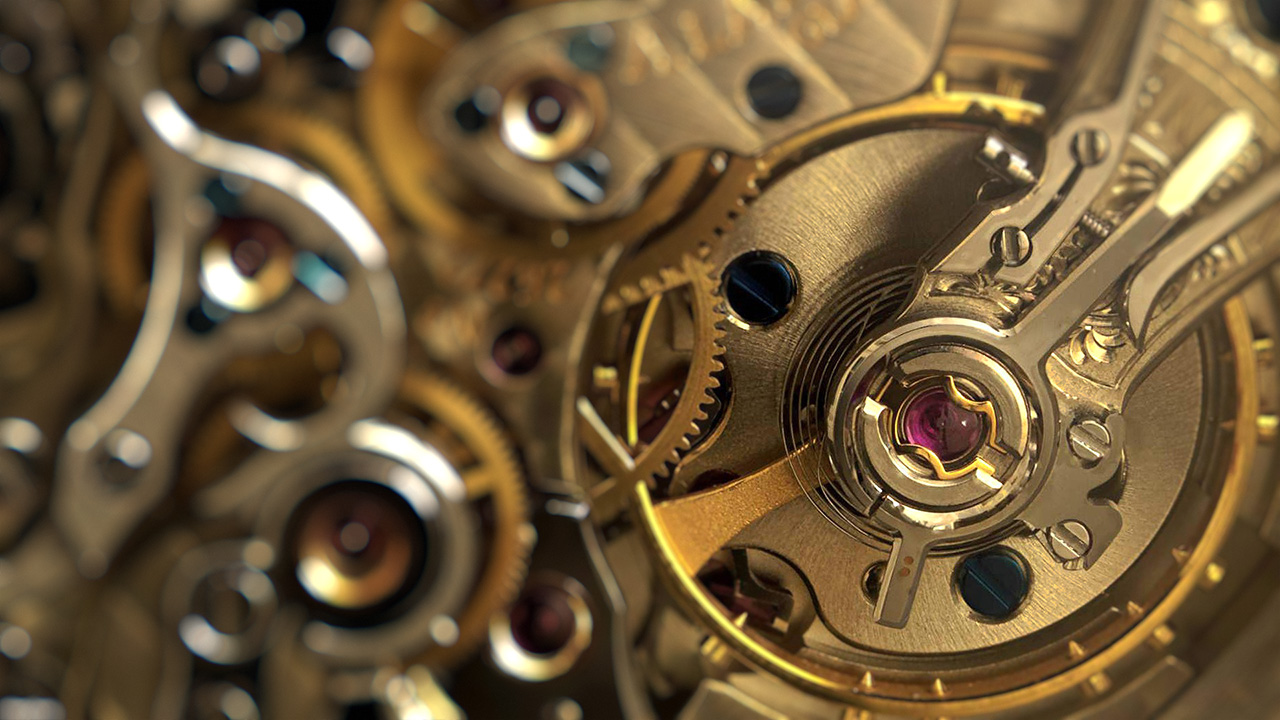
DOF PRO achromatic aberration with front vs back bokeh differentiation – Richard Rosenman (Source image: Jamesbondwatches.com)
DOF PRO generates razor-sharp, vivid bokeh!
Optical Vignetting (Cat’s Eye)
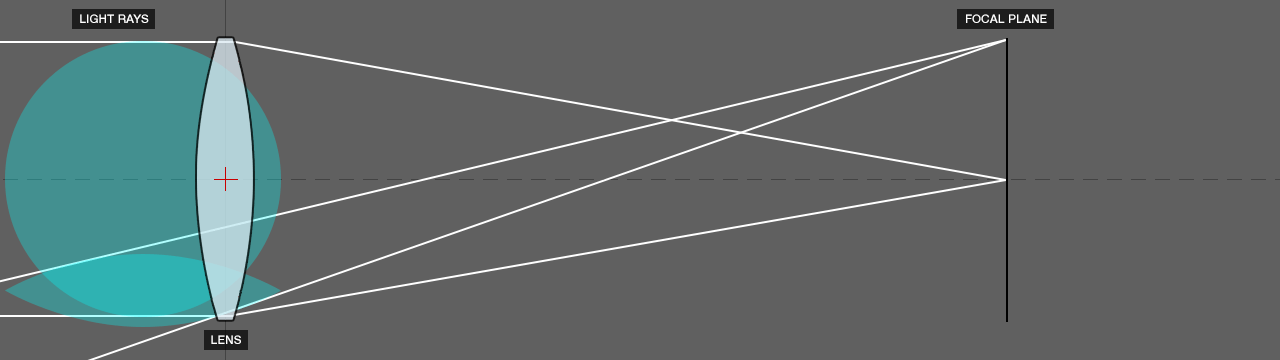
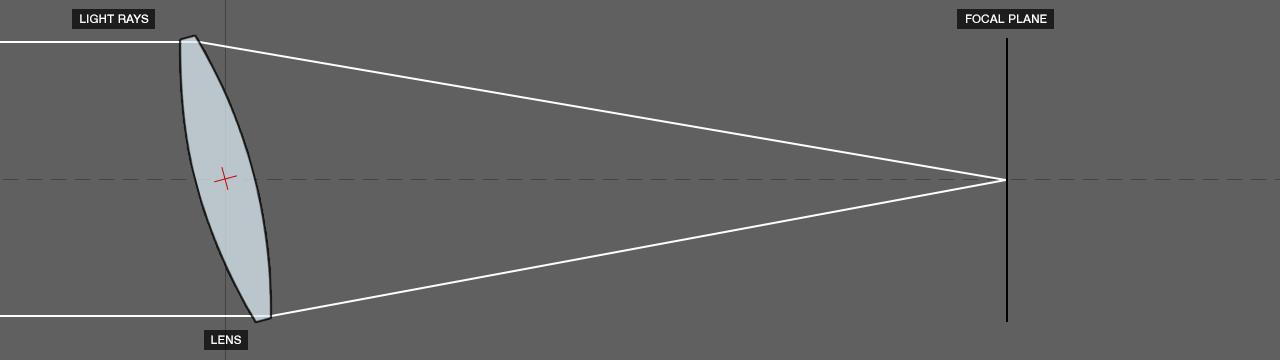
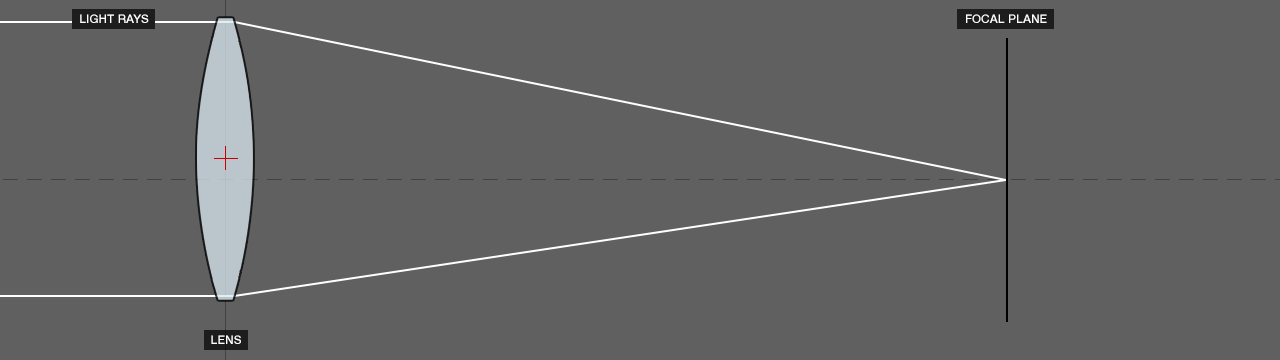
Optical Vignetting, also known as Cat’s Eye, is the result of when obliquely incident light is confronted with a smaller lens opening than light approaching the lens head-on. Aperture shapes take on the shape of the oblique opening which results in a bokeh shaped similar to that of a cat’s eye.
Optical Vignetting Diagram
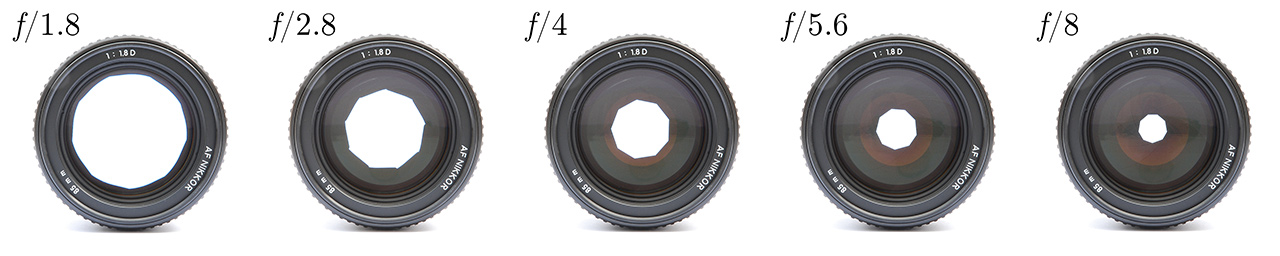
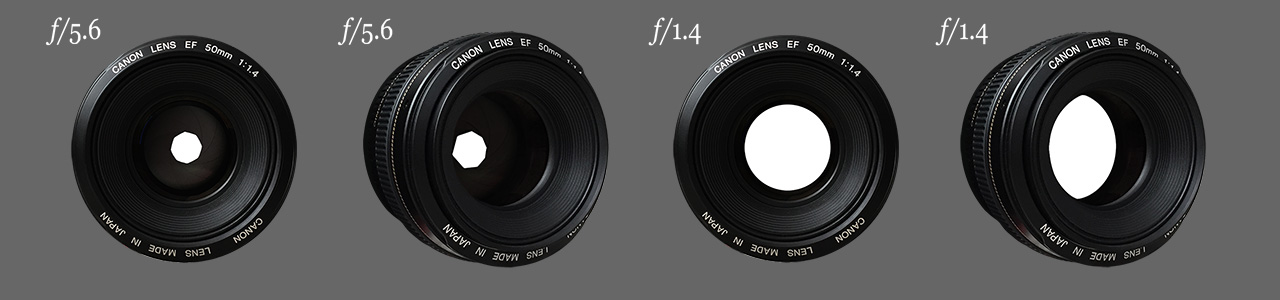
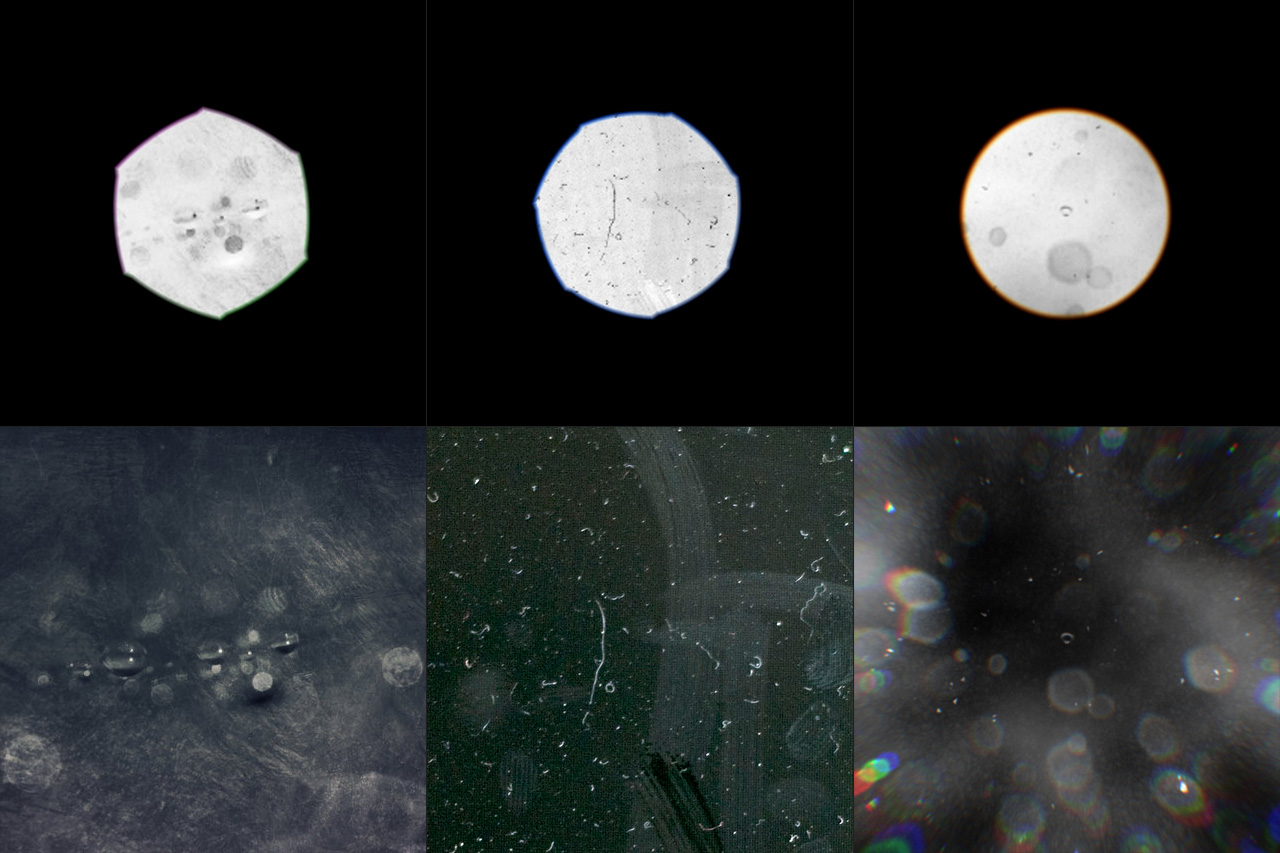
The white openings in the example below illustrate how and why optical vignetting occurs. In the f/5.6 lenses, the aperture is small enough that when light enters it is unobstructed by the lens barrel. Therefore, obliquely incident light sees the same aperture as normally incident light. In the f/1.4 lenses, the entry pupil is partially shielded by the lens barrel; the rims of the front element and rear element. As a result, less light enters for off-axis points than for on-axis points thereby shaping the bokeh into a cat’s eye.
Optical Vignetting as seen through the aperture
Optical vignetting tends to be stronger in wide angle lenses and large aperture lenses, but it can also be seen with most photographic lenses. Zoom lenses also tend to produce a fair amount of optical vignetting.
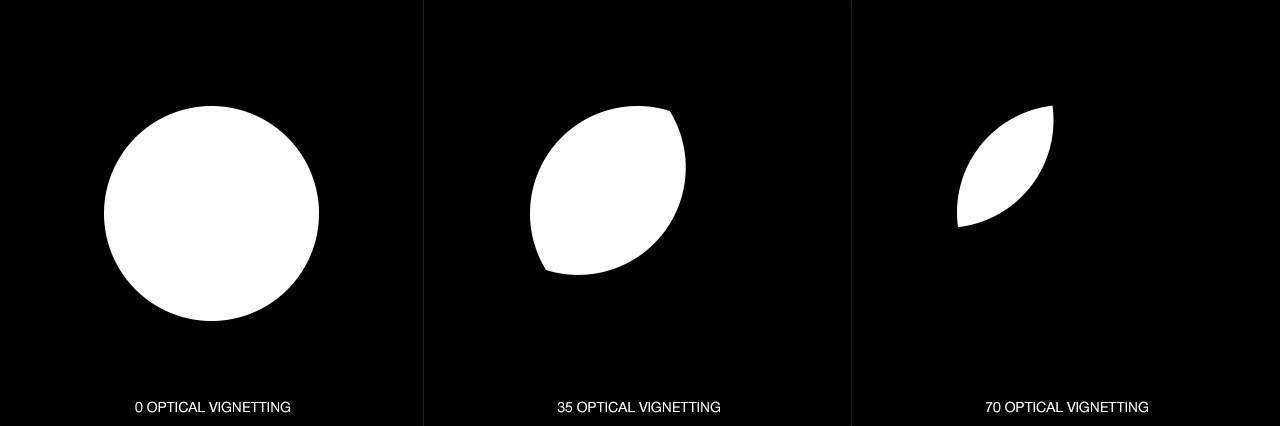
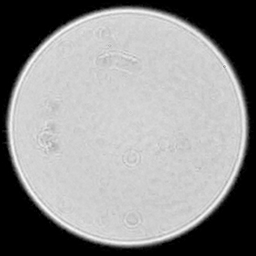
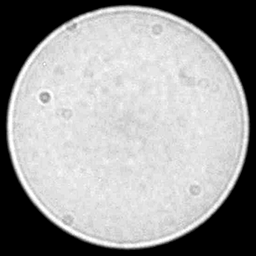
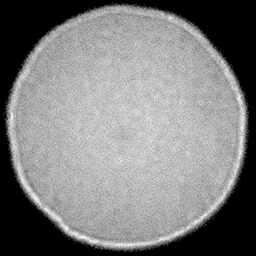
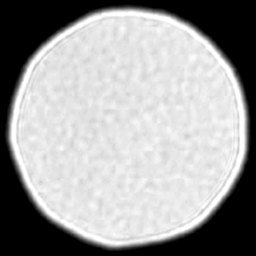
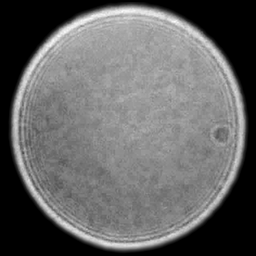
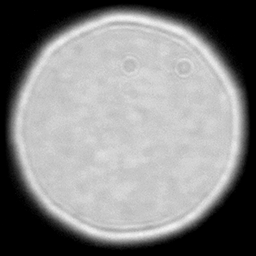
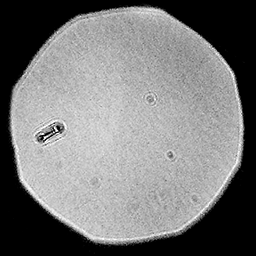
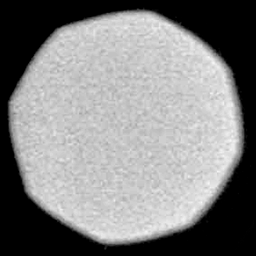
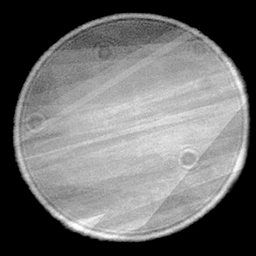
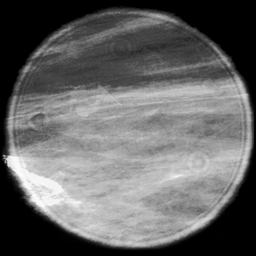
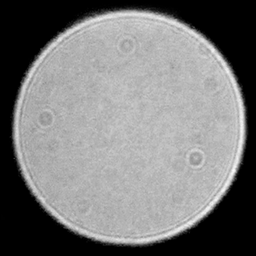
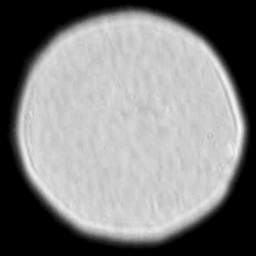
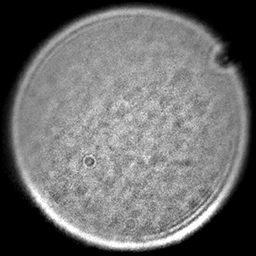
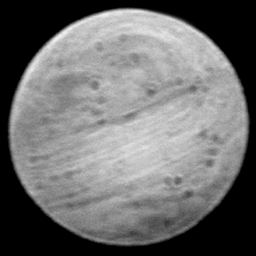
DOF PRO fully supports optical vignetting. Because the shape of an out-of-focus highlight mimics the shape of the clear aperture, an increasing distance from the optical axis results in out-of-focus highlights progressively narrowing and beginning to resemble a cat’s eye. The larger the distance from the image center, the narrower the cat’s eye becomes.
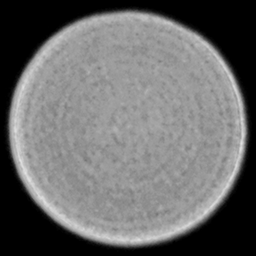
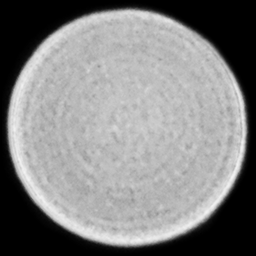
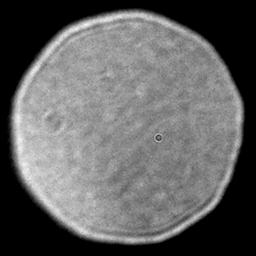
Left: DOF PRO circular aperture without optical vignetting, Right: DOF PRO circular aperture with optical vignetting
DOF PRO features positive and negative optical vignetting, complete with intensity control. While optical vignetting is usually positive, DOF PRO provides negative optical vignetting to mimic the optical vignetting produced by mirrors in catadioptric lenses (See Catadioptric Lens).
Left: Real-world optical vignetting with Canon EF100mm f2.8 Macro USM – Jon Mitchell, Right: DOF PRO Optical Vignetting
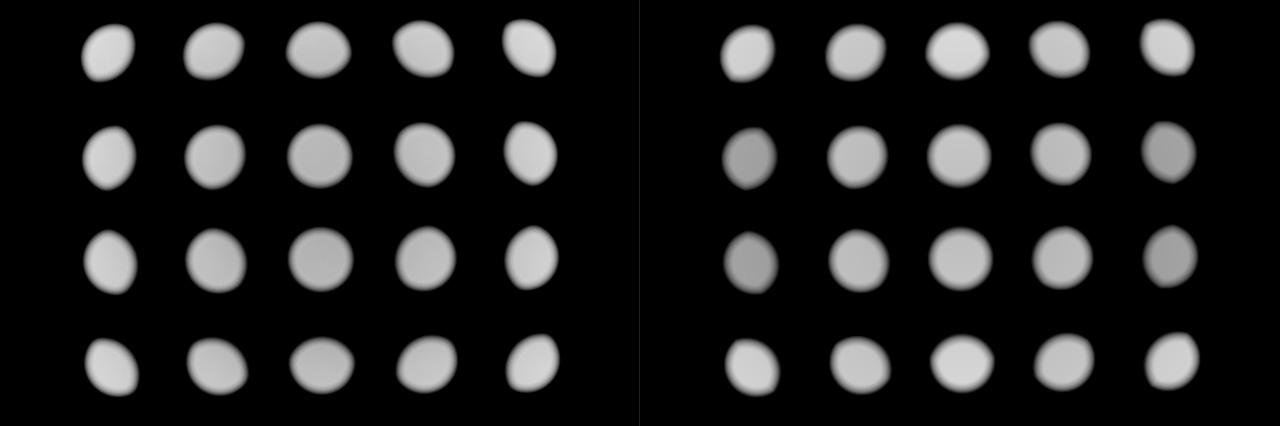
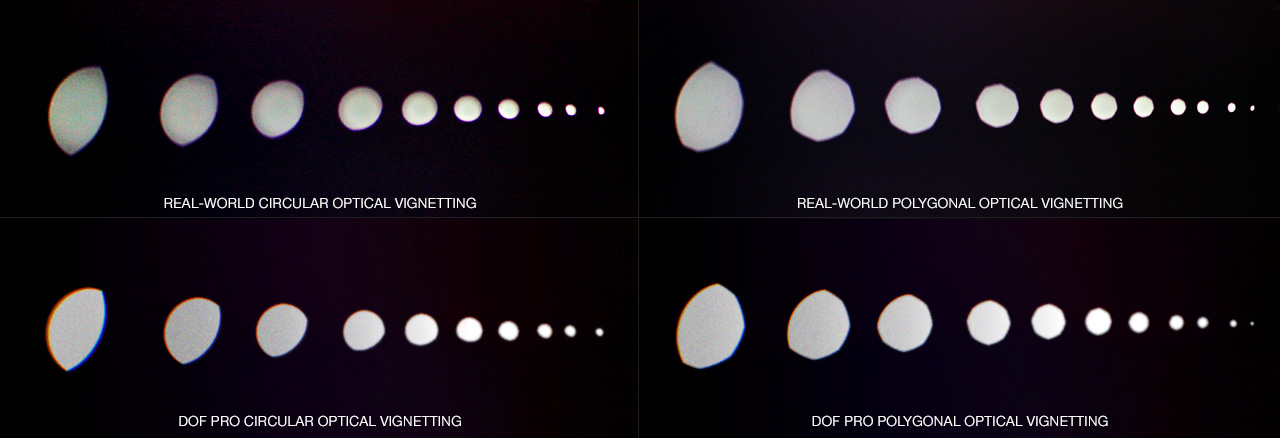
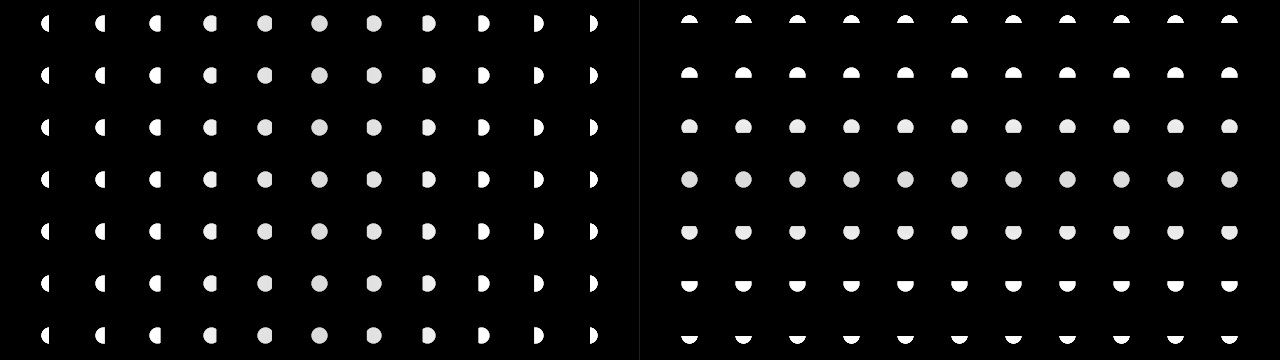
Although polygonal bokeh optical vignetting is rare, it does occur in some instances. The example below on the top left panel shows real-world optical vignetting on a circular bokeh as it increasingly approaches the frame edge. On the bottom left you can see the DOF PRO generated bokeh – almost a perfect match. The example below on the top right panel shows real-world optical vignetting on a polygonal bokeh as it increasingly approaches the frame edge. On the bottom right you can see the DOF PRO generated bokeh – again, almost a perfect match.
Left: Real-world circular optical vignetting vs DOF PRO, Right: Real-world polygonal optical vignetting vs DOF PRO
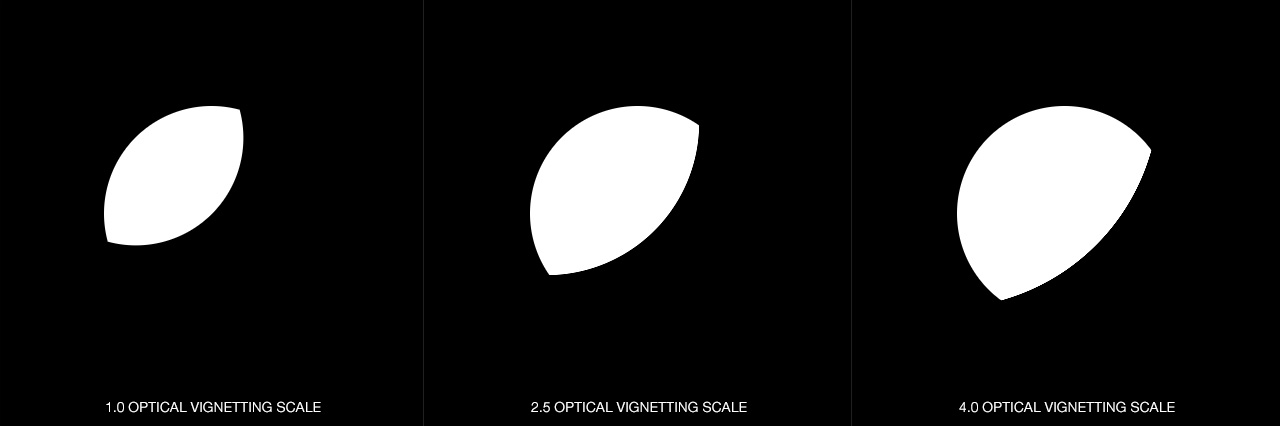
Optical vignetting produces a symmetrical cat’s eye shape only if the aperture size is relatively the same size as the lens barrel. However, when a small aperture becomes affected by a lens barrel much larger than its size, certain characteristics take hold. The vignetting, instead of starting from the center, will start much closer to the frame edge, thereby revealing cat’s eye bokeh only near the edge and unaffected bokeh in the middle. Additionally, the occluded part of the bokeh will have a straighter edge due to the larger lens barrel occlusion shape.
Left: Real-world example of small aperture with large aperture optical vignetting – Ntscha, Right: DOF PRO generated bokeh with optical vignetting scale
These subtle but crucial characteristics resulted in DOF PRO’s optical vignetting scale feature that allows for the adjustment of optical vignetting size. Together with optical vignetting intensity, DOF PRO can produce virtually any type of real-world optical vignetting effect found in film and photography.
DOF PRO’s optical vignetting scale feature
Tilt-Shift
Tilt-Shift lenses allow lens movement. The rotation of the lens plane relative to the image plane is called tilt while the movement of the lens parallel to the image plane is called shift. Tilt is used to control the orientation of the plane of focus whereas shift is used to adjust the position of the subject in the image area without moving the camera back.
Tilt Diagram
Shift Diagram
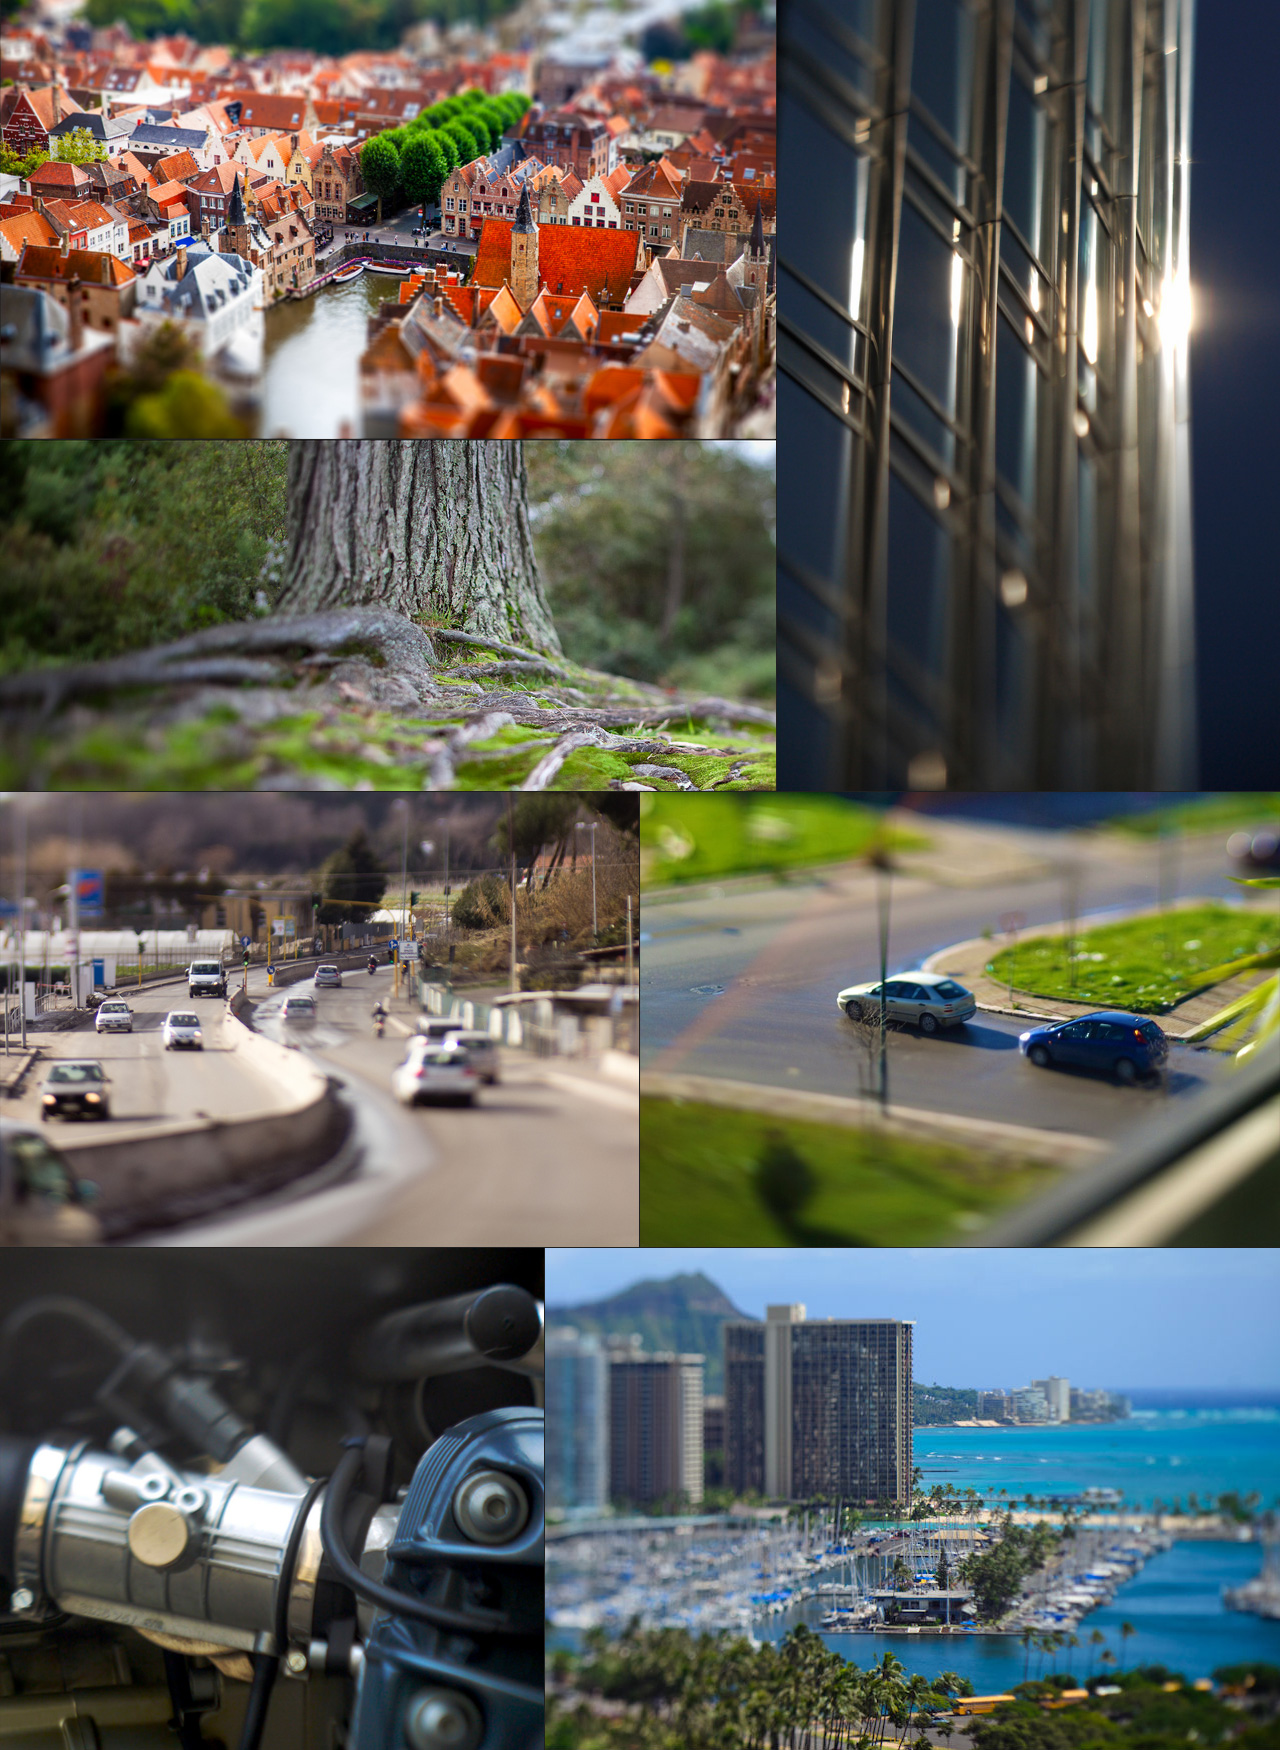
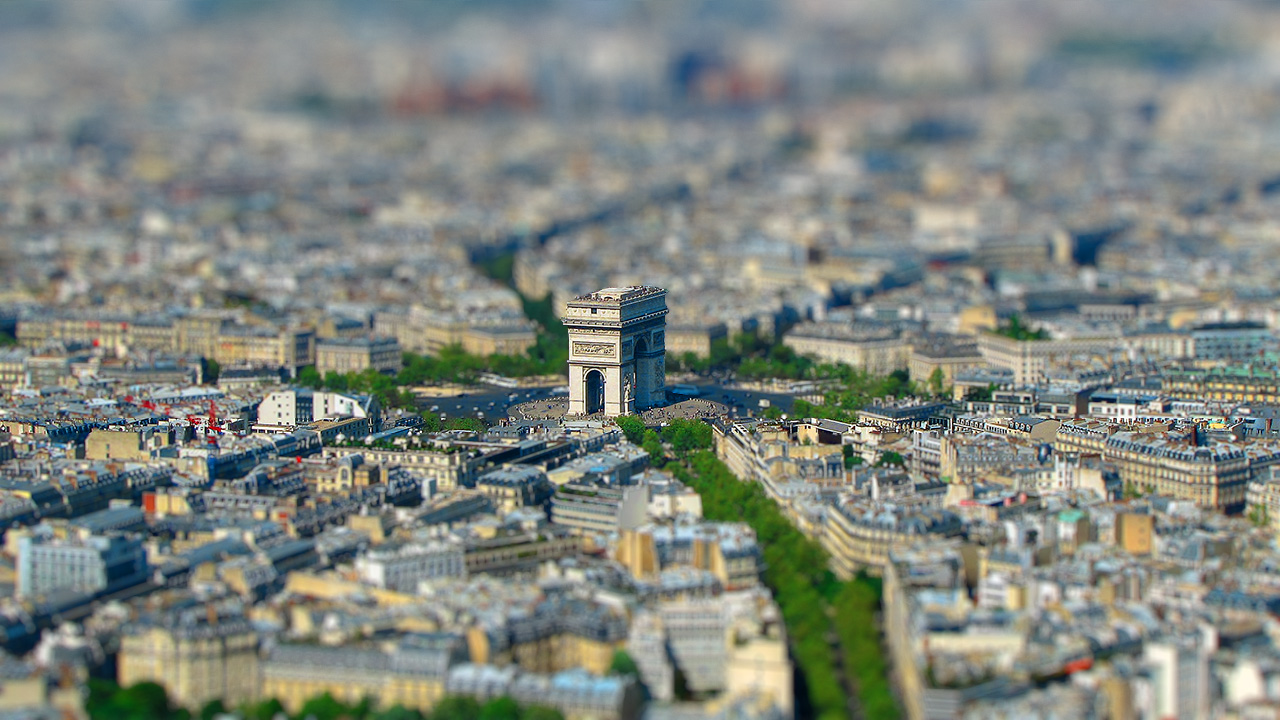
Tilt-shift lenses were popularized due to their unique effect of making subjects appear miniaturized in wide shots. However, lenses are expensive and many of these effects are now being done digitally with specialized software, such as DOF PRO.
DOF PRO fully supports tilt photography using any linear gradient depth map. An inverted gradient allows for negative tilt resulting in defocusing in the center with sharp details at the edges.
Left: DOF PRO no tilt, Right: DOF PRO tilt
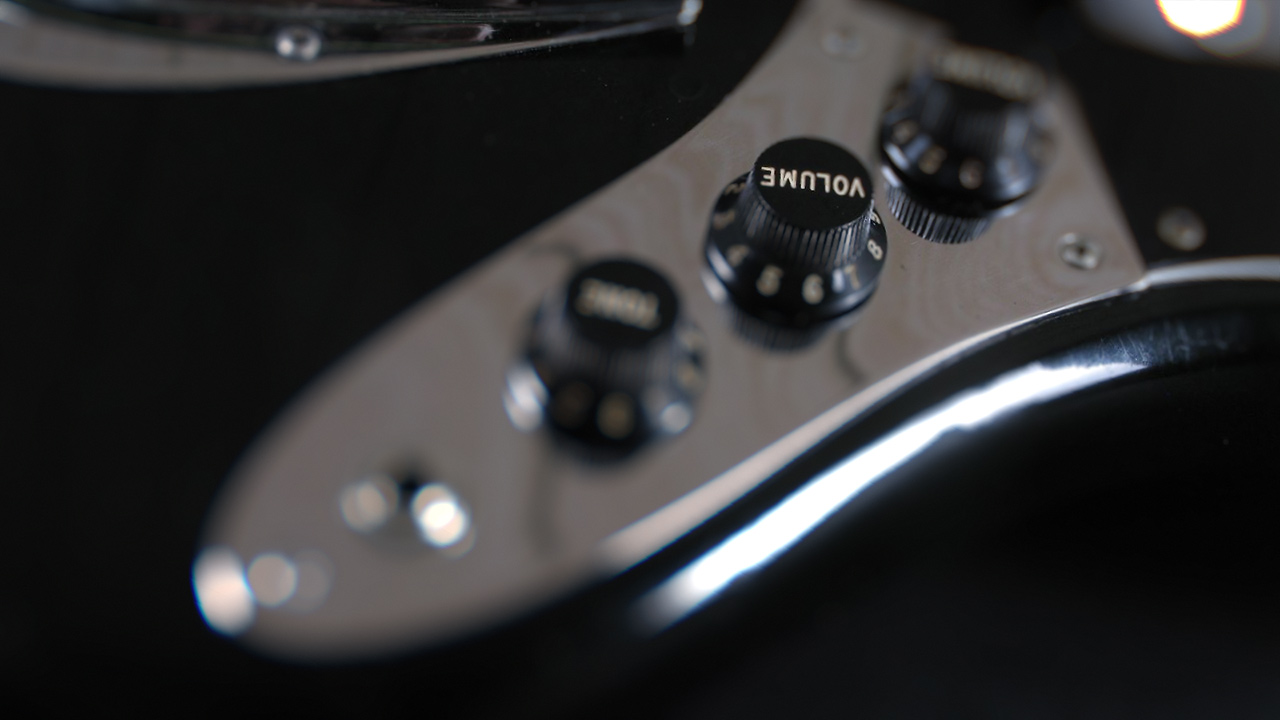
DOF PRO Tilt-Shift – Richard Rosenman (Source image: Pixabay.com)
Field Curvature
Field Curvature (also known as Petzval Field Curvature) is the result of a lens focusing oblique rays slightly in front of the sensor thereby yielding a curved image. Since lenses are curved and sensors are flat, there will always be some degree of aberration in this field.
Field Curvature Diagram
There are curved sensors that have been developed such as the Kepler Space Laboratory Image Array Sensor which compensates for field curvature. Conversely, there are lenses, such as the Petzval lens which deliberately produces field curvature.
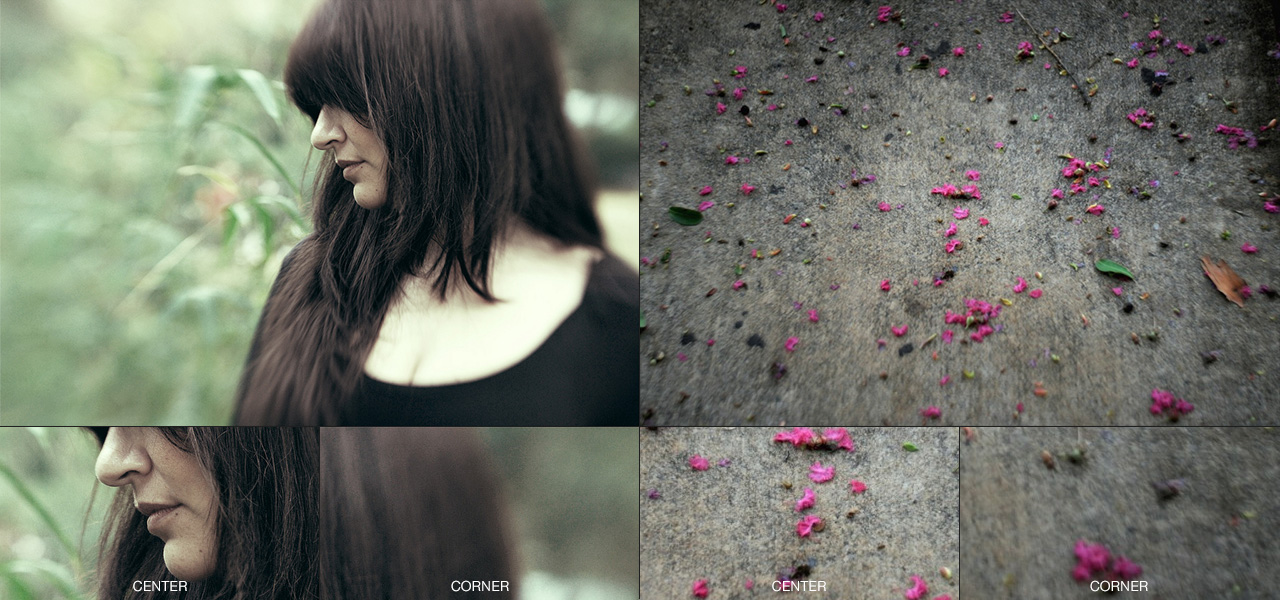
Field curvature always reveals itself as a progressive defocus increasing from the center of the image. Field curvature is very closely related to astigmatism.
DOF PRO fully supports field curvature using any radial gradient depth map. An inverted gradient allows for negative field curvature resulting in defocusing in the center with sharp details at the corners.
Left: DOF PRO no field curvature, Right: DOF PRO field curvature
Astigmatism
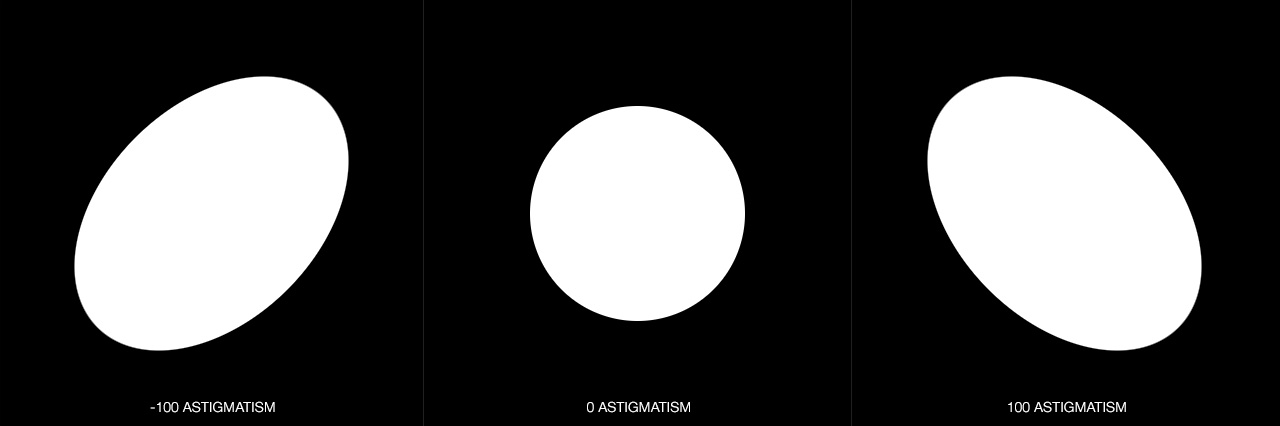
Astigmatism is the result of a lens not focusing on the same point in tangential and sagittal orientations. Astigmatism never occurs in the center of an image but rather towards the edge of the image, depending on whether it is tangential or sagittal. Astigmatism can be decreased by stopping down.
Astigmatism Diagram
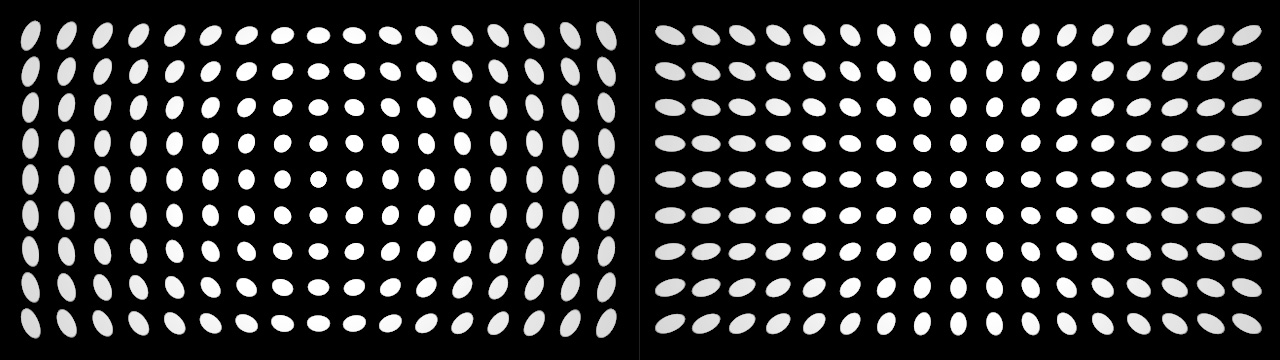
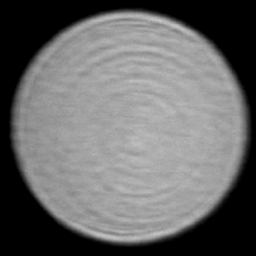
Tangential astigmatism creates a defocus effect similar to a spin blur, while sagittal astigmatism creates a defocus effect similar to a zoom blur.
DOF PRO fully supports both tangential and sagittal astigmatism, complete with intensity control.
Left: DOF PRO tangential astigmatism, Right: DOF PRO sagittal astigmatism
Catadioptric Lens
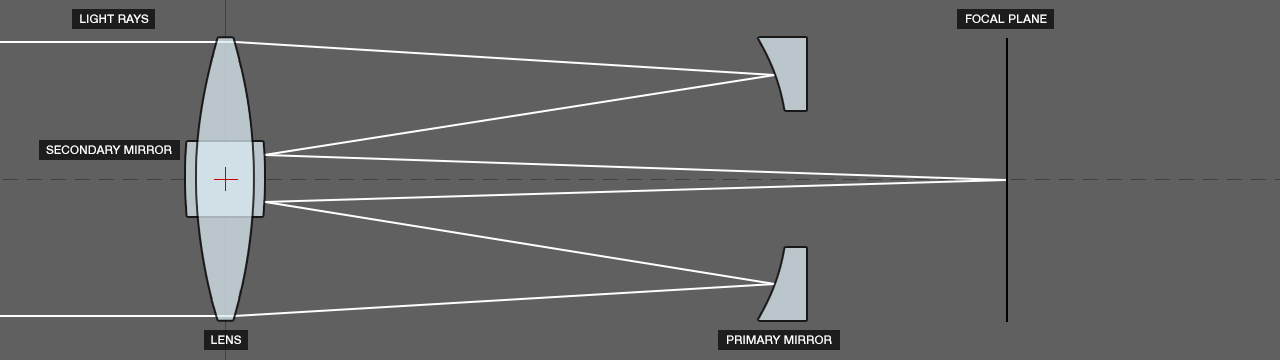
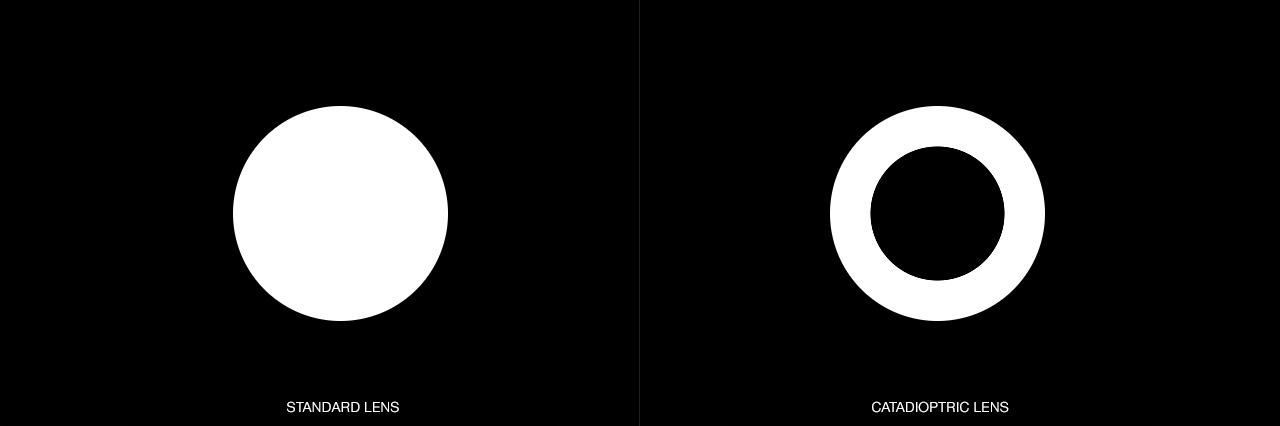
Catadioptric lenses, also known as Mirror Lenses or Reflex Lenses, combine refraction and reflection in an optical system through the use of lenses (dioptrics) and curved mirrors (catoptrics).
Catadioptric Lens Diagram
Catadioptric lenses can feature focal lengths from 250 mm up to and beyond 1000 mm that are much shorter and compact than their long focus or telephoto counterparts. Additionally, chromatic aberration, a major problem with long refractive lenses, and off-axis aberration, a major problem with reflective telescopes, is almost completely eliminated by the catadioptric system.
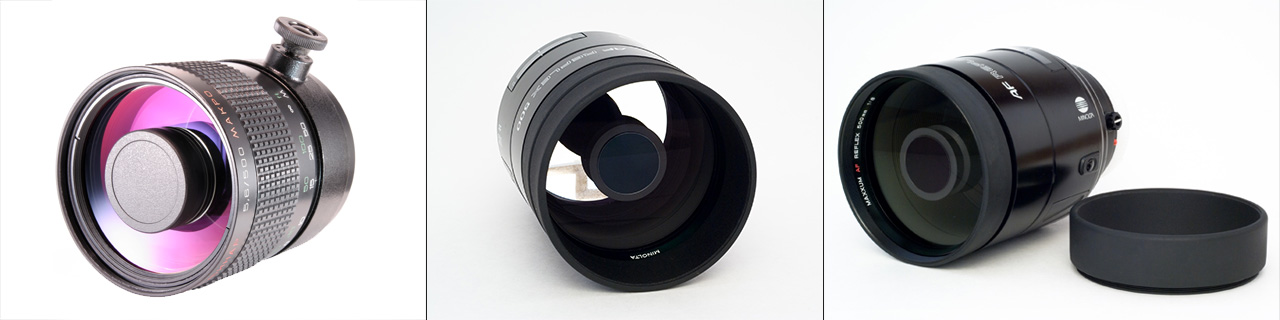
Catadioptric Lenses – Wikipedia
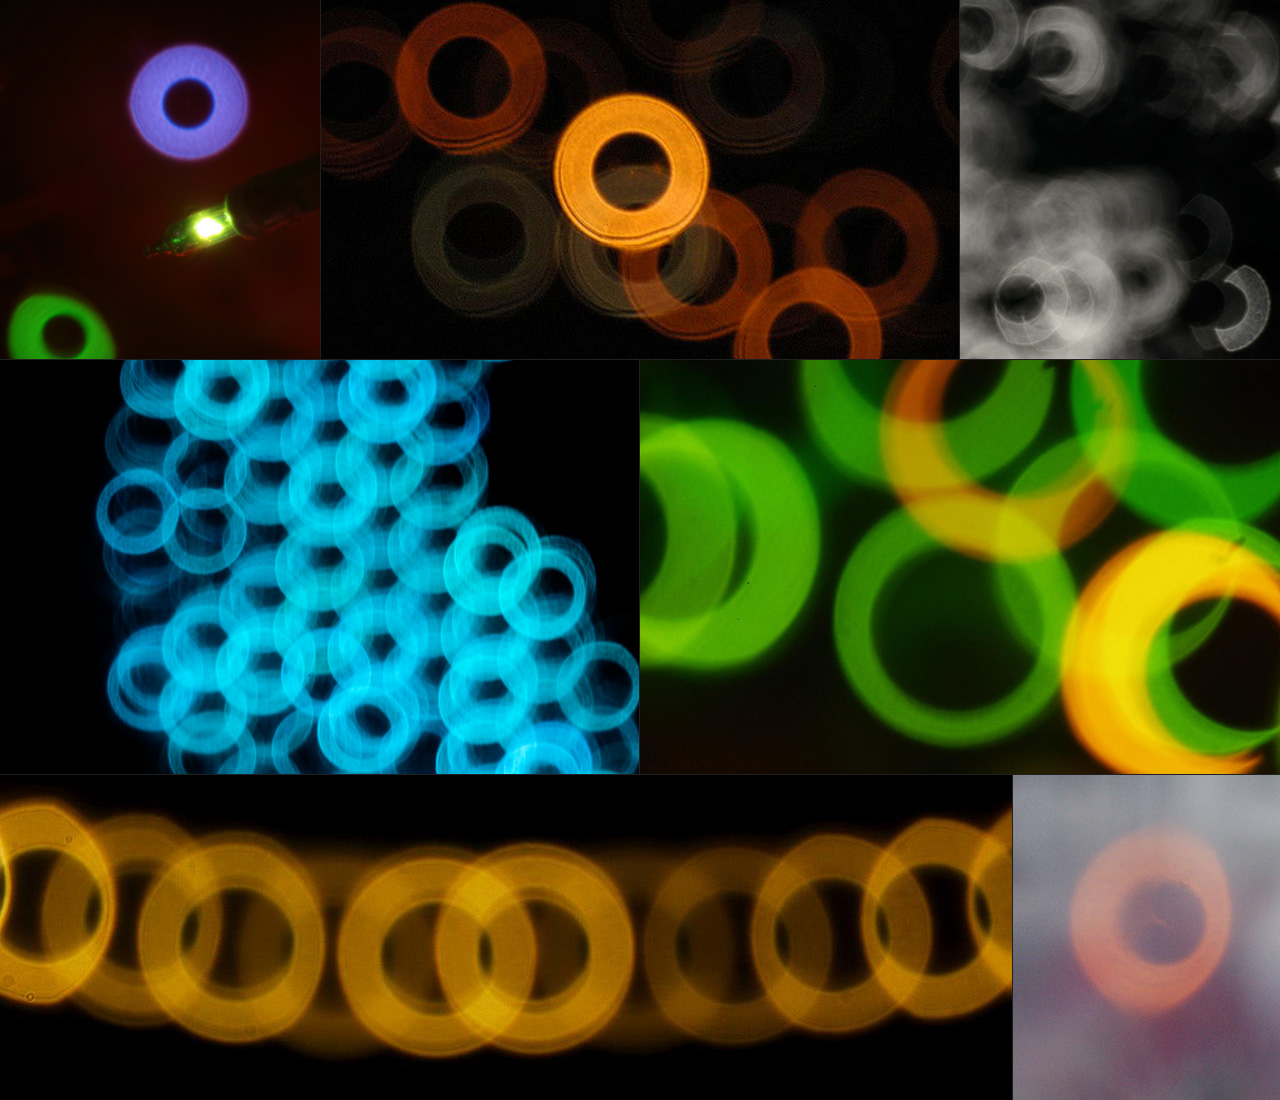
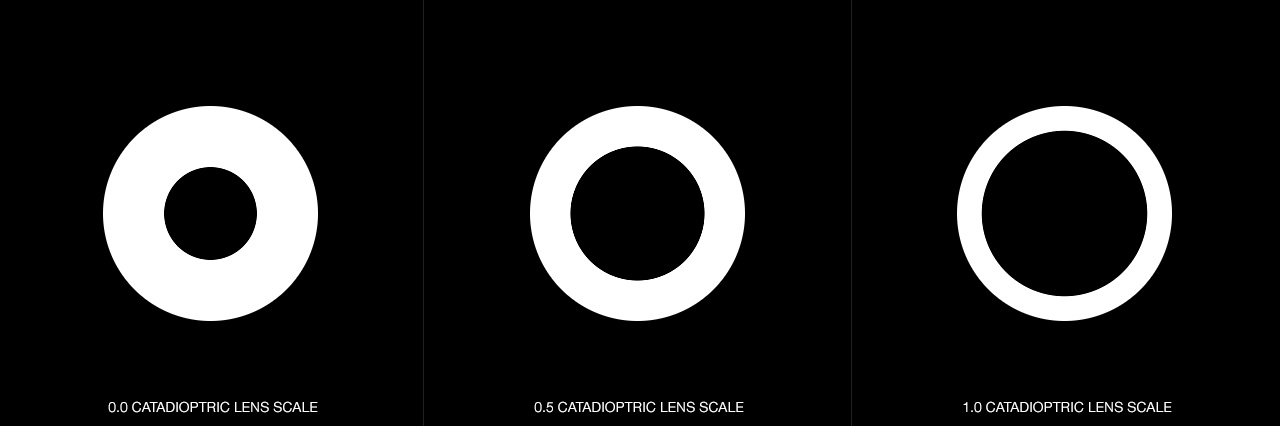
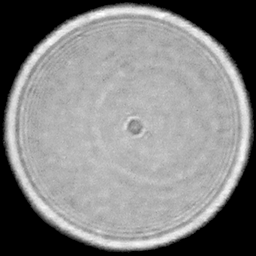
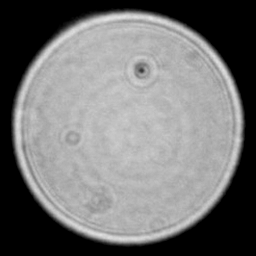
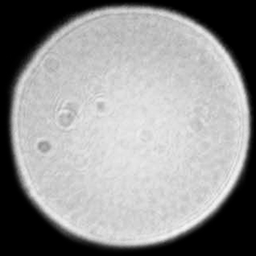
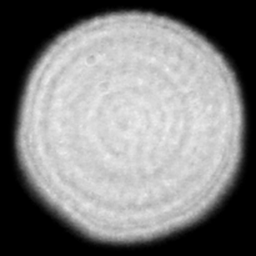
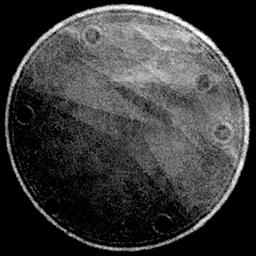
The drawback with catadioptric lenses is that they produce donut-shaped bokeh due to the obstruction from the secondary mirror. This is unique to these types of lenses.
Several companies produced catadioptric lenses throughout the later part of the 20th century such as Nikon, Canon, Tamron, Samyang, Vivitar, and Opteka. Sony also produced a catadioptric lens that had the distinction of being the only reflex lens manufactured by a major brand to feature auto-focus.
DOF PRO fully supports catadioptric lenses, with the ability to adjust the secondary mirror size. In addition, the use of negative optical vignetting allows catadioptric bokeh to realistically occlude as they approach image corners, thereby behaving exactly like a real catadioptric lens does.
Left: Real-world catadioptric lens – Kamen Kunchev, Right: DOF PRO catadioptric lens with optical vignetting
Highlights
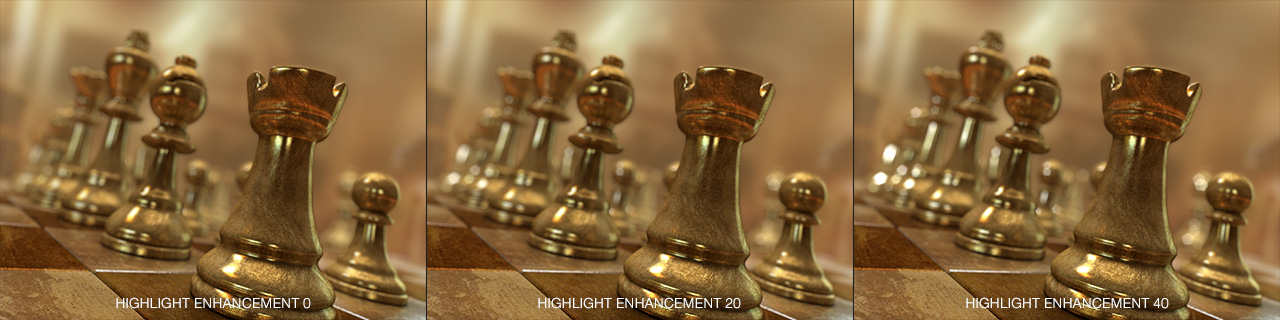
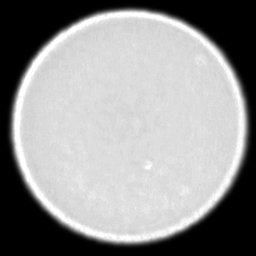
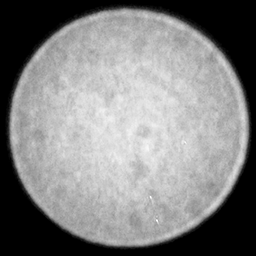
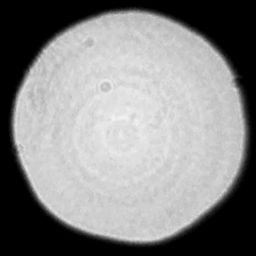
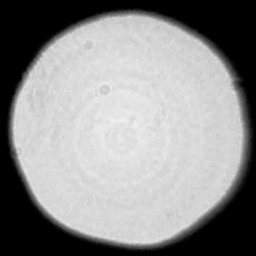
DOF PRO provides sophisticated highlight enhancement tools, critical to producing bright, sharp and vivid bokeh. Due to the limited dynamic range of images, highlights are usually clipped as a trade-off to a reasonable overall exposure. When highlights are out of focus, this truncated light intensity may be restored using these tools as the light is distributed over a larger area.
Left: DOF PRO without highlight enhancement, Right: DOF PRO with highlight enhancement – Wallpapersafari.com
DOF PRO offers total control over highlights by specifying a threshold that determines the onset of highlights. Image areas with brightness values above this threshold will be enhanced in order to restore their original (unclipped) brightness. Moreover, DOF PRO offers tinting and saturation controls for unparalleled highlight adjustment.
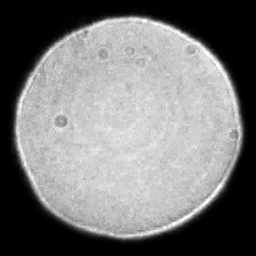
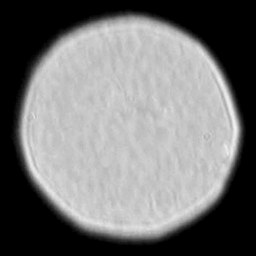
Aperture Textures
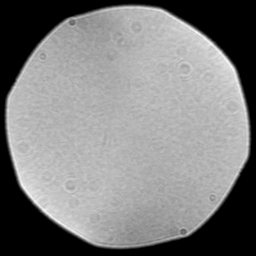
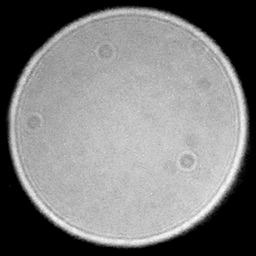
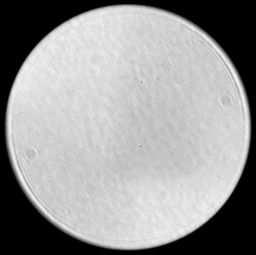
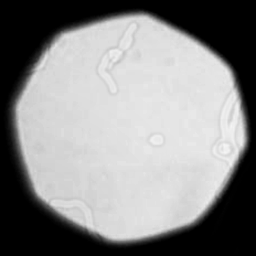
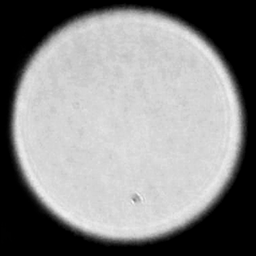
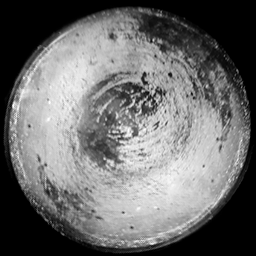
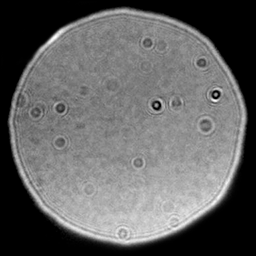
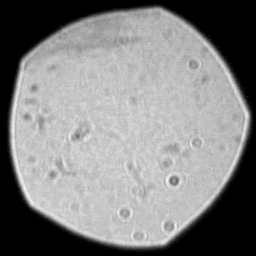
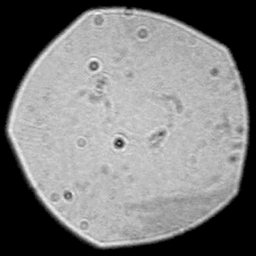
DOF PRO introduces a killer new feature called Aperture Textures. Given enough time, dirt and dust accumulate on the front and rear element of the camera. Although not immediately visible in photographs, this noticeably reveals itself in the bright bokeh. In keeping with photorealistic depth of field phenomena, DOF PRO has implemented such features. Any After Effects layer can now be used as an aperture texture. Furthermore, since DOF PRO accesses aperture textures from layers within the composition window, multiple textures can be stored and easily selected.
DOF PRO aperture textures allow the use of any image to be used as a bokeh texture
Even the smallest particles of dust and dirt on the camera element will reveal themselves in bright bokeh.
Once the aperture texture is specified, the intensity can be adjusted. DOF PRO aperture textures also provide an offsetting feature that allows the texture to be offset according to on-screen bokeh position much like a real camera does.
Left: DOF PRO Aperture Texture without offsetting, Right: DOF PRO Aperture Texture with offsetting
DOF PRO introduces a new feature called matte box. A matte box is a device mounted on the end of a lens to block outside light in order to prevent glare and lens flare. Matte box and a lens hood are essentially the same thing but a matte box uses adjustable fins called French flags. A lens hood also tends to be circular (Conical lens hood) although there are semi-square shaped ones too (Chopped petal lens hood).
Matte boxes, lens hoods and any other mounts in front of the lens may affect the image. Although in most cases there is no visible interference, bokeh are often more susceptible to these devices. The french flags will often crop the bokeh, depending on the angle of the flag. Even mirror boxes when used with heavy depth of field can affect bokeh. This is especially evident in anamorphic bokeh.
DOF PRO’s matte box affects bokeh exactly the same way real matte boxes do. They increasingly crop bokeh as they near image edges. Each individual top, bottom, left and right fins has its own slider for 100% creative control over the cropping. DOF PRO’s matte box is for those looking to match exactly how real bokeh are influenced under these real-world conditions. It is also ideal for matching plates not otherwise possible with any other depth of field processor.
Left: DOF PRO left & right matte box flags, Right: DOF PRO top & bottom matte box flags
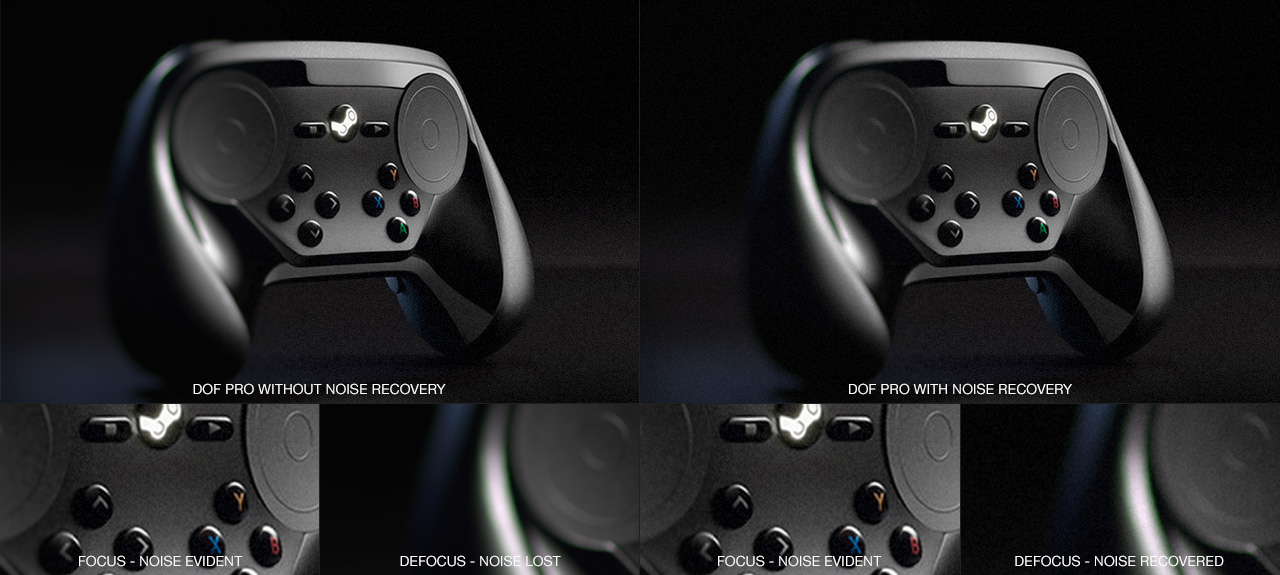
Noise
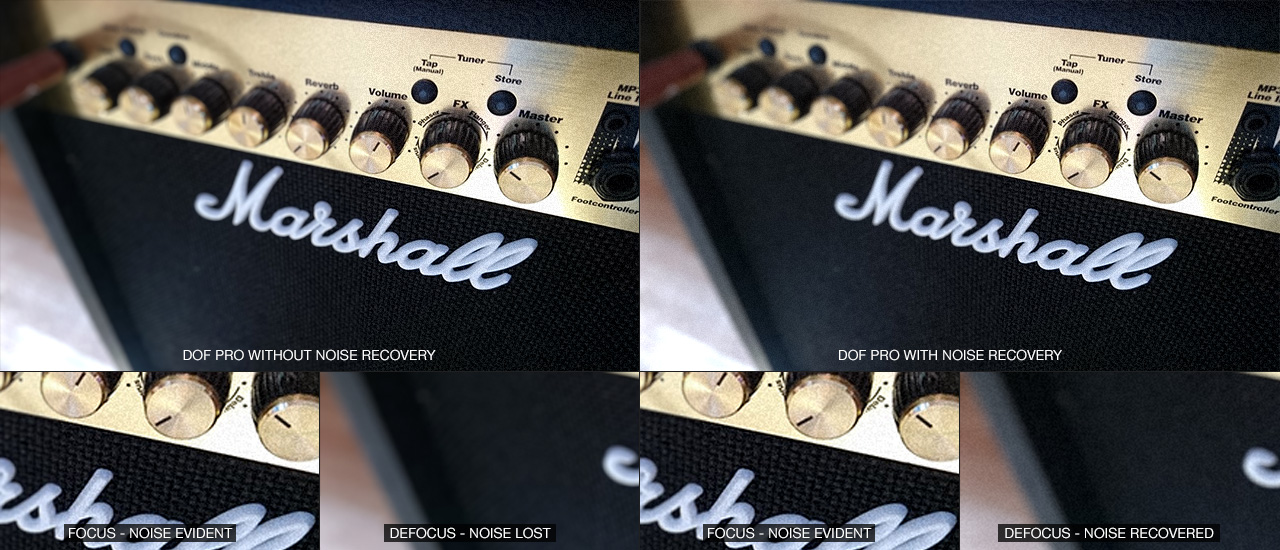
DOF PRO includes an extremely powerful pixel noise rendering engine for producing even more realistic depth of field effects. Noise is an inherent naturally-occurring byproduct of most 3D raytraced engines and digital CCD cameras. The re-introduction of noise in defocused image areas is crucial in producing a realistic depth of field effect as this is almost entirely eliminated through the processing. This is often difficult to achieve due to varying degrees of defocusing throughout the image which therefore requires varying degrees of pixel noise.
DOF PRO provides sophisticated noise tools for dealing with this. Noise can be applied in an animated or non-animated fashion and in monochromatic or color. It can be applied uniformly, photometrically (luma-sensitive), and can be distributed in a fixed manner, or even through the use of the focus map or blur amount which effectively allows the user to recover lost grain of varying intensity. The noise can be tinted in color and a realtime GUI window displays a preview of your currently selected noise attributes. DOF PRO’s powerful noise rendering engine takes your images from a realistic to a photorealistic level.
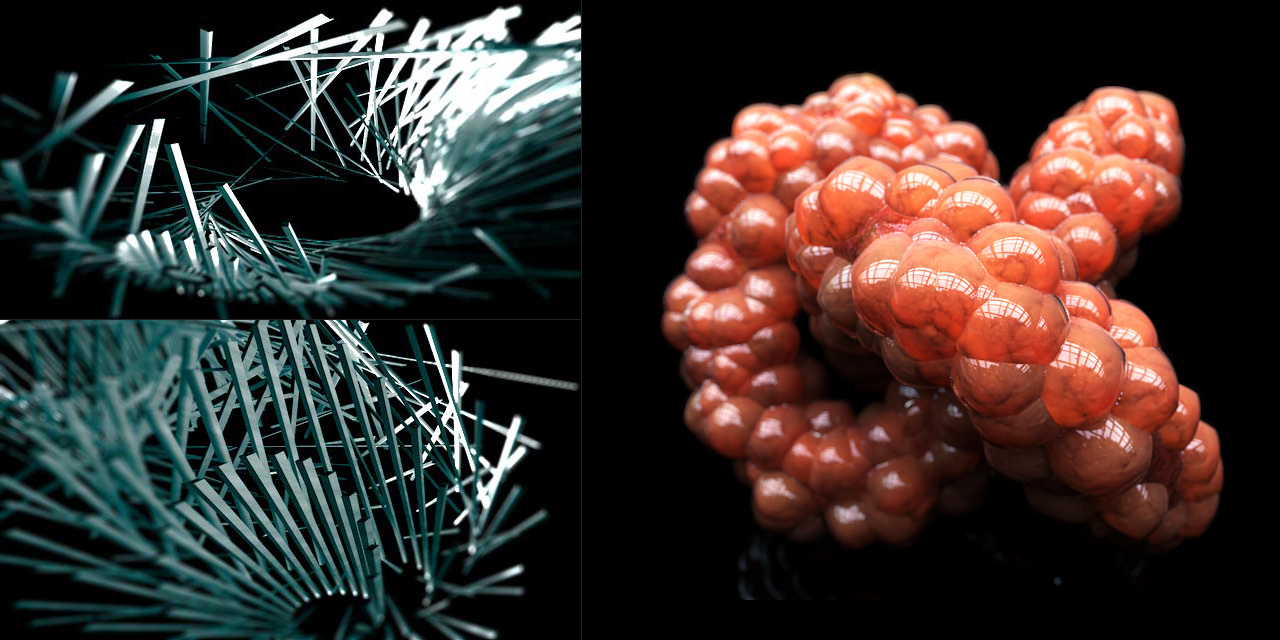
DOF PRO Artists: Tom Larson
Photometric Burnout
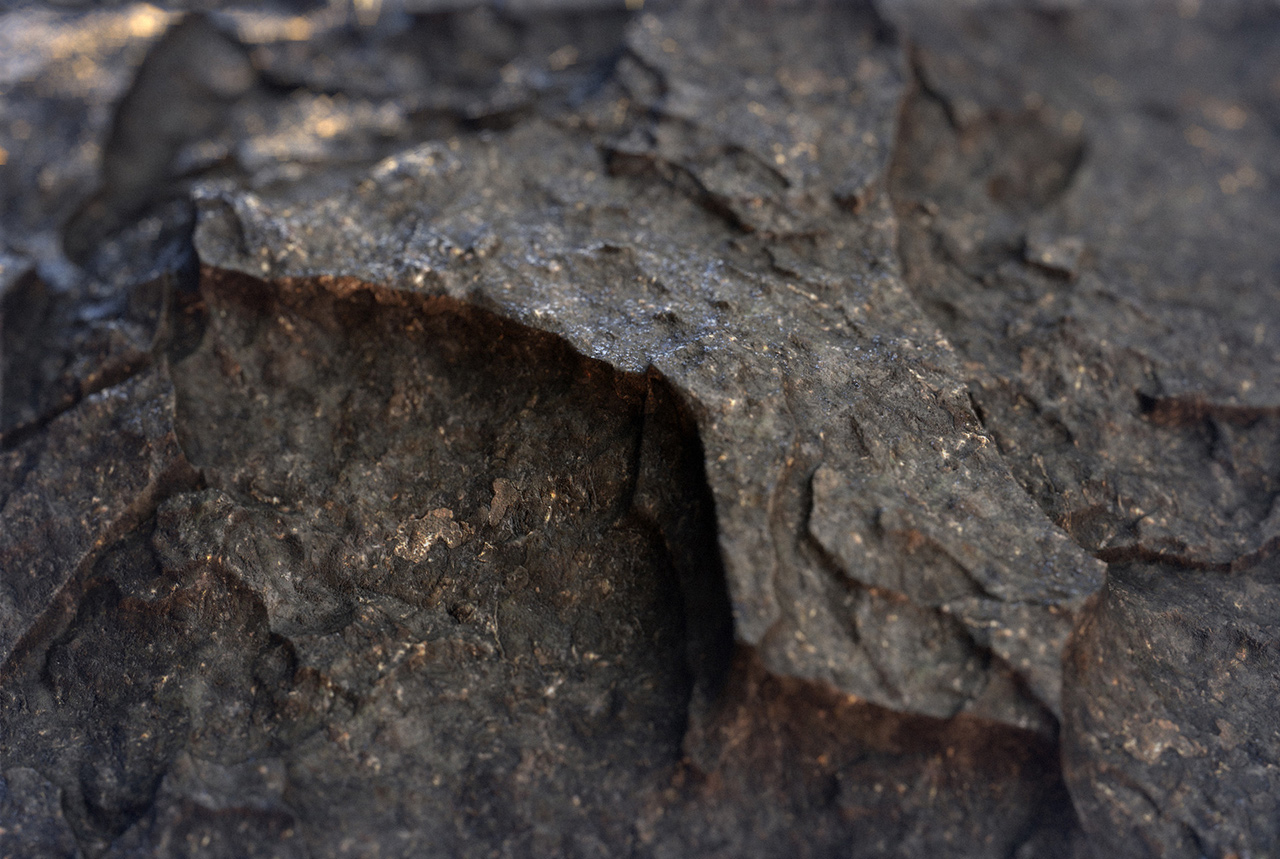
Photometric Burnout is a specific effect that occurs when a subject is photographed in front of an intense backlight (natural or artificial). This produces overexposed image areas in which the subject appears to be silhouetted against the background and its edges become corroded and contracted. Burnouts are quite different than blurs because the corroded edges of the subject(s) remain sharp and faithfully represent the camera’s aperture shape. Since DOF PRO uses optically-correct depth of field algorithms, photometric burnouts can be easily simulated with virtually no setup time involved.
DOF PRO photometric burnout
Additionally, photometric burnout creates high-contrast boundaries which are particularly difficult for sensors to capture correctly, and often result in visible color fringing. This too can be easily replicated through the use of DOF PRO’s chromatic and achromatic aberration features.
DOF PRO is a production tested plugin currently being used by customers worldwide demanding the very best in depth of field effects. Users range from digital artists and photographers to major broadcast, film and print production studios. DOF PRO has been developed with quality output being the number one priority – to produce the most sophisticated and photorealistic depth of field effects possible as a post process thus providing a faster alternative to computationally-intensive traditional 3D raytracing techniques. For photographers and retouchers, it is an alternative to already-captured photography lacking sufficient depth of field, or for those wishing to emphasize it further. It has been developed closely with users and production studios in an effort to meet the digital community’s creative demands. DOF PRO has been reviewed by numerous publishers world-wide, always receiving outstanding reviews, honorary mentions and feature publications. Most important of all, DOF PRO has become the chosen tool for uncompromised, photorealistic depth of field effects.
DOF PRO operates by applying photorealistic depth of field based on a depth map. A depth map is a grayscale image that describes the distance of every object in the image from the camera. Based on this distance, DOF PRO analyses the image information and processes an accurate depth of field effect.
Depth maps are very easy to produce from just about any 3D software including 3ds Max, Maya Blender, Lightwave, Modo, etc. For photography, depth maps need to be created manually although DOF PRO’s built-in gradient tools can suffice in most cases. Manually creating a depth map is fairly straight forward through the use of After Effect’s masking tools and requires the selection of every object in the scene and assigning a solid greyscale level relating to its depth in the scene. In most cases, only two or three levels of depth need to be dealt with.
Although DOF PRO provides unparalleled output, like all post depth of field processors it cannot compete against a true raytracer. 3D generated depth of field will always yield superior results to any and all post depth of field processors as raytracers have access to the entire scene, thereby being able to correctly render in front and behind defocused objects. Post depth of field processors rely on a 2D depth map and must, to some degree, guess missing information in front and behind defocused objects. As a result, DOF PRO should be thought of as a faster alternative to computationally intensive 3D depth of field, not a replacement for it.
Having said that, DOF PRO can produce photorealistic depth of field effects in literally seconds whereas 3D generated depth of field typically takes hours, sometimes days. As with everything, it is ultimately a balance between speed and quality.
There are many cases in which a post depth of field processor can produce almost identical results to that of a 3D raytracer. In other cases, those that involve fine details such as thin focused objects over heavily defocused backgrounds or vice versa, artefacts may become present. Therefore, the output of any post depth of field processor is partially dependent on the scene.
For Photography, DOF PRO is an asset for images shot that require additional depth of field. Once again, output will depend on the scene and / or the depth map.
There will be instances in which an image will contain a fully-sharp foreground element against a defocused background element. While the typical workflow will be to composite the elements together and apply DOF PRO to the entire image, a cleaner alternative is to apply DOF PRO to the background only and then composite the fully-sharp foreground element, or vice-versa. This will ensure the image remains artefact-free.
It’s easy to get carried away with unnecessarily adding too much depth of field. Therefore, it’s helpful to first research reference imagery so as to have an idea of how much depth of field is acceptable and how much is too much.
Depth map antialiasing, which can produce artefacts, becomes less noticeable as image resolution increases.
Antialiasing on depth maps actually yields incorrect results. The shaded antialiased edge suggests multiple depth planes for that particular object. On the other hand, aliased depth maps tend to produce aliased edges in the processed image. If you encounter visible artifacts around edges, it is recommended to generate an unfiltered depth map using your 3D app of choice.
DOF PRO supports alpha channels / transparency. This means specific element layers can receive depth of field and will correctly composite with other layers.
The interface is handled by After Effects and therefore can be dynamically resized to fit any single or dual monitor setup thereby providing a much larger preview window if desired.
The Graphical User Interface (GUI) is structured into groups of controls which belong to a logical unit. Individual controls or entire control groups may be enabled or disabled, depending on the settings of other controls.
Richard Rosenman
Performance
DOF PRO performs some very complex calculations that may affect performance. Having a clear understanding of its operation will ensure you get the most out of the software. The following are helpful tips that can help you optimize DOF PRO for speed.
DOF PRO has been developed to work intelligently. It bypasses algorithms not required when they are set to 0 (off), thereby speeding up processing. For instance, setting astigmatism to a value of less than or greater than 0 will enable the astigmatism algorithm which may increase rendering times. Most features in DOF PRO work this way. Aperture texture set to disabled will bypass that algorithm. Matte box set to 0 (off) in any direction will bypass that specific algorithm. Switching to polygonal aperture shape will enable additional blade algorithms.
Enabling longitudinal or lateral chromatic or achromatic aberration from the default state of 0 (off), will switch to a more complex algorithm. Since chromatic and achromatic aberration is calculated in a physically-correct manner, additional passes need to be performed for the red, green and blue wavelengths. This means that chromatic and achromatic aberration require 3X the number of computations than non-chromatic and non-achromatic calculations.
Astigmatism can increase rendertimes extensively depending on the amount specified. As such, it should be use with care.
Fixed defocus depth map mode (no depth map specified) demands the most performance in contrast to using a depth map. This is because using a depth map will vary depth of field levels up to the currently-specified size whereas fixed defocus will always perform only at the currently-specified size.
DOF PRO performs a number of pre-processing & analytical passes on the depth map. As such, you may experience a slight delay before processing begins when using large images.
When working with highlights, set the display from Rendered to Processed Highlights. This will display processed highlights against black, resulting in clearer bokeh visualization.
Setting the After Effects composition preview window to something lower than Full Resolution will speed up rendering by that respective factor.
When adjusting depth map layers, custom aperture map layers and custom aperture texture layers with effects, you must precompose those layers for those effects to work. This is normal After Effects functionality.
DOF PRO is capable of working in 8 bits / channel, 16 bits / channel and 32 bits / channel color modes. Depth maps are also handled according to their respective color depths.
DOF PRO is fully multithreaded and will take advantage of as many workstation cores made available to it.
DOF PRO PS (Photoshop) vs DOF PRO AE (After Effects)
DOF PRO AE is a port developed from DOF PRO PS. As such, DOF PRO’s award-winning technology has been retained 100% intact. This means that the results in DOF PRO AE will be almost identical to those of DOF PRO PS. Both versions also have almost identical feature sets with the After Effects version only lacking ones that are easily handled by After Effects itself.
For example, DOF PRO PS’s linear and radial depth maps generated directly within the app have not been added to DOF PRO AE. This is because it’s very easy to create ones own linear and radial depth maps in After Effects using the Generate Ramp filter. Likewise, DOF PRO PS’s Alias Depth Map features haven’t been included in DOF PRO AE since it is now customary for depth maps to exported without antialiasing from just about any 3D app in the industry.
DOF PRO AE doesn’t include DOF PRO PS’s preview undersampling because that is handled through After Effect’s preview resolution dropdown. Additionally, the region rendering feature in DOF PRO PS isn’t included in DOF PRO AE since the composition size can be easily adjusted.
There are also some notable key improvement in DOF PRO AE over that of DOF PRO PS. For example, DOF PRO AE supports 32 bits / channel color depth, also known as floating point. This is an extremely important feature especially for professional 3D artists. DOF PRO AE also supports alpha channel / transparency, another crucial feature required for working on elements to be later composited together. DOF PRO AE’s custom aperture map supports chromatic / achromatic aberration, whereas DOF PRO PS’s doesn’t. Gamma correction has been added to DOF PRO AE, along with an upper threshold for highlight enhancement, as well as blackpoint and whitepoint depth data extraction. Unlike DOF PRO PS, DOF PRO AE isn’t limited to custom aperture maps of 255 pixels or 8-bit externally-loaded depth maps in BMP format only. DOF PRO AE’s iris / Iris Array preview displays a 100% accurate result while DOF PRO PS’s is an approximation. Some of these new improvements will be available in forthcoming versions of DOF PRO PS.
DOF PRO PS and DOF PRO AE are considered two entirely different products, even if they share the same technology. DOF PRO PS will receive continued development for single frame depth of field processing while DOF PRO AE will receive continued development with an emphasis on footage.
Main
This section contains several options that are not specific to any particular sub-section. These options apply to the general operation of the entire plugin.
Display: Specifies what render mode to display. The following modes are available:
Rendered: Displays the final, processed frame.
Depth Map: Displays the currently selected depth map.
Focus Map: Displays the currently selected depth map, affected by the focus.
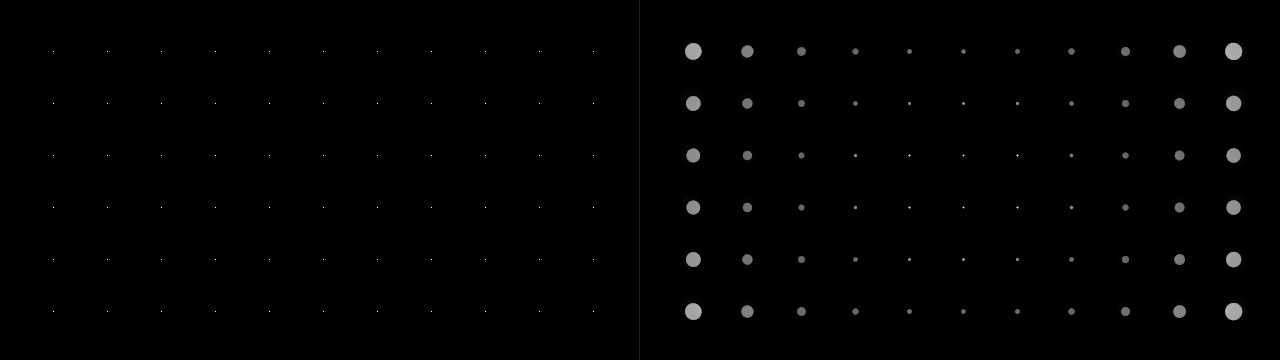
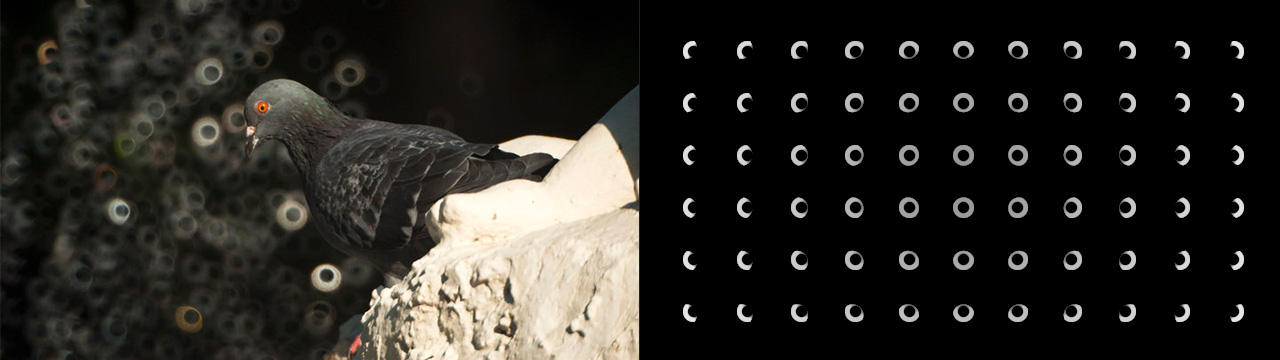
Iris: Displays a single iris shape with the currently specified aperture settings.
Iris Array: Displays an iris shape array with the currently specified aperture settings, which is helpful for visualizing optical vignetting, astigmatism, and more.
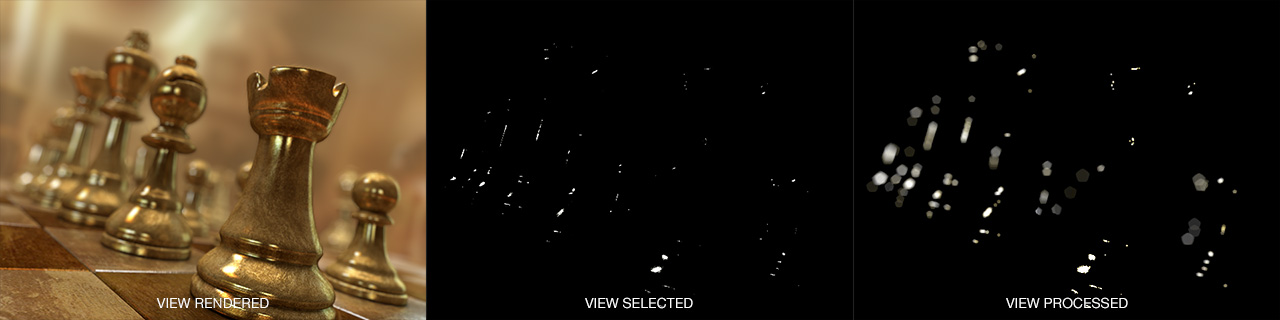
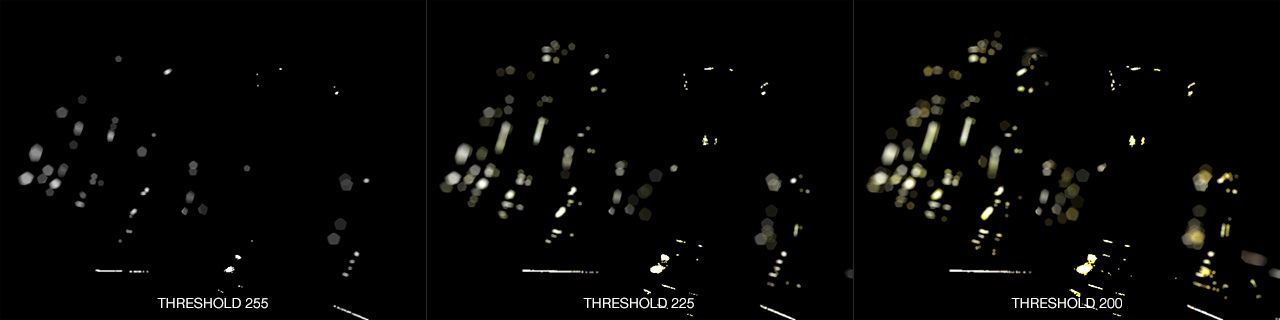
Selected Highlights: Displays the parts of the image selected based on the lower and upper highlight threshold, prior to processing.
Processed Highlights: Displays the parts of the image selected based on the lower and upper highlight threshold, after processing processing.
Left: DOF PRO view rendered highlights, Middle: DOF PRO view selected highlights, Right: DOF PRO view processed highlights
Gamma Correction: Transforms the image into linear space prior to processing. Then transforms it back. This option should always be enabled as this is representative of what happens in a real camera. The only time this option should be turned off is if the image has already been transferred to linear mode.
Depth
This section contains all the controls related to the image’s depth map information. Generally speaking, the depth map information determines the amount of blur applied to a particular region of the image.
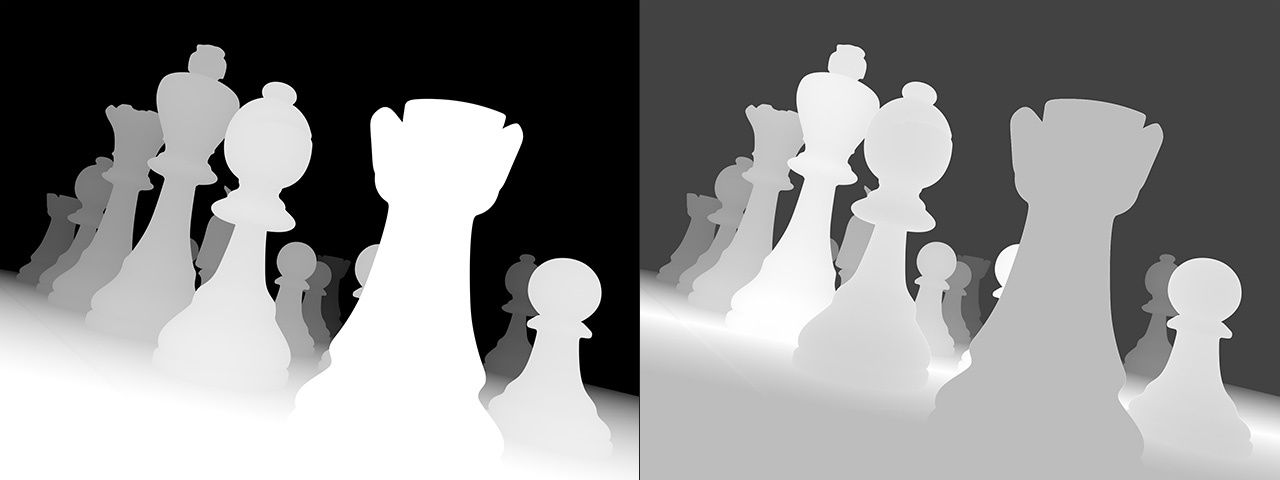
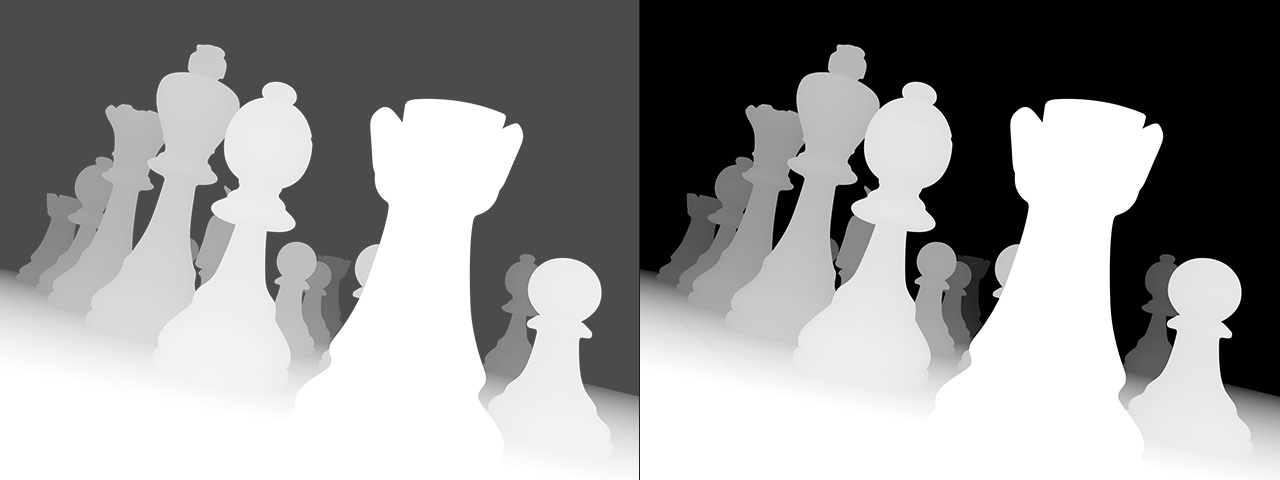
It is important to recognize the difference between a depth map and a focus map. They are not the same. A depth map contains information regarding the location of objects within the scene. A focus map contains information regarding the focal point of the camera. It is not recommended that you use a focus map as your depth map because this will confuse DOF PRO since there are two depth map branches.
Left: Depth Map, Right: Focus Map
A correct depth map should contain white foreground objects transitioning to black background objects and the focus should be set within DOF PRO using the Focus slider. For instance, if you wish to have a distant object in focus, you would not generate a black to white depth map. Instead, you would generate a standard white to black depth map, and then set the focal depth controller ( Focus ) within the filter from 1.0 to 0.0. This will effectively change the focal point from the foreground to the background, as seen by displaying the Focus Map display drop-down.
A focus map, depending on its settings, may have two branches – in front of the focal plane and behind the focal plane. This is important as DOF PRO provides specialized features for dealing with front bokeh differently than back bokeh, much like a real camera does (See Spherical Aberration and Chromatic Aberration).
Different types of depth maps produce different results
Depth Layer: Specifies the depth layer. DOF PRO will handle depth levels according to the depth map color depth. An 8 bits / channel depth map will only contain 256 levels of depth. A 16 bits / channel depth map will contain 32,768 levels of depth. A 32 bits / channel depth map will contain an unlimited number of depth levels. For these levels of depth to be accessed, the project must also be set to the corresponding color depth. A depth layer should match in resolution to the processed image. If there is a resolution mismatch, incorrect results will be produced.
Channel: Specifies which channel to extract the depth data from. Since depth information is always in grayscale, only one color channel is required for storage. As such, different 3D apps allow depth data to be stored in the red, green, blue or even alpha channels. Options include:
Invert: Inverts the currently selected depth layer.
Tip: Always ensure your depth map contains a full range of grays, from black to white!
Focus: Specifies the focal point when using a depth map. Use this slider to shift the focus from one object to another. When not using a depth map, this slider will still control the focus amount, with a value of 1.0 resulting in full defocus and a value of 0.0 resulting in no defocus.
Set Focus: Interactively specifies the focal point. When selecting this option, a cross hair will appear at the mouse pointer and allow you to click in the composition window to visually select the focal point. The preview window resolution must be set to Full quality for this feature to work correctly.
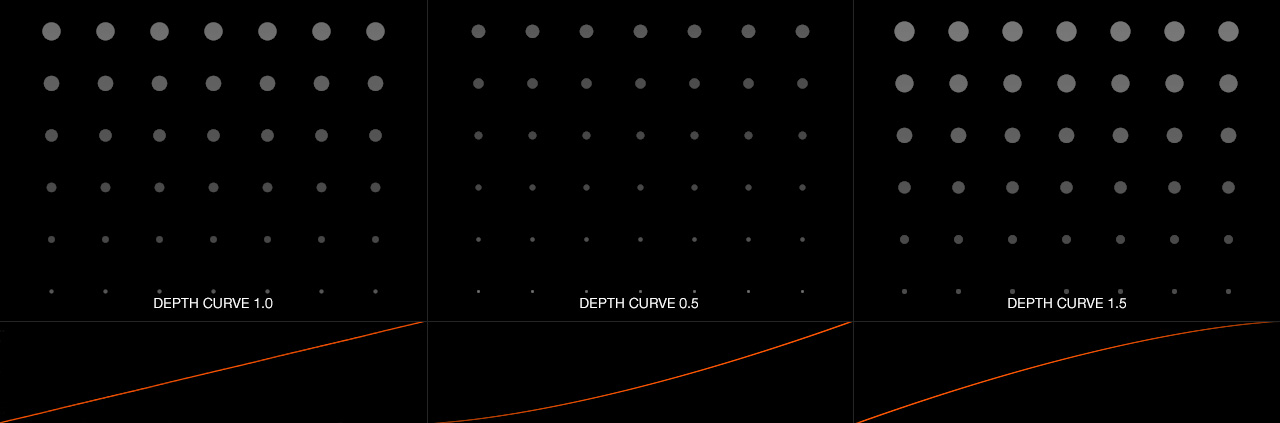
Curve: Adjusts the gamma of the depth map, thereby controlling the degree of focus objects between the closest and furthest ones. Adjusting this parameters will shift the focus so it may require realignment.
Depth curve adjusts the amount of defocus between the closest and furthest objects.
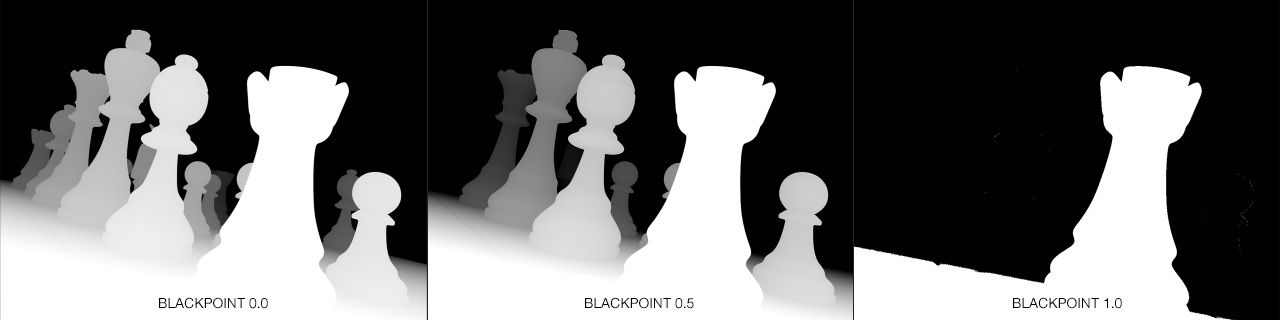
Blackpoint: Specifies which depth values from the external channel are to be considered black. All depth values beyond that are clipped to black. This feature is especially important for 32 bit depth layers that may contain data with values greater than 1.0 or less than 0.0.
DOF PRO Blackpoint
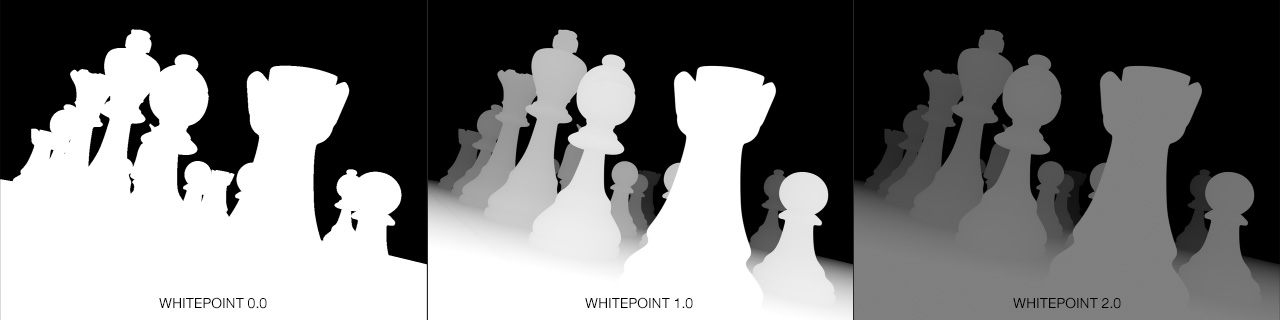
Whitepoint: Specifies which depth values from the external channel are to be considered white. All depth values beyond that are clipped to white. This feature is especially important for 32 bit depth layers that may contain data with values greater than 1.0 or less than 0.0.
DOF PRO Whitepoint
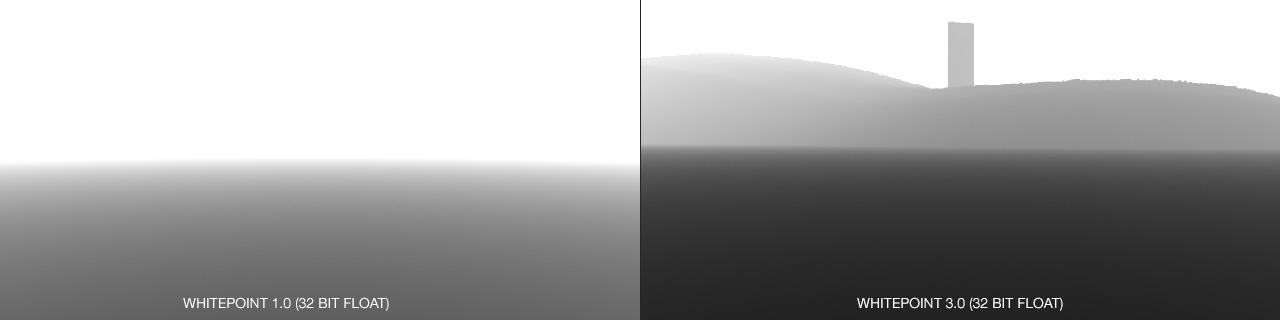
Blackpoint and whitepoint are especially useful in 32 bit / float color depth where pixel ranges can dip below 0.0 or greater than 1.0. This feature allows you to retrieve otherwise hidden data in 32 bit color depth. In the example below, the depth map was rendered so that the brightest value was at 3.0. In 8 bit or 16 bit color depth, this data gets clipped and the result is the image on the left. In 32 bit / float color depth, we can successfully retrieve that data by increasing the whitepoint to 3.0.
Whitepoint in 32 bit color / float retrieves otherwise hidden pixel data – Zeke Faust
Richard Rosenman
Aperture
This section defines the size and shape of the aperture (i.e. the amount and look of defocus). A small amount of defocus is typically sufficient for most cases. Higher values may result in unrealistic depth of field and significantly longer processing times.
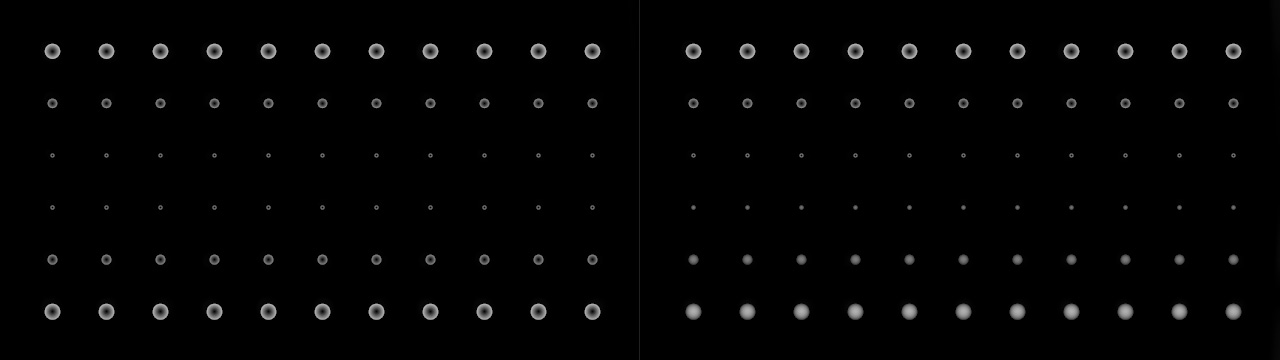
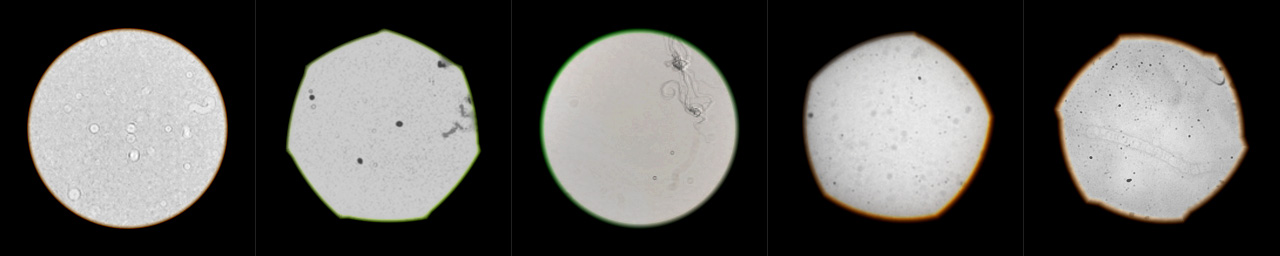
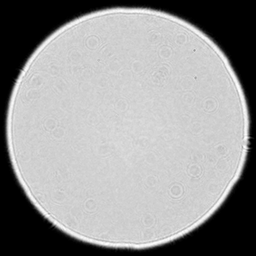
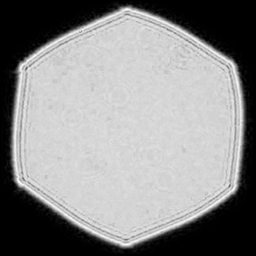
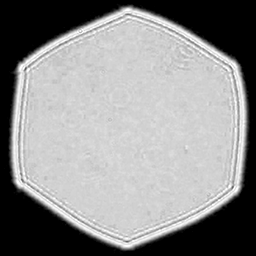
DOF PRO aperture shapes with various settings
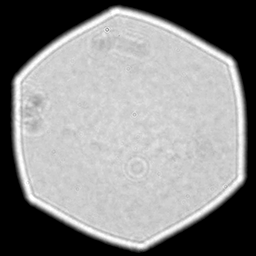
Aperture Shape: Specifies the aperture shape. Options include circular, polygonal, notched and custom. The number of aperture blades in a lens typically defines the look of the highlight. A lens with few aperture diaphragm blades, say 5, tends to produce pentagonal highlights, whereas a lens with more aperture blades, say 7-8, tends to produce rounder heptagonal/octagonal highlights. Ultimately, a higher number of aperture blades will produce more circular highlights.
Custom Aperture: Specifies a layer to be used as a custom aperture shape. This option will only be enabled when Custom has been selected as the aperture shape. Custom aperture maps have a limited number of options available to them. Custom aperture layers will be converted to gray-scale. A custom aperture does not have to match in resolution to the processed image. The difference in scale will be appropriately computed.
DOF PRO allows custom aperture maps to be used – Matthew Gunn
DOF PRO uses bilinear filtering as its default algorithm for all custom aperture map transformations, so as to provide speed. However, none of the conventional filtering algorithms will produce acceptable results when performing significant scaling transformations to any image. If a custom aperture map has a resolution of 1080×1080 and the largest target bokeh size will be 10 pixels, that is a 99% scale reduction. In cases like these, box filtering is the only algorithm that produces a good results but it is extremely slow.
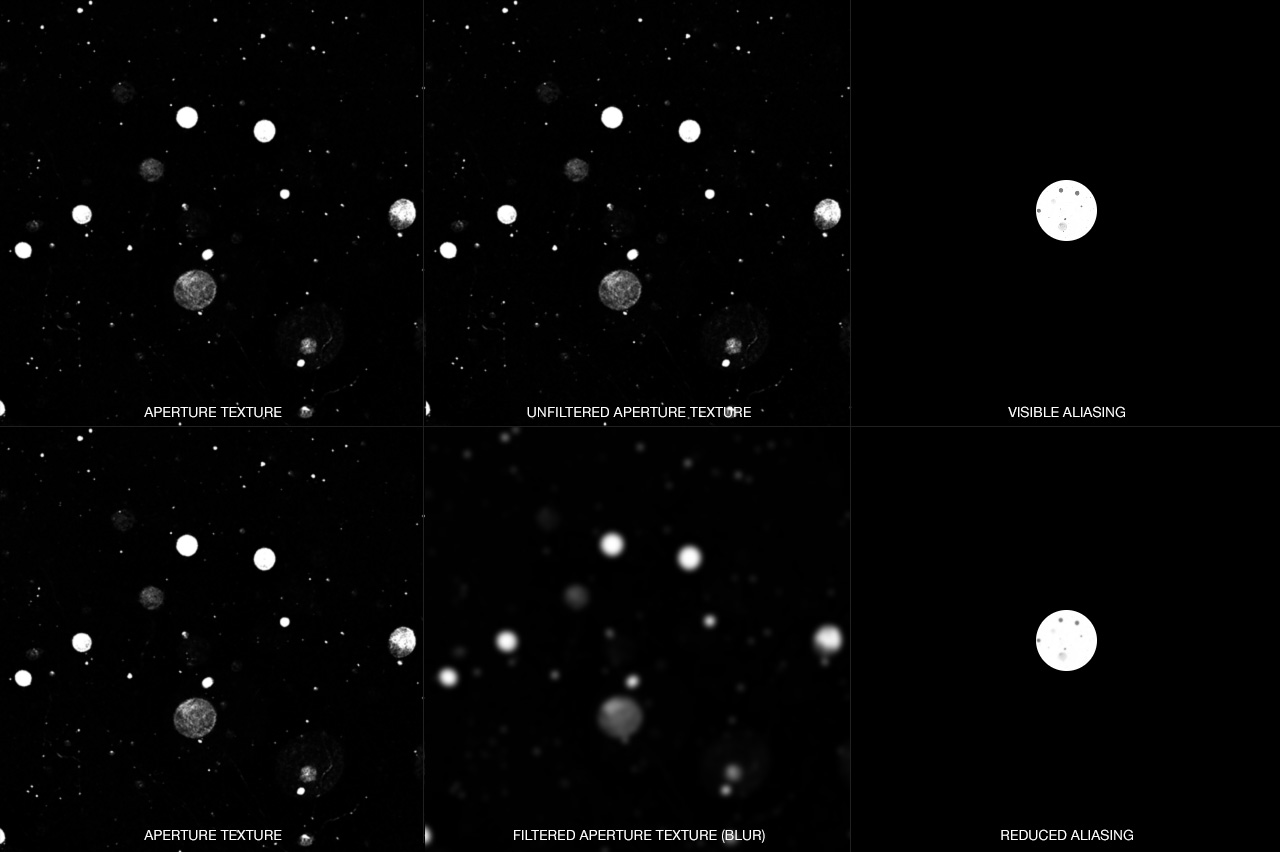
When such significant scaling transformations occur, aliasing may become visible. The greater the scale ratio, the more likely aliasing will occur. As a result, there are steps a user can take so as to minimize the degree of aliasing. By performing a simple blur operation beforehand on the aperture texture, we can produce the same effect as a box filter. The greater the degree of scale, the greater the amount of blur to be applied. Below is an exaggerated but helpful example.
In the upper row we see the original custom aperture map , followed by the same one unfiltered. The reduced custom aperture map shows slight aliasing in the bokeh. In the lower row, we see the original custom aperture map, followed by the same one with a blur filter applied to it. The reduced custom aperture map now displays correctly and without signs of aliasing. The closer in size the custom aperture map is to the resulting bokeh size, the less likely aliasing will occur.
DOF PRO custom aperture map filtering
Aspect Ratio: Specifies the aspect ratio. If matching bokeh to a photographic or film plate, it’s critical to match the aspect ratio. Some common industry aspect ratio values can be found here.
DOF PRO features common industry standard aspect ratios and custom ones too
Aperture Size: Specifies the aperture size. The value corresponds to the radius in pixels at maximum out-of-focus. This slider controls the amount of defocus. Naturally occurring depth of field is, in most cases, subtle. It is important to keep this in mind as it is a natural tendency to apply more than is necessary, which will directly affect the rendertime and produce unrealistic results. Although the slider has a maximum limit of 45.0, a value greater than and up to 255.0 can be manually entered.
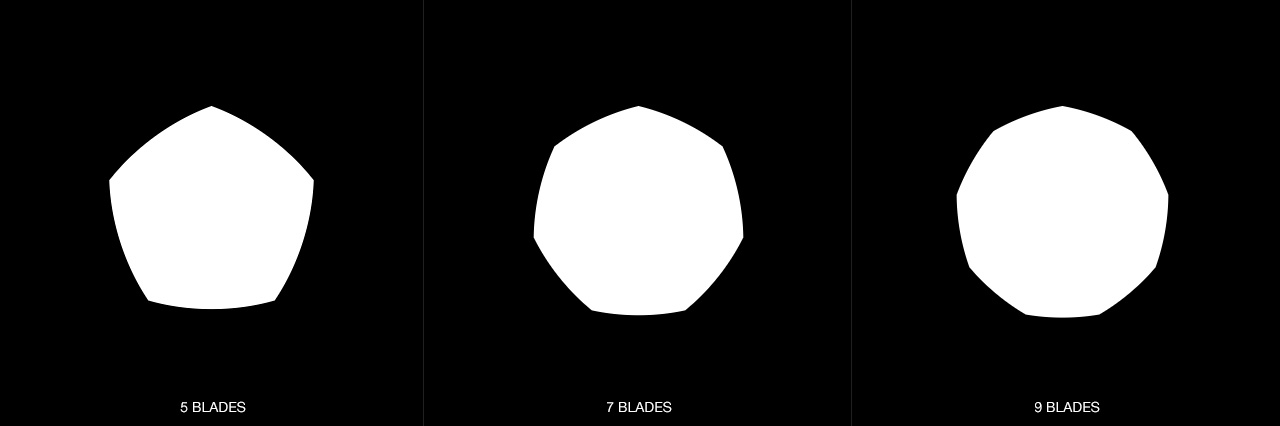
Blades: Specifies the number of aperture blades for polygonal apertures. This slider is disabled if Circular or Custom aperture is selected as aperture shape.
DOF PRO aperture blades
Blade Angle: Specifies the aperture orientation. Moving from 0 to 100 covers all orientations without multiples. For example, a value of 100 rotates a hexagon by 60 degrees. If Custom is selected, the value 0-100 will cover 360 degrees. This slider is disabled if Circular aperture is selected as aperture shape.
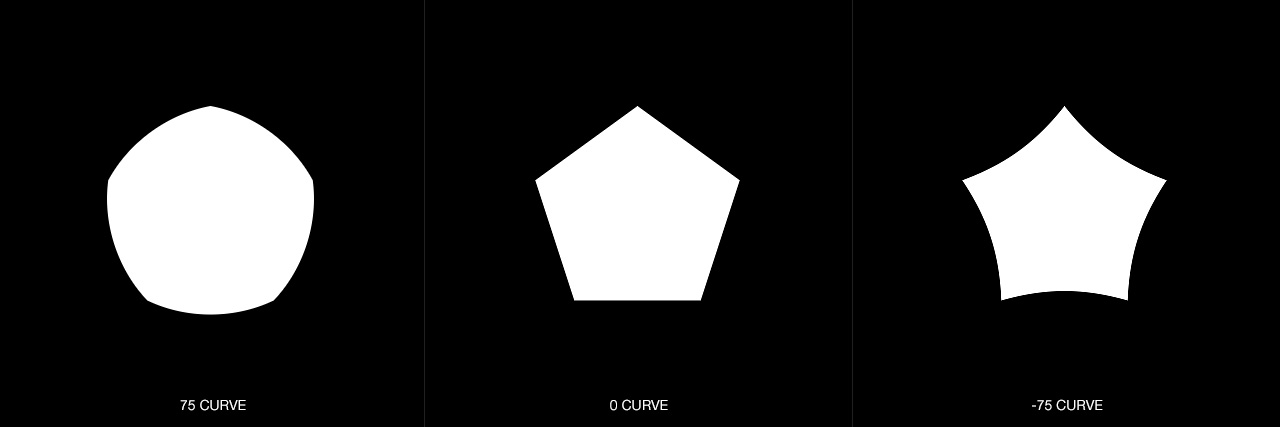
Blade Curve: Allows you to specify blade curvature. 0 corresponds to straight lines, -100 results in concave lines and 100 results in convex lines. This slider is disabled if Circular or Custom aperture is selected as aperture shape.
DOF PRO aperture curve
Notch Angle: Specifies the angle for blade notching. This slider is disabled if Circular or Custom aperture is selected as aperture shape.
DOF PRO notch angle
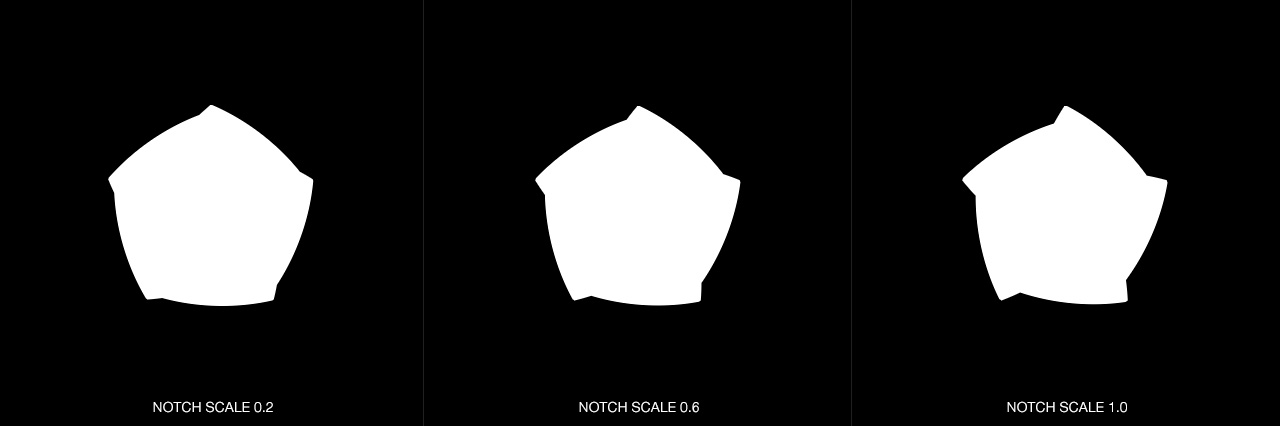
Notch Scale: Specifies the size for blade notching. This slider is disabled if Circular or Custom aperture is selected as aperture shape.
DOF PRO notch scale
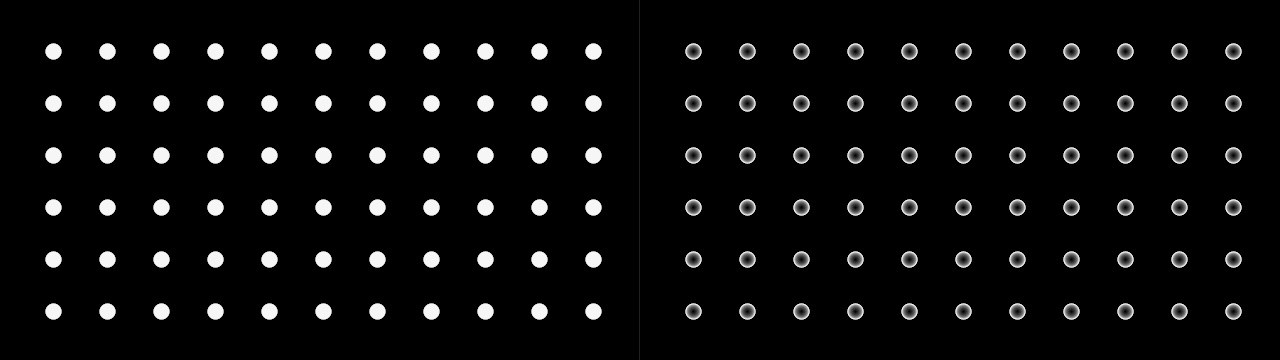
Spherical Aberration: Controls the light distribution across the aperture. Positive values will result in an over-corrected bokeh (halo effect) while negative values will result in an under-corrected bokeh (core effect). Spherical Aberration occurs when an increased refraction of light strikes the lens edge as opposed to the center.
DOF PRO spherical aberration
Spherical Aberration + | -: Factors front and back bokeh into the spherical aberration algorithm. In real optical systems, if an over-corrected bokeh appears in front of the focus plane, the inverse under-corrected bokeh will appear behind the focus plane, and vice versa. Enabling this feature will force DOF PRO to behave exactly like a real optical system. Disabling this will force DOF PRO to use the currently-specified spherical aberration for the front and back bokeh, regardless of the focus plane position.
DOF PRO example of under-corrected bokeh on the front of focal plane vs over-corrected bokeh in back of focal plane
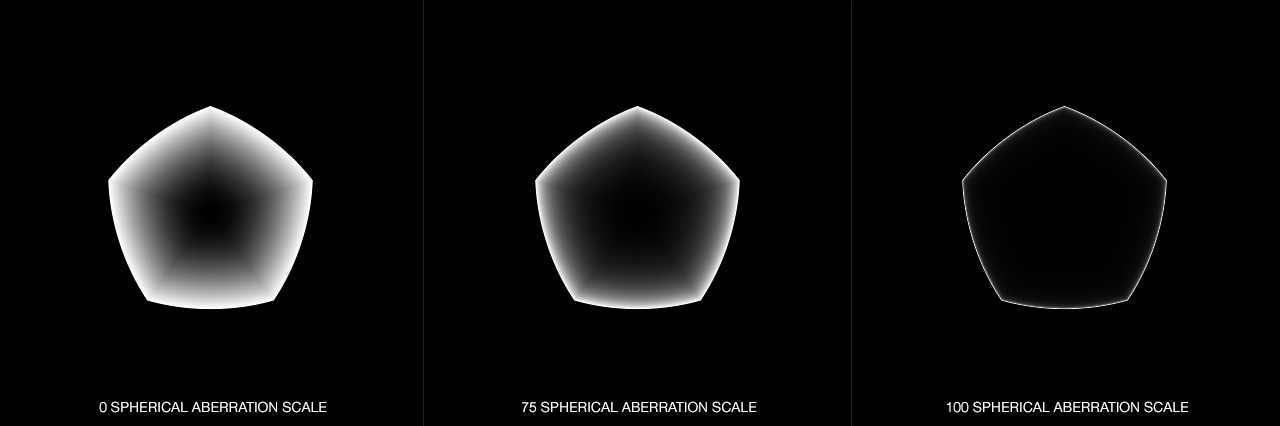
Spherical Aberration Scale: Controls the size of the spherical aberration.
DOF PRO spherical aberration scale
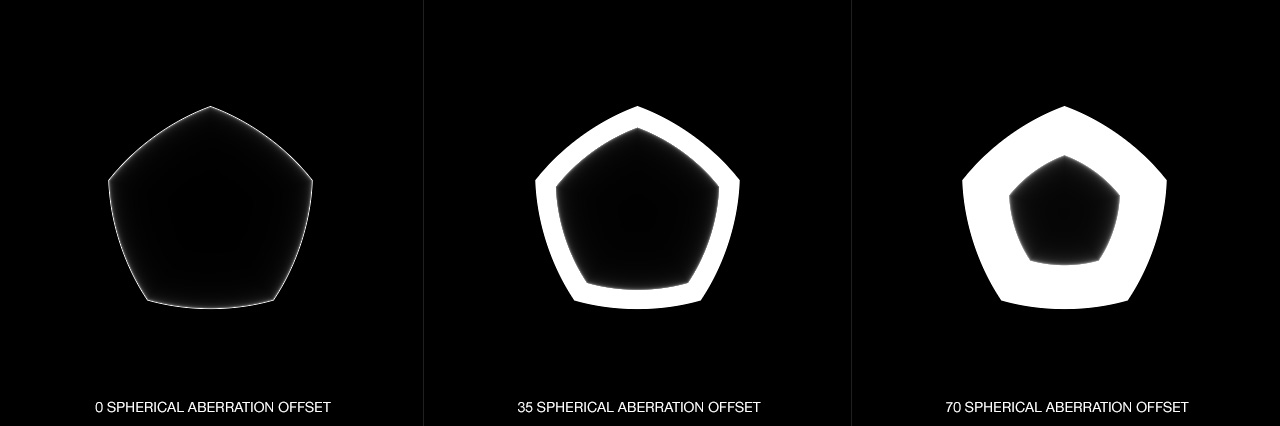
Spherical Aberration Offset: Controls the offset of the spherical aberration.
DOF PRO spherical aberration offset
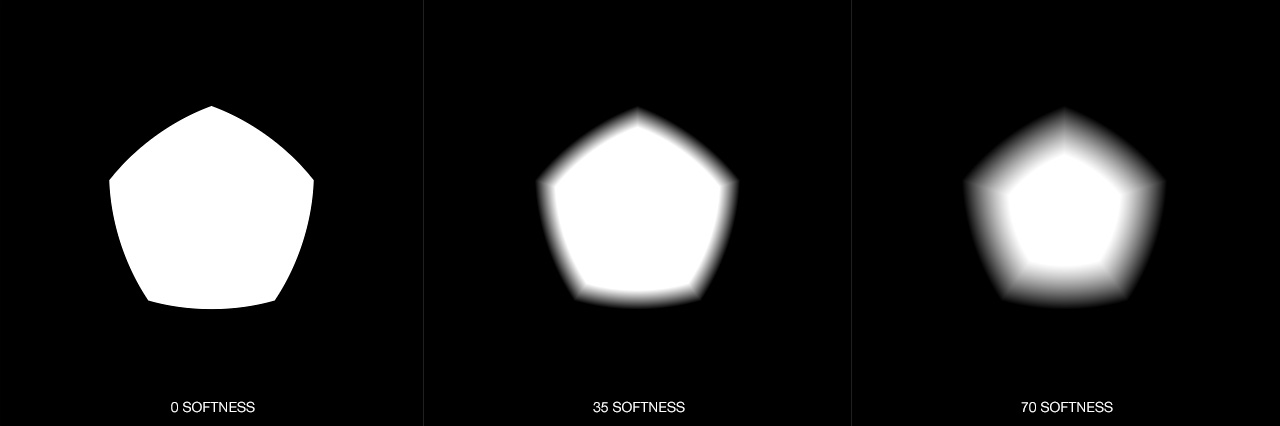
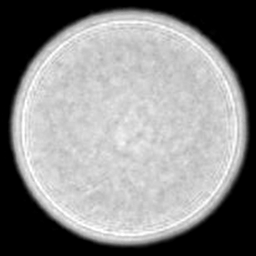
Softness: Controls the edge softness of the bokeh.
DOF PRO softness
Optical Vignetting: Controls the amount of positive or negative optical vignetting. This control effectively controls the cat’s eye occlusion. It should always be used in the positive range to mimic real-world optical vignetting caused by the lens hood. However, a negative option has also been provided for the use of Catadioptric Lenses which feature negative optical vignetting due to occlusion from the secondary mirror.
DOF PRO optical vignetting
Optical Vignetting Scale: A symmetrical Cat’s Eye bokeh only occurs when the aperture opening is relatively the same size as the lens hood. However, there are times when the scale difference between the two is substantial and this results in optical vignetting occurring only closer to the frame edge with a straighter occlusion line due to the larger occlusion object. Optical Vignetting Scale will adjust the scale of the occlusion object so as to behave correctly under these certain circumstances.
Chromatic Aberration Mode: Specifies whether to use chromatic or achromatic aberration. Chromatic aberration results from a lens’s inability to focus red, green and blue wavelengths together on a convergent point. This results in red, green and blue color fringing. Achromatic aberration focuses the red and blue wavelengths together on a convergent point. This results in magenta and green color fringing.
Left: DOF PRO chromatic aberration mode, Right: DOF PRO achromatic aberration mode
Reset: Resets the chromatic aberration parameters to default settings.
Longitudinal Chromatic / Achromatic Aberration: Specifies the amount of longitudinal chromatic / achromatic aberration. In the case of chromatic aberration, positive values will displace blue wavelengths outward and red wavelength inwards while negative values will produce the reverse. In the case of achromatic aberration, positive values will displace green wavelengths outward and red and blue wavelengths inward while negative values will produce the reverse.
DOF PRO longitudinal chromatic aberration
DOF PRO longitudinal achromatic aberration
Chromatic Aberration + | -: Factors front and back bokeh into the longitudinal chromatic aberration algorithm. In real optical systems, if a positive chromatic aberration bokeh appears in front of the focus plane, the inverse negative chromatic aberration bokeh will appear behind the focus plane, and vice versa. Enabling this feature will force DOF PRO to behave exactly like a real optical system. Disabling this will force DOF PRO to use the currently-specified chromatic aberration for the front and back bokeh, regardless of the focus plane position.
Left: DOF PRO without chromatic aberration front vs back bokeh differentiation, Right: DOF PRO with chromatic aberration front vs back bokeh differentiation
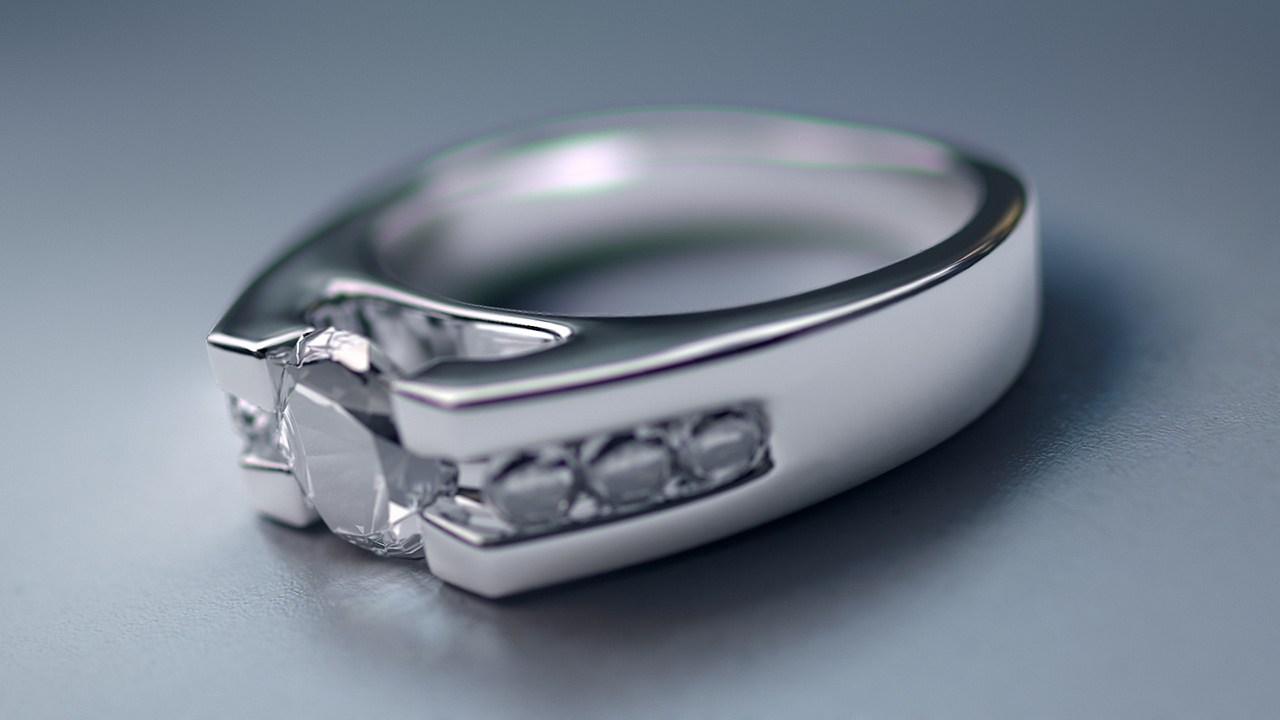
DOF PRO achromatic aberration with front vs back bokeh differentiation – Richard Rosenman (Image source: Jamesbondwatches.com)
Lateral Chromatic / Achromatic Aberration: Specifies the amount of lateral chromatic / achromatic aberration. In the case of chromatic aberration, positive values will displace blue wavelengths outward and red wavelength inwards while negative values will produce the reverse. In the case of achromatic aberration, positive values will displace green wavelengths outward and red and blue wavelengths inward while negative values will produce the reverse.
DOF PRO Lateral chromatic aberration
DOF PRO lateral achromatic aberration
Catadioptric Lens: Forces DOF PRO to behave similarly to a catadioptric (mirror, reflex) lens. Catadioptric lenses use mirrors to reduce physical size but due to the secondary mirror, donut-shaped bokeh are produced. Negative optical vignetting should be used when using the catadioptric lens so as to simulate real-world secondary mirror occlusion.
DOF PRO catadioptric lens
Catadioptric Lens Scale: Adjusts the catadioptric lens secondary mirror size.
DOF PRO catadioptric lens secondary mirror scale
Richard Rosenman
Highlights
This control group deals with highlight management. Highlights are the single most important component in producing beautiful, sophisticated and realistic depth of field. Due to the limited dynamic range of the image, highlights are usually clipped as a trade-off to a reasonable overall exposure. When highlights are out of focus, this truncated light intensity may be restored using these tools as the light is distributed over a larger area.
When working with highlights, set the display drop-down from Rendered to Processed Highlights. This will render the highlight against black resulting in clearer display better suited for fine-tuning.
Bokeh effects work best on small, bright highlights. If the highlight is too large, the bokeh effect will get lost within it and it will not be as clearly visible. To enhance the bokeh effects, work with the Enhancement tool by adjusting the Lower Threshold, Upper Threshold and Enhancement settings until you achieve the desired result. Be careful when increasing the Enhancement controller as values too high can result in aliased highlights.
Left: DOF PRO without highlight enhancement, Right: DOF PRO with highlight enhancement – Wallpapersafari.com
Lower Threshold: Determines the lower threshold for onset of highlights. Image areas with brightness values between the lower and upper thresholds will be enhanced in order to restore their original (unclipped) brightness. When using 32 bit color depth (floating point), values larger than 255 (100% brightness) are permitted. As a result, this slider allows larger values than 255 (100% brightness) so as to be able to select floating point values greater than 1.0.
Upper Threshold: Determines the upper threshold for onset of highlights. Image areas with brightness values between the lower and upper thresholds will be enhanced in order to restore their original (unclipped) brightness. When using 32 bit color depth (floating point), values larger than 255 (100% brightness) are permitted. As a result, this slider allows larger values than 255 (100% brightness) so as to be able to select floating point values greater than 1.0.
DOF PRO highlight threshold controls the onset for highlight enhancement
Softness: Softens the selection relative to the brightest value.
Saturation: Controls the amount of saturation enhancement.
Enhancement: Controls the amount of enhancement. Careful adjustment is recommended, as too high values will result in white and aliased highlights.
DOF PRO highlight enhancement
Tint Color: Specifies a highlight tint color. This may be useful to restore color information which has been clipped away in the image. The default color is set to white which contains the original highlight color information.
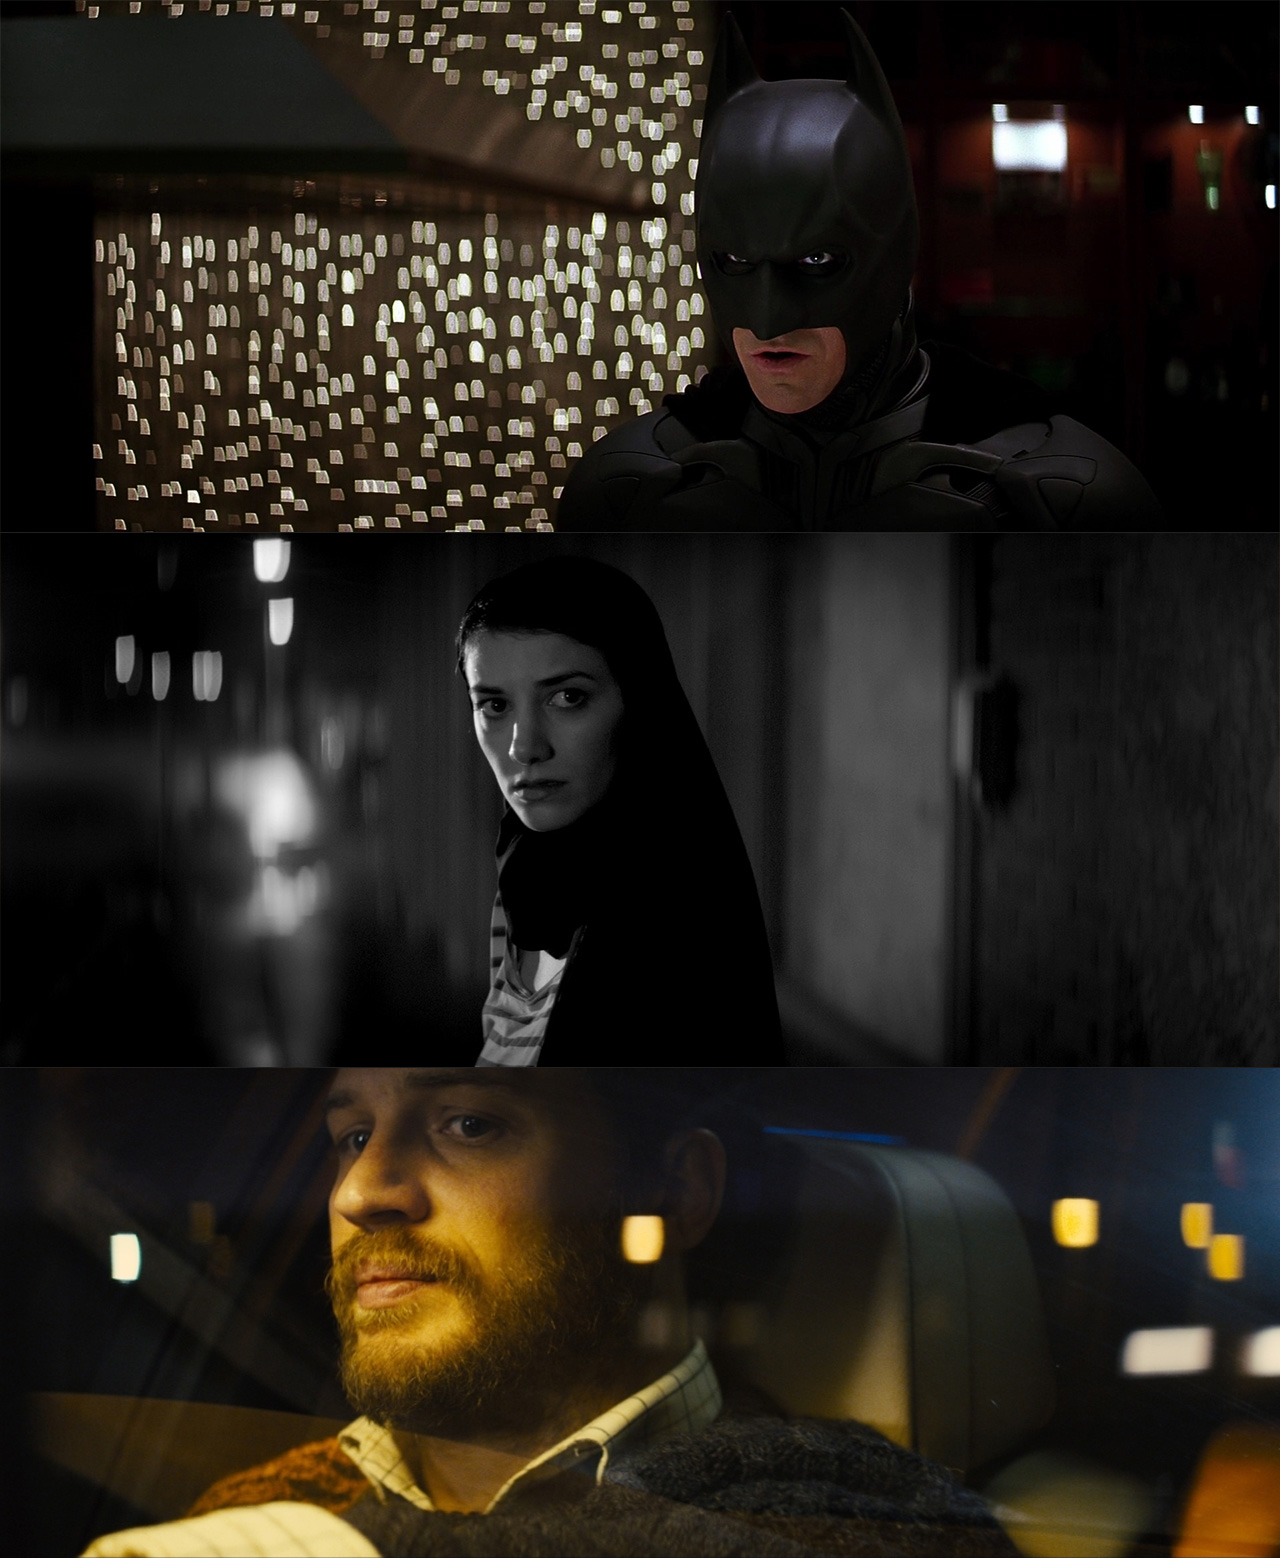
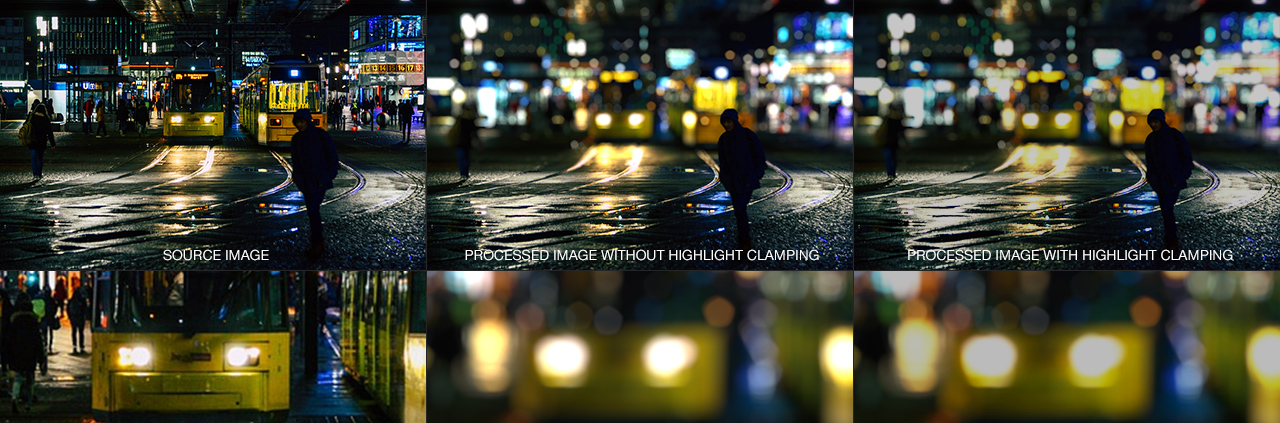
When multiple highlights become defocused and overlap they can quickly overexpose to white. This is true in both real-world and computer-generated depth of field. However, there are many factors that can decrease the exposure of the bokeh including F-Stop, camera exposure, and post-processing. A bokeh intensity should never be brighter than the overall image exposure. Below are various examples of real-world depth of field where the bokeh intensity doesn’t reach 100% brightness.
Real-world highlight exposure – Pixabay & Pexels
To achieve this effect, highlights can be enhanced in DOF PRO and then clamped using any standard curves tool available in most graphics applications. The example below shows the original image on the left, the DOF PRO processed image in the middle with enhanced highlights, and the clamped highlights image on the right processed with Photoshop curves. The result is more natural looking highlights for some instances.
Highlight Clamping – Pixabay
Hatch Studios
Aperture Texture
DOF PRO provides a unique feature that allows the use of custom aperture maps as aperture textures. This allows for ultra-realistic bokeh rendering and can easily mimic dirt on the front and rear camera element, a side-effect often revealed in bokeh.
DOF PRO aperture textures allow the use of any image to be used as a bokeh texture
DOF PRO can use any After Effects layer as an aperture texture. Aperture textures are converted to grayscale maps since the illumination of them depends on the source image highlight colors, not the texture itself.
DOF PRO uses bilinear filtering as its default algorithm for all aperture texture transformations, so as to provide speed. However, none of the conventional filtering algorithms will produce acceptable results when performing significant scaling transformations to any image. If an aperture texture has a resolution of 1080×1080 and the largest target bokeh size will be 10 pixels, that is a 99% scale reduction. In cases like these, box filtering is the only algorithm that produces a good results but it is extremely slow.
When such significant scaling transformations occur, aliasing may become visible. The greater the scale ratio, the more likely aliasing will occur. As a result, there are steps a user can take so as to minimize the degree of aliasing. By performing a simple blur operation beforehand on the aperture texture, we can produce the same effect as a box filter. The greater the degree of scale, the greater the amount of blur to be applied. Below is an exaggerated but helpful example.
In the upper row we see the original aperture texture, followed by the same one unfiltered. The reduced aperture texture shows slight aliasing in the bokeh. In the lower row, we see the original aperture texture, followed by the same one with a blur filter applied to it. The reduced aperture texture now displays correctly and without signs of aliasing. The closer in size the aperture texture is to the resulting bokeh size, the less likely aliasing will occur.
DOF PRO aperture texture filtering
Aperture Texture Layer: Enables and specifies which aperture texture to use.
Invert: Inverts the aperture texture. The aperture texture, when composited on the bokeh, should be predominantly white with dark details, not the other way around.
Intensity: Specifies the intensity of the aperture texture.
Scale: Specifies the scale of the aperture texture. Due to the extreme downscaling of the aperture texture to fit within a small bokeh, aliasing may present itself. The scaling feature can be used to scale the texture up so as to view details clearly and minimize aliasing.
Offset: Offsets the texture according to on-screen bokeh position much like a real camera does.
Left: DOF PRO Aperture Texture without offsetting, Right: DOF PRO Aperture Texture with offsetting
Richard Rosenman
Matte Box
DOF PRO offers a new matte box feature. A matte box is a device used on the end of a lens to block the sun or other light source in order to prevent glare and lens flare. It performs essentially the same function as a lens hood and also mounts in front of the lens, but usually includes adjustable fins called French flags.
Left: Example of a matte box with fins (french flags)
Left: Real-world left fin matte box influence on lights, Right: Real-world bottom fin matte box influence on lights
Although matte boxes don’t typically affect the recorded image, they produce a particular effect on bokeh which results in an increasingly noticeable clipping, depending on which fins are being used. In extreme cases of depth of field, the camera’s own mirror box has even been known to produce this effect.
Left: DOF PRO left & right matte box flags, Right: DOF PRO top & bottom matte box flags
Top: Controls the top matte box fin visibility.
Bottom: Controls the bottom matte box fin visibility.
Left: Controls the left matte box fin visibility.
Right: Controls the right matte box fin visibility.
Noise
DOF PRO supports an extremely powerful noise rendering engine. This engine offers the capability to reintroduce crucial lost noise in the defocused areas.
Real depth of field is unaffected by noise. Defocused areas will maintain the same amount of noise as focused areas. As a result, digitally defocused areas must also retain their original noise levels in order to present a realistic result. Since defocusing is performed by complex focus map levels, it is impossible to manually reintroduce noise. DOF PRO’s noise engine uses the focus map to accurately reintroduce noise where the defocusing process has removed it.
Animated: Specifies randomized noise generation for each frame.
Monochromatic: Specifies monochromatic noise. Otherwise red, green and blue channels will each receive independent noise.
Left: DOF PRO monochromatic noise, Right: DOF PRO RGB noise
Luma Distribution: Specifies how to distribute the noise according to light values. The following options are available:
Uniform: Applies the same amount of noise to each pixel.
Photometric: Applies more noise to darker pixels than to brighter pixels. This resembles the behavior of digital camera sensors.
Map Distribution: Specifies how to distribute the noise according to the depth map. The following options are available:
Fixed: Generates spatially-independent noise.
Focus Map: Yields Focus Map controlled noise, i.e. no noise in focus area, with gradually increasing noise for out-of-focus regions.
Blur Amount: Similar but not identical to the Focus Map option. Use the Blur Amount mode to recover noise lost by defocus amount.
Left: DOF PRO uniform noise, Right: DOF PRO photometric noise
Left: DOF PRO noise by focus map, Right: DOF PRO noise by blur amount
Amount: Specifies the amount of noise to reintroduce.
Tint Color: Provides an option to add colored noise.
Hatch Studios
Changelog
v1.0 – First release.
v1.0.1 – Fixed a bug that on some systems, interrupting the current render by moving to another frame or changing parameters prematurely could result in a crash.
v1.1 – Multi-Frame Rendering (MFR) support.
v1.2 – Fixed missing request code & description in After Effects v26+.
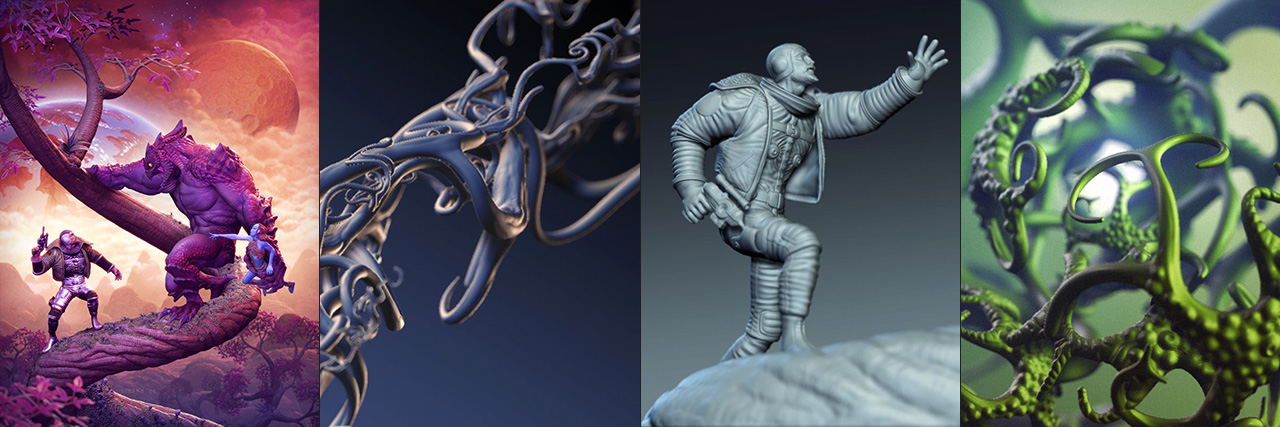
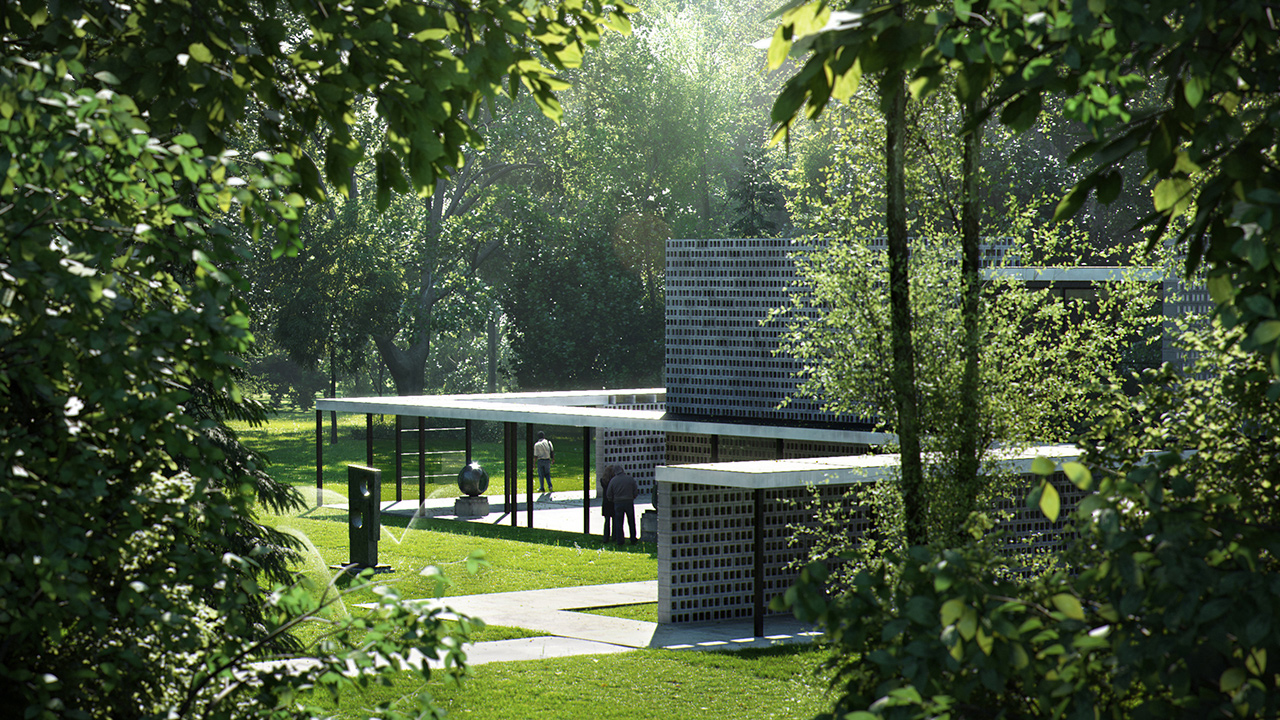
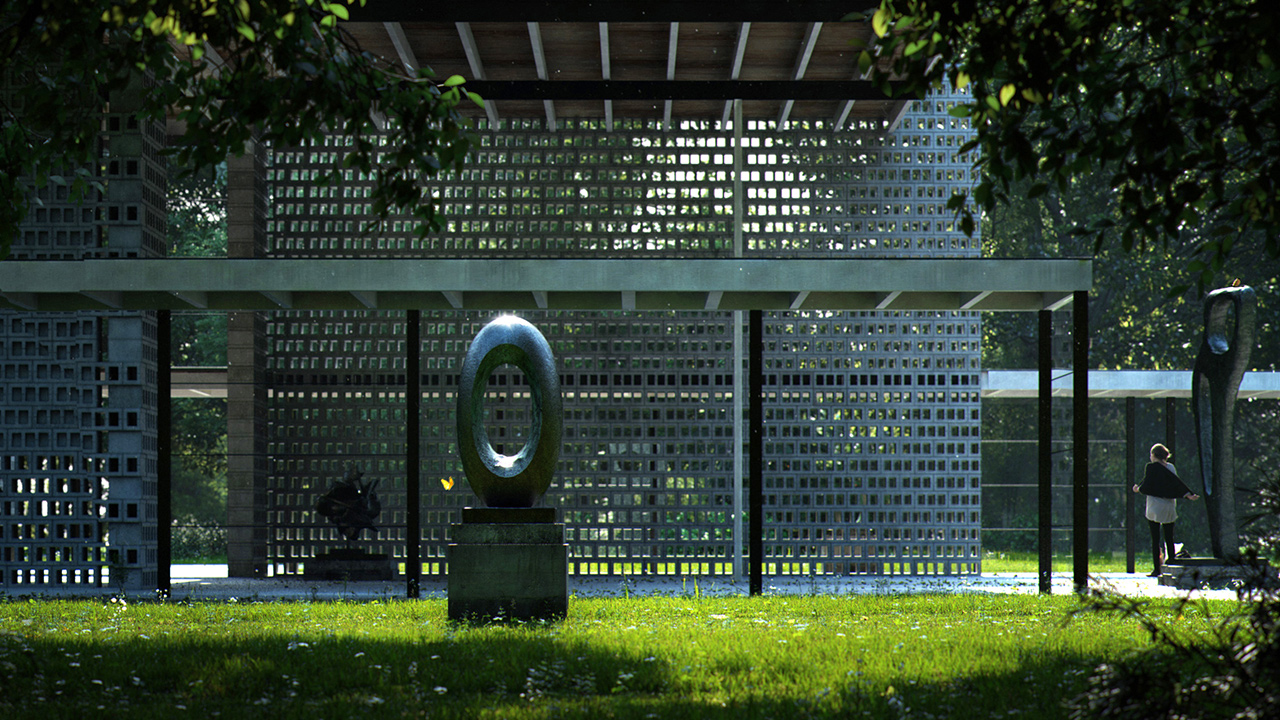
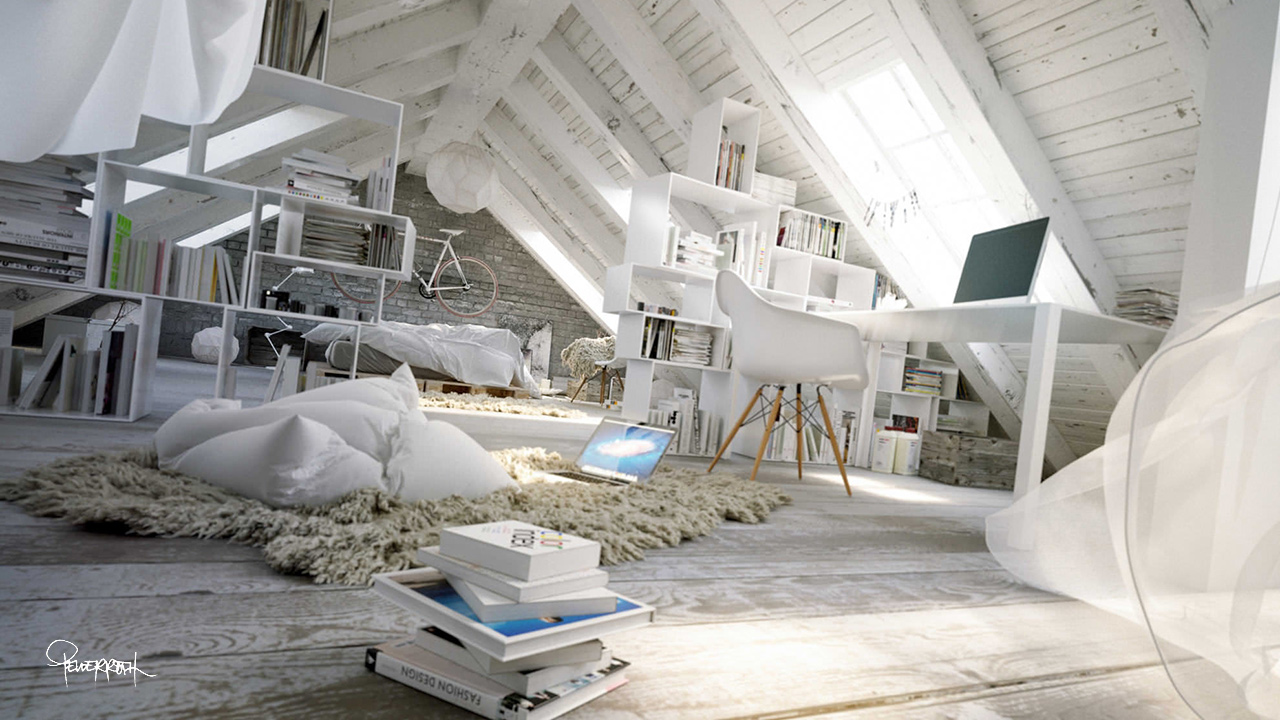
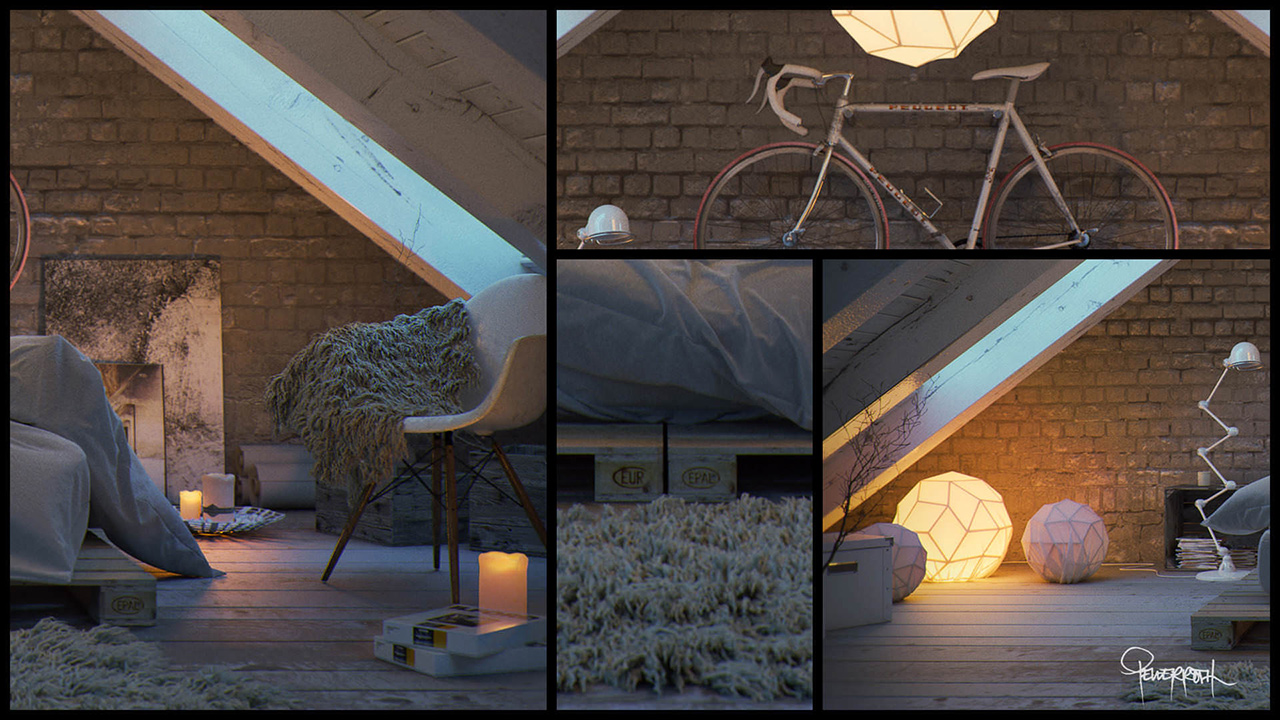
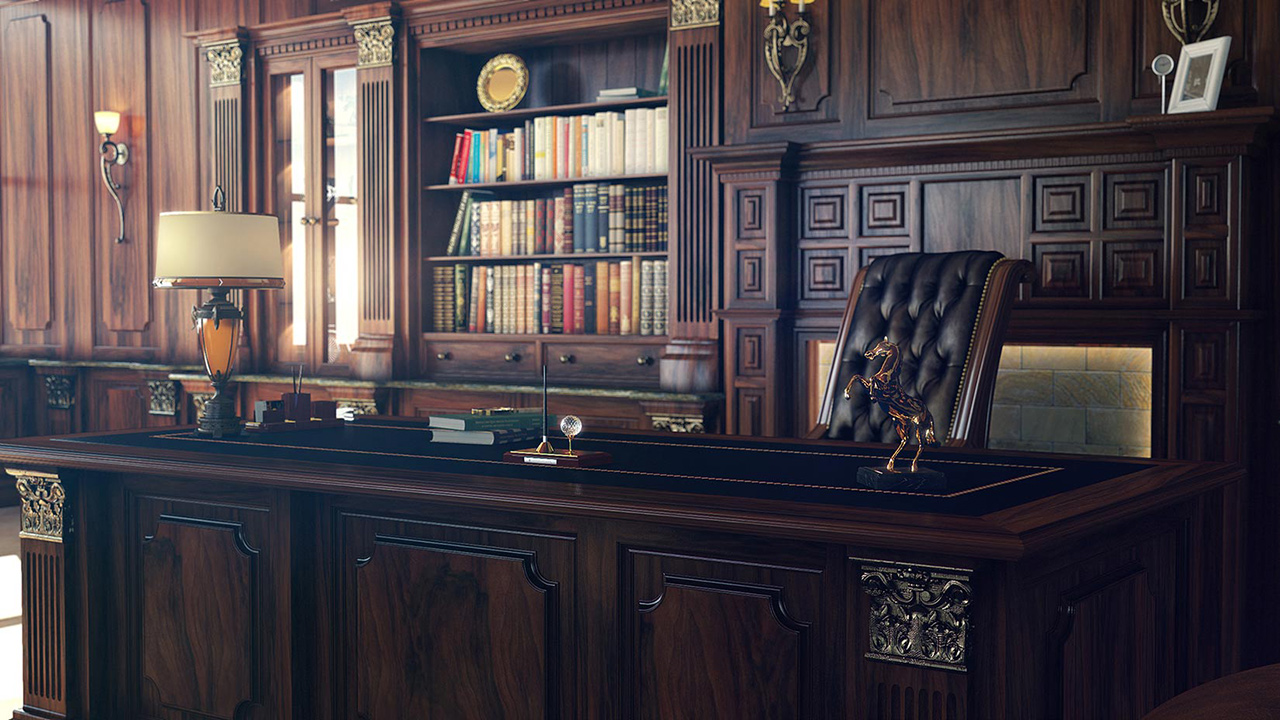
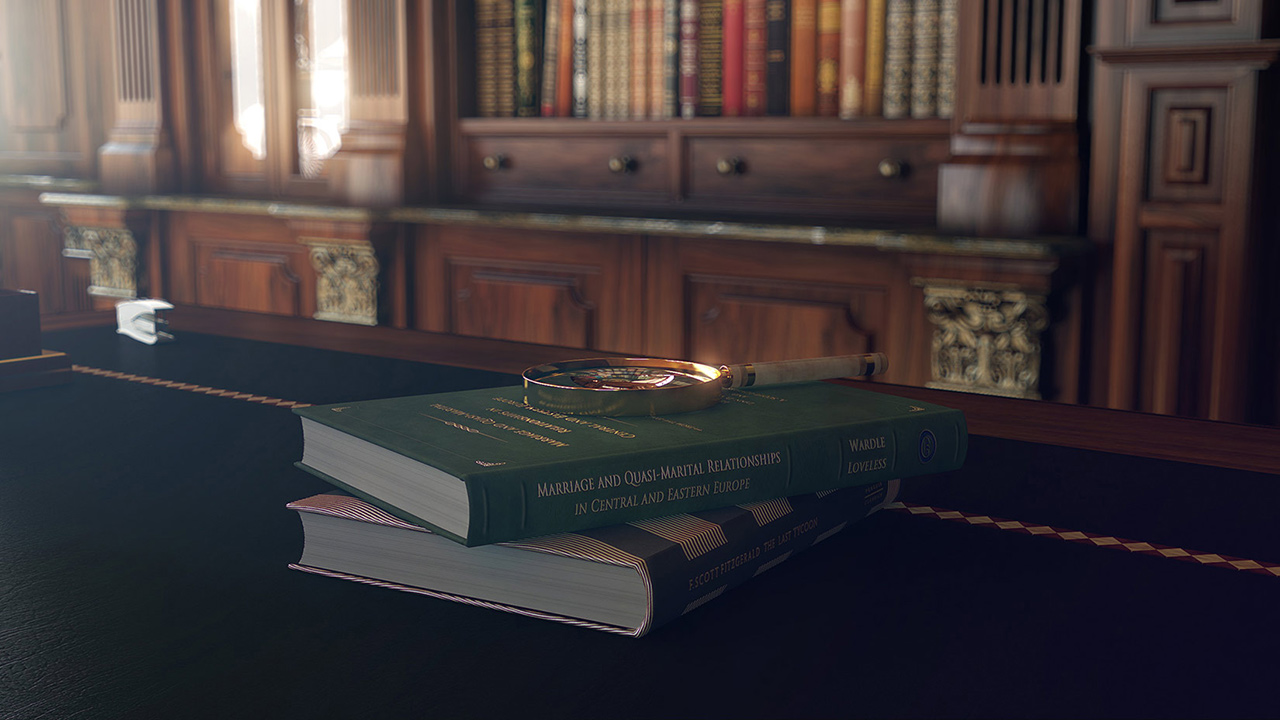
This section focuses on 3D computer generated imagery with depth of field generated using DOF PRO. In most cases, a computer generated depth map will have been used to calculate the depth of field. Enjoy browsing through the gallery of insanely talented artists and designers and if you would like to submit your won DOF PRO work, please email it.
Got any high-quality work created with DOF PRO? We are currently updating the galleries so please email us your work to have it featured!
This section focuses on 2D photographic imagery with depth of field generated using DOF PRO. In most cases, DOF PRO’s linear and gradient tools were used for the depth of field calculation. None of these images had any depth of field in their starting form and the originals can be seen by clicking on the credit information.
Got any high-quality work created with DOF PRO? We are currently updating the galleries so please email us your work to have it featured!
The following table compares DOF PRO’s features to those of After Effects CS6 and its Camera Lens Blur filter.
FEATURES
DOF PRO
Lens Blur
Display Rendered
X
X
Display Depth Map
X
Display Focus Map
X
Display Iris
X
Display Iris Array
X
Display Selected Highlights
X
Display Processed Highlights
X
Gamma Correction
X
X
Depth Map Layer Selection
X
X
Depth Map Channel Selection
X
X
Depth Map Inversion
X
X
Depth Map Focus
X
X
Depth Map Set Focus
X
Depth Map Curve
X
Depth Map Blackpoint
X
Depth Map Whitepoint
X
Depth Map Placement
X
Aperture Shapes
X
X
Circular Aperture Shape
X
Polygonal Aperture Shape
X
X
Notched Aperture Shape
X
Custom Aperture Shape
X
Custom Aperture Shape Chromatic Aberration
X
Custom Aperture Shape Achromatic Aberration
X
Aspect Ratio
X
X
Aperture Size
X
X
Aperture Blades
3-16
3-10
Aperture Angle
X
X
Aperture Curvature
X
X
Aperture Blade Notching Angle
X
Aperture Blade Notching Scale
X
Aperture Spherical Aberration
X
Positive Only
Aperture Spherical Aberration Scale
X
Aperture Spherical Aberration Offset
X
Front vs Back Spherical Aberration Differentiation
X
Aperture Softness
X
Aperture Optical Vignetting (Cat’s Eye)
X
Aperture Optical Vignetting Scale
X
Aperture Astigmatism
X
Aperture Chromatic / Achromatic Mode
X
Aperture Longitudinal Chromatic Aberration
X
Aperture Lateral Chromatic Aberration
X
Aperture Longitudinal Achromatic Aberration
X
Aperture Lateral Achromatic Aberration
X
Front vs Back Chromatic Aberration Differentiation
X
Front vs Back Achromatic Aberration Differentiation
X
Catadioptric Lens
X
Catadioptric Lens Scale
X
Highlight Adjustment
X
X
Highlight Lower Threshold
X
X
Highlight Upper Threshold
X
Highlight Saturation
X
X
Highlight Tint
X
Highlight Enhancement
X
X
Highlight Edge Behavior
X
Aperture Textures
X
Aperture Texture Layer Selection
X
Aperture Texture Inversion
X
Aperture Texture Intensity
X
Aperture Texture Scale
X
Aperture Texture Offset
X
Aperture Texture Chromatic Aberration
X
Aperture Texture Achromatic Aberration
X
Matte Box
X
Noise Recovery
X
Animated Noise
X
Static Noise
X
Color Noise
X
Monochromatic Noise
X
Photometric Noise
X
Noise by Focus Map
X
Noise by Blur Amount
X
Noise Tinting
X
Quality Comparison
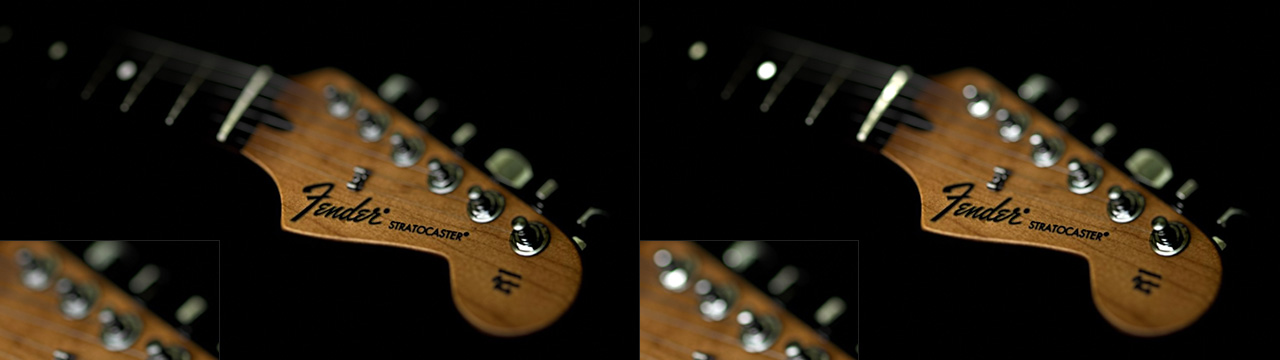
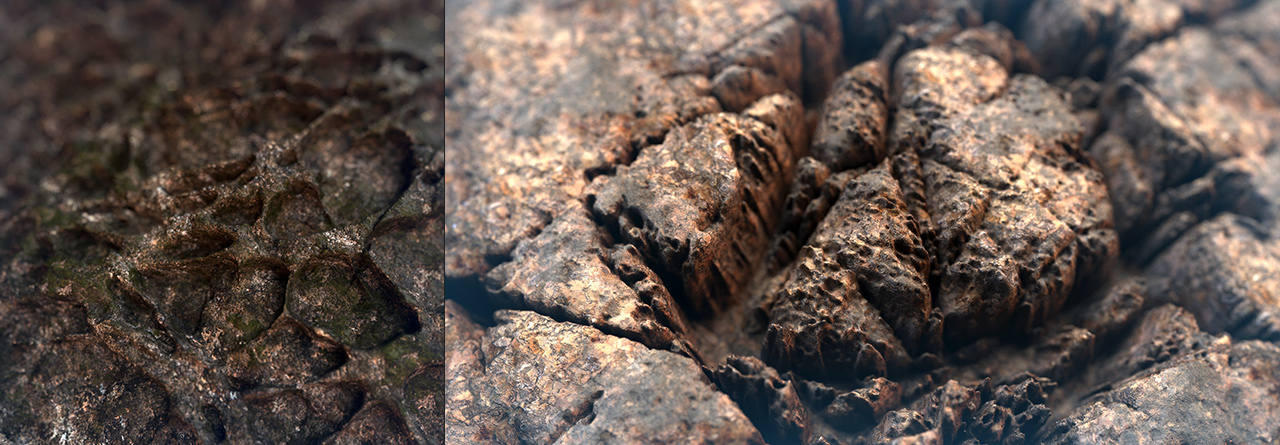
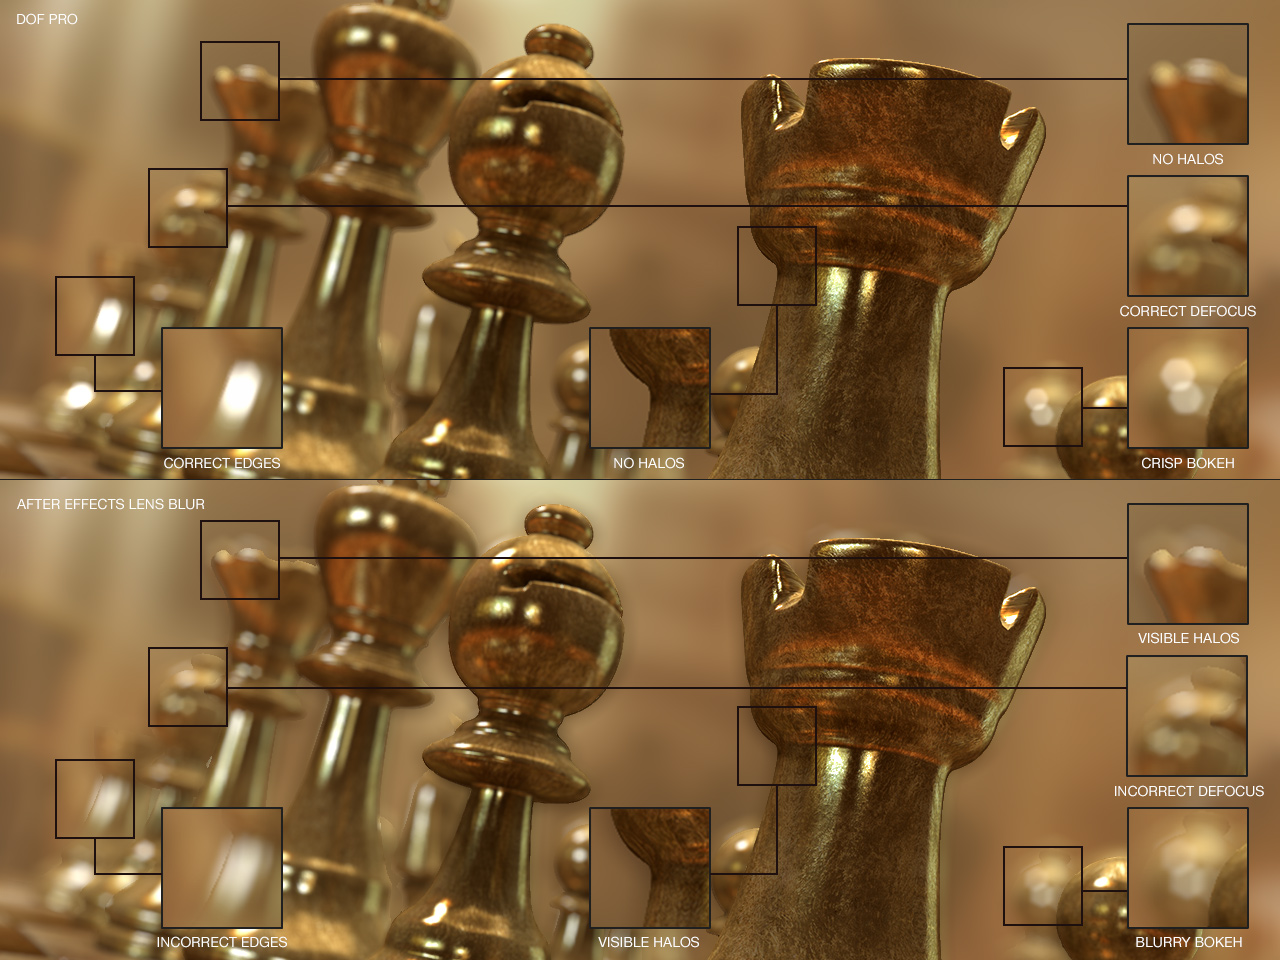
Despite DOF PRO’s massive featureset, the real difference shines through in quality. After Effects’ Lens Blur suffers from some very serious deficiencies including blurry bokeh, dim bokeh, incorrect defocusing and aliased artefacts. In both cases the highlights were enhanced but After Effects’ remained blurry. Lens Blur also produced some very prominent halos. The following is a detailed comparison in output between DOF PRO and Lens Blur.
Top: DOF PRO, Bottom: Lens Blur
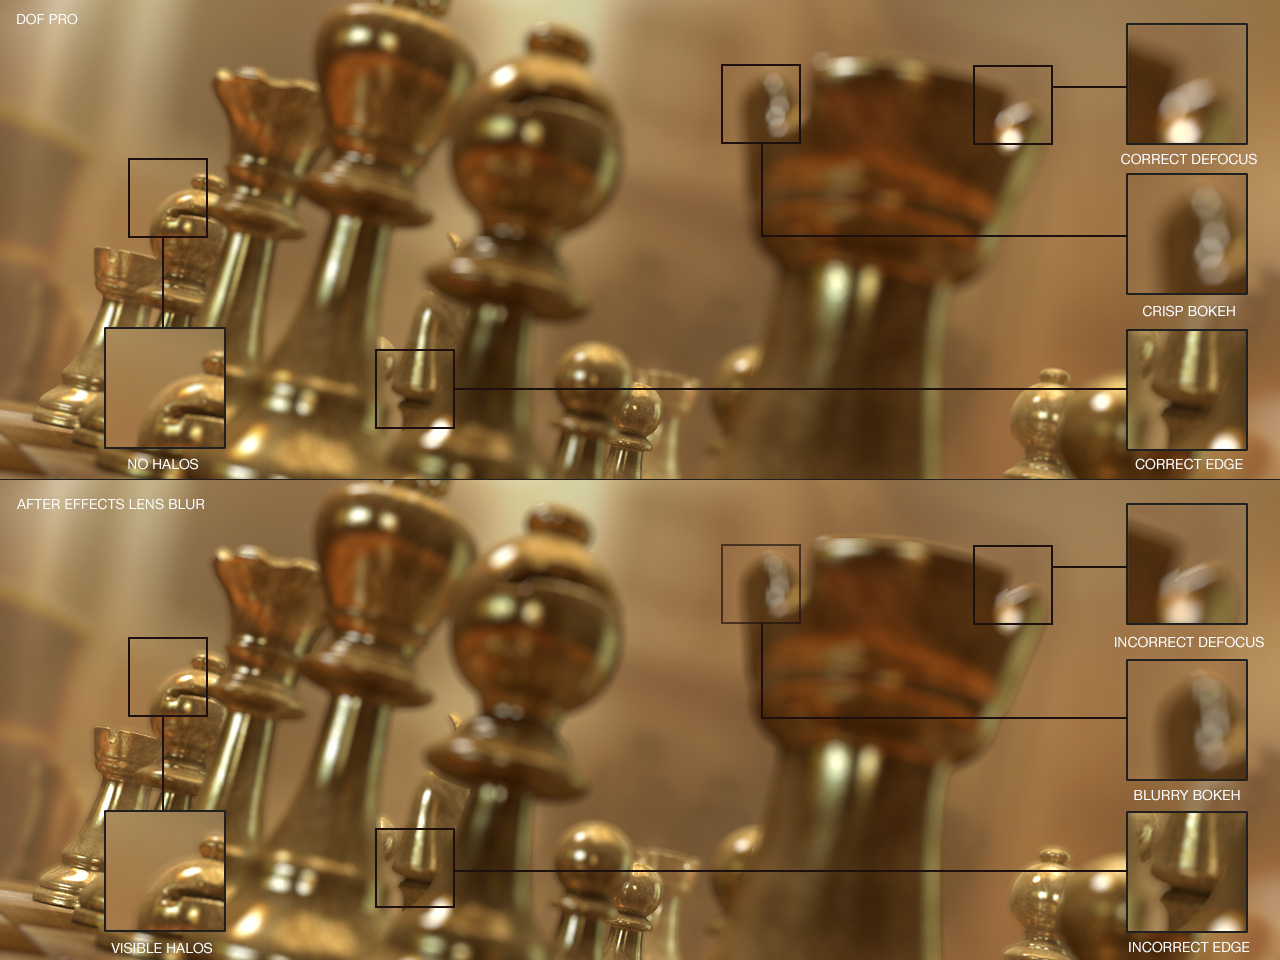
Possibly the most significant difference is when the focus shift is changed to something other than default. In such cases, Photoshop’s Lens Blur filter completely falls apart producing totally incorrect results. Foreground objects that should be defocused are affected only within the depth map boundaries thereby revealing a sharp edge and producing extremely unrealistic results.
Top: DOF PRO, Bottom: Lens Blur
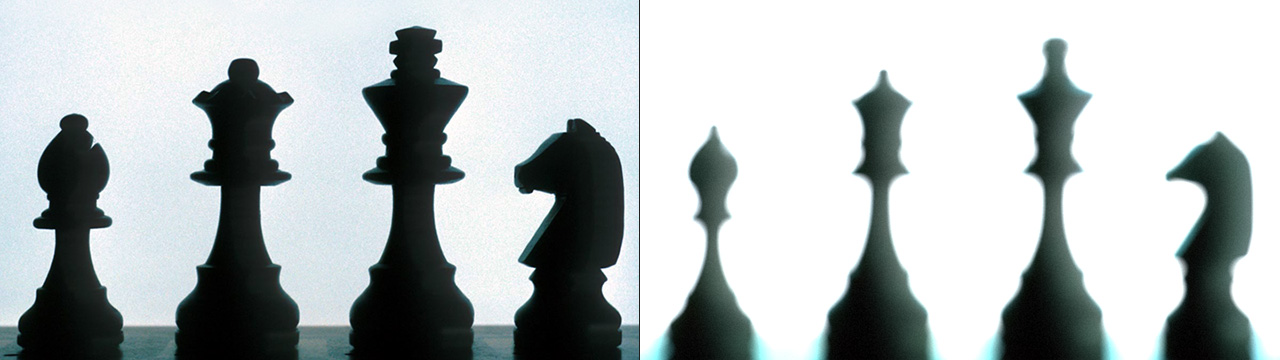
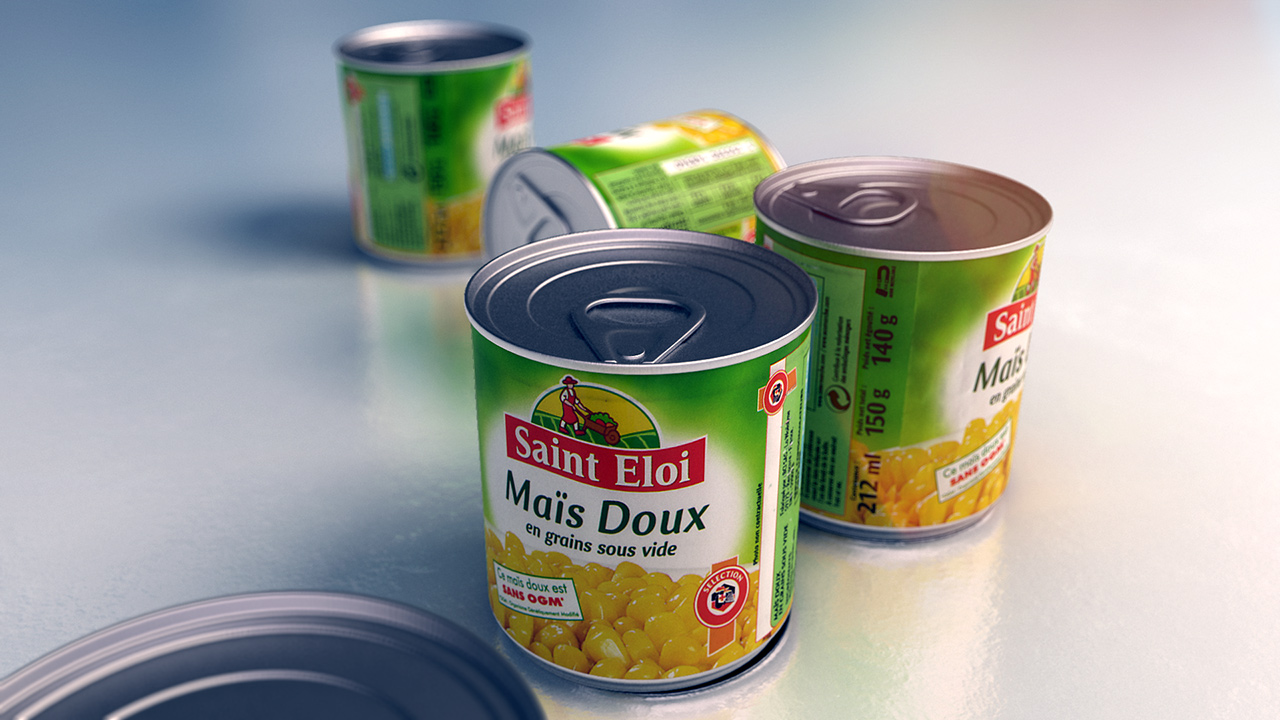
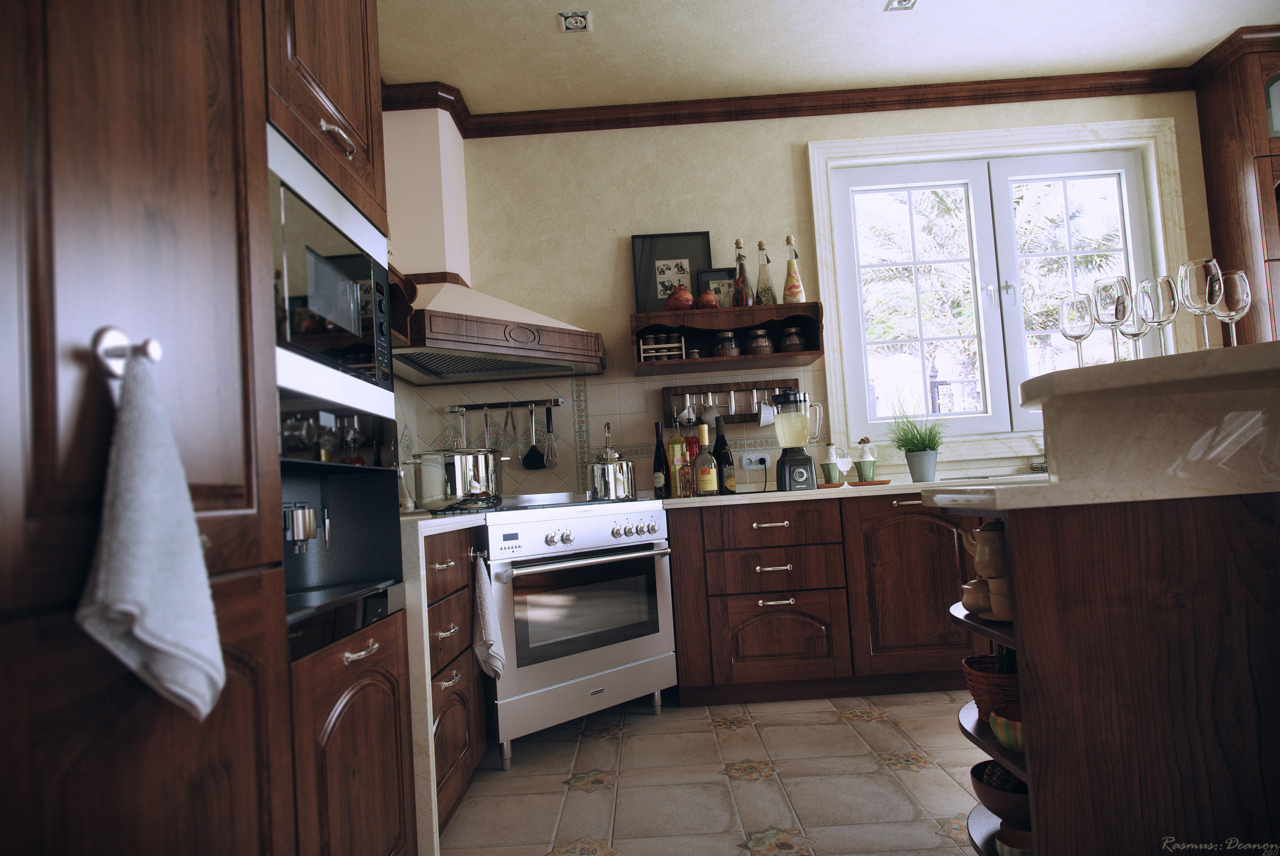
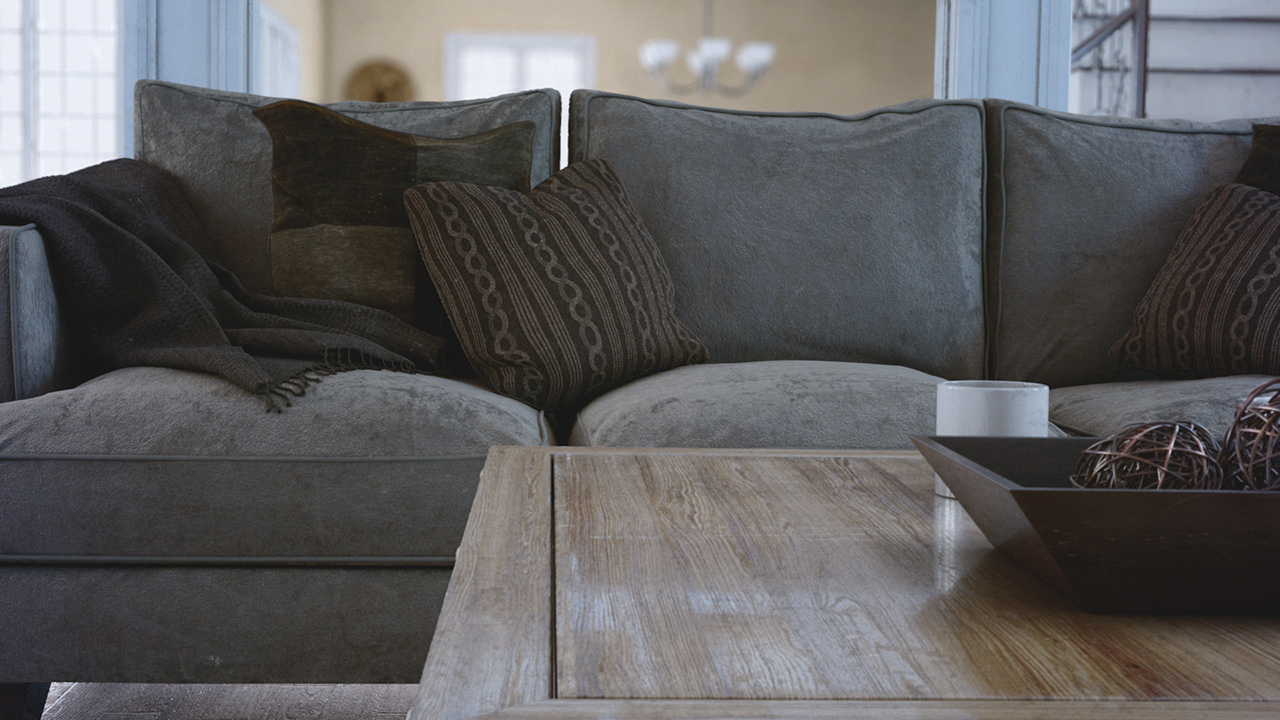
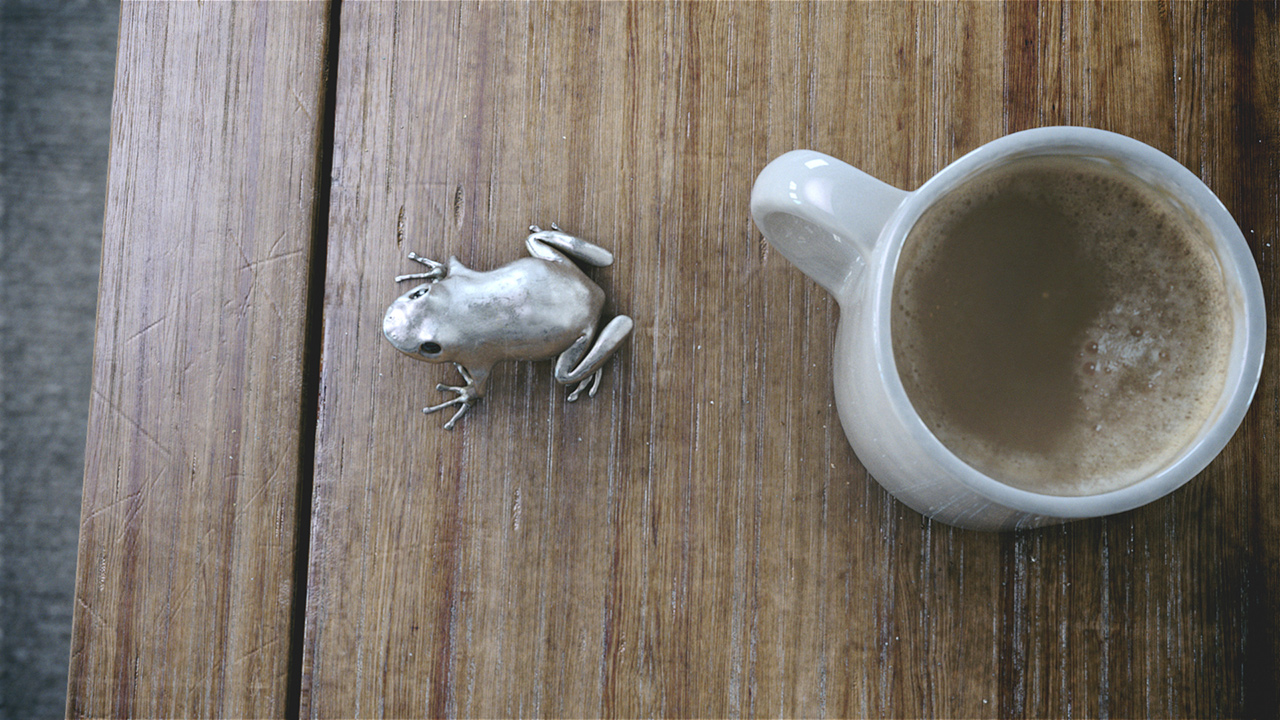
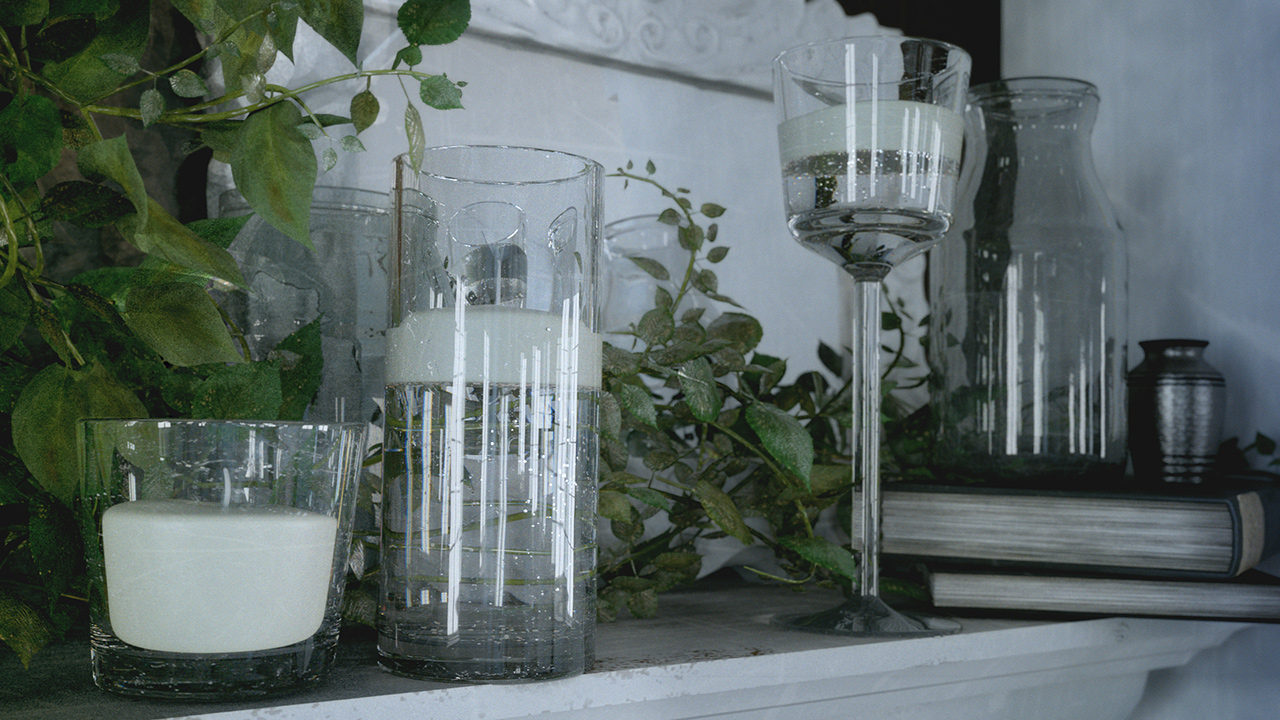
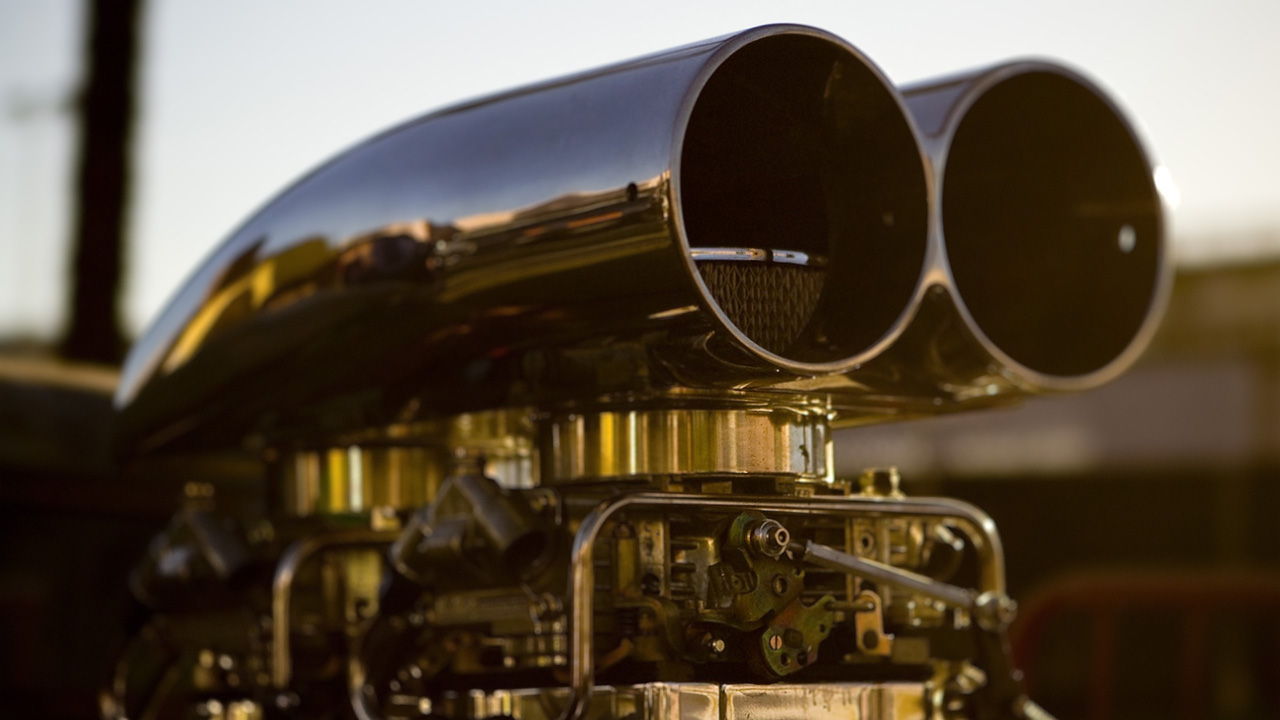
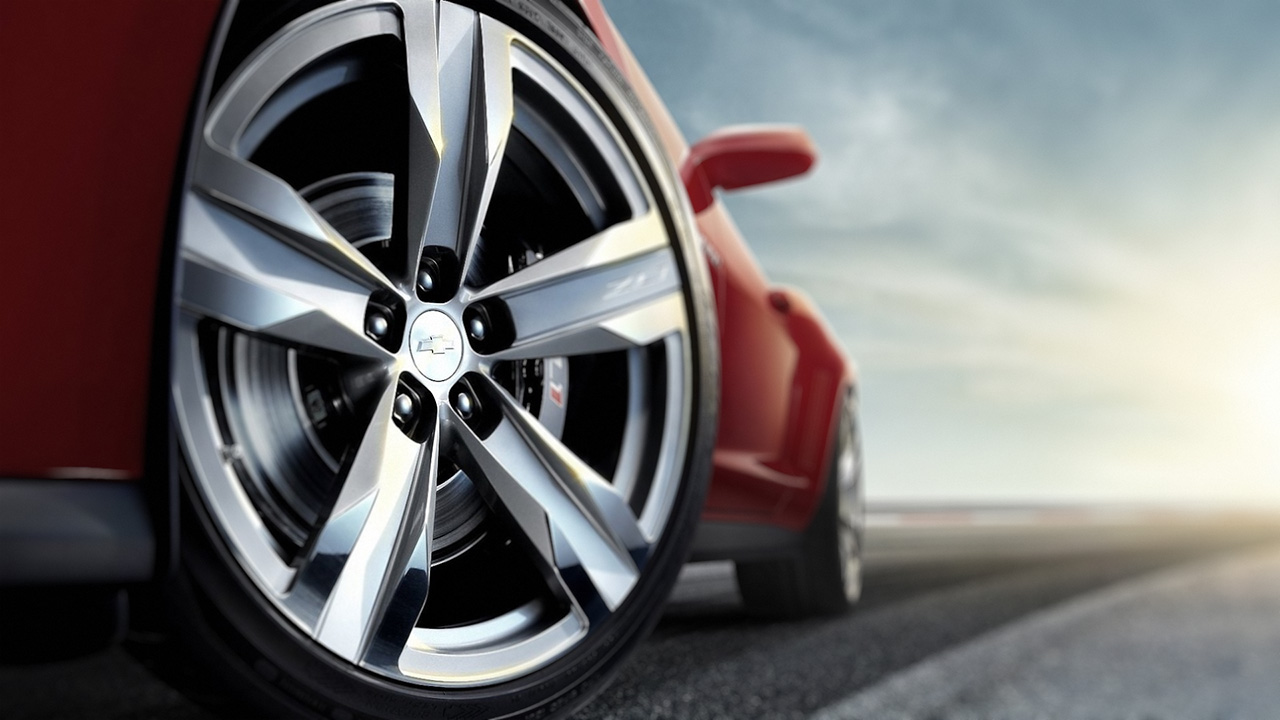
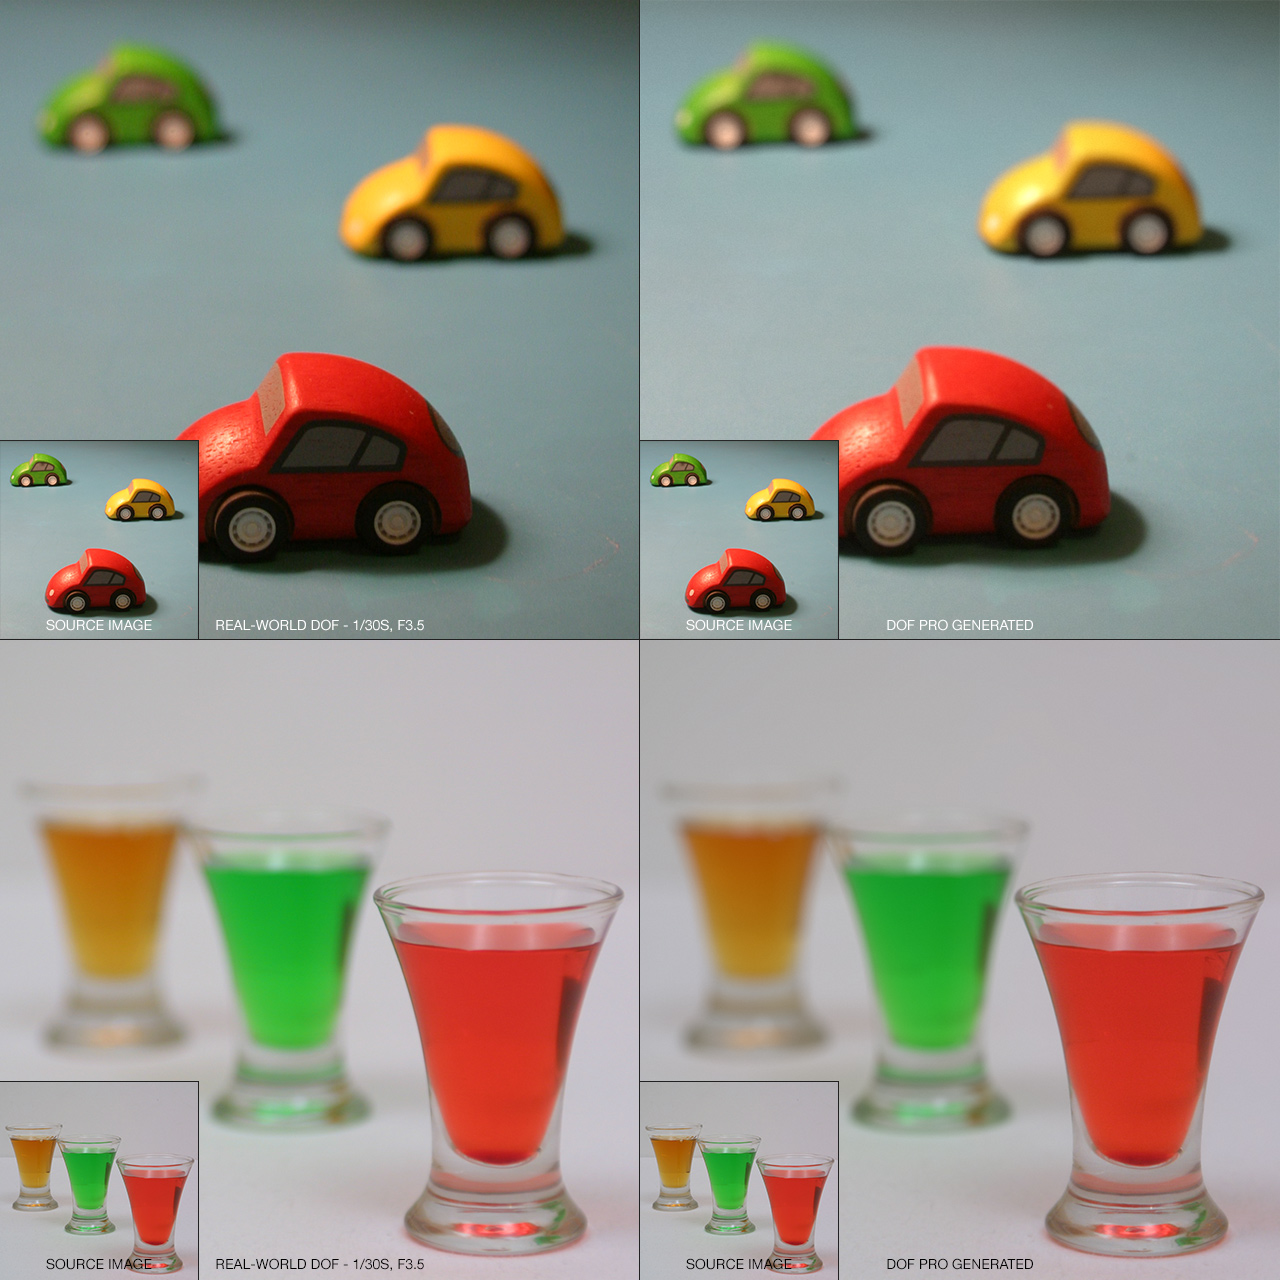
The following image is a direct comparison between DOF PRO and real-world depth of field. In the case of the cars, the built-in linear gradient was used and in the case of the glasses, a depth map was created. The results are virtually identical, highlighting DOF PRO’s photorealistic output.
The following aperture map library has been developed exclusively for DOF PRO customers. If you are a DOF PRO customer and wish to use these, simply right-click on any aperture map and save it to your computer. Please review the terms and conditions.
The following videos provide tutorials for DOF PRO for After Effects.
Installing this software is easy and only requires three simple steps:
1 – Download the software by clicking on the Download Demo button located above on the software page. This will prompt you to save a .zip file on your computer.
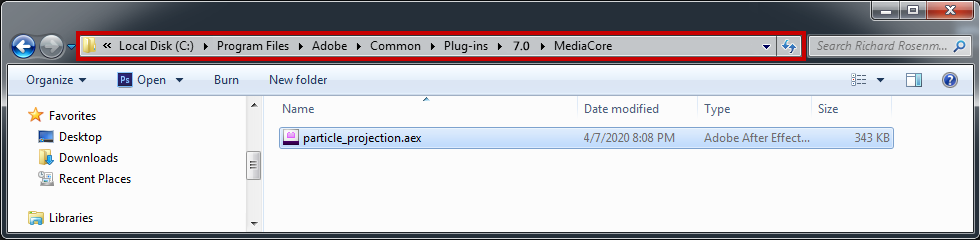
2 – Extract the contents from the .zip file and place the .aex file into your host’s plugin folder. For all Adobe After Effects versions CS6 and higher, this folder is the MediaCore folder. Place the .aex file into the location shown below. You can make a sub-folder to keep your plugins organized.
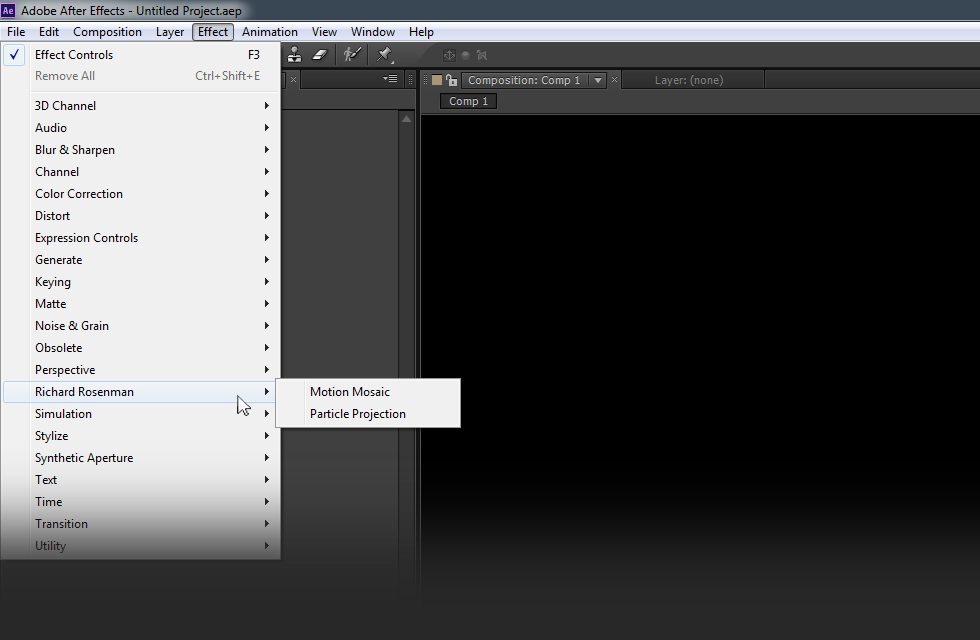
3 – Launch Adobe After Effects, create a new composition, add a new solid, and click on Effect > Richard Rosenman > Effect Name.
If you have purchased a commercial license, please review the activation section.
If you have purchased a commercial license, you must activate your software. You can manually activate your software at any time by logging into your account. Activating this software is easy and only requires five simple steps:
1 – Log into your account by clicking on the Account button in the top menu.
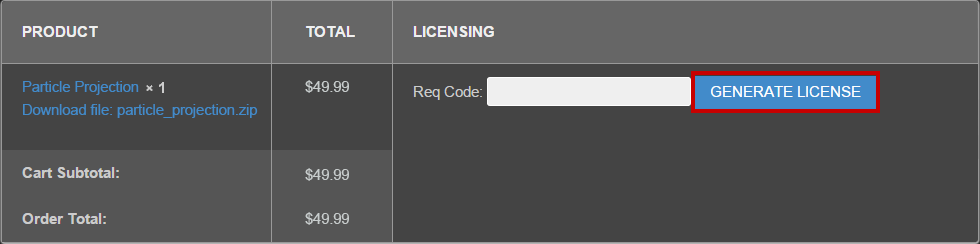
2 – Click on VIEW to display the order details containing the product you wish to activate.
3 – Enter your request code and click GENERATE LICENSE. Please see below for info on how to retrieve your request code.
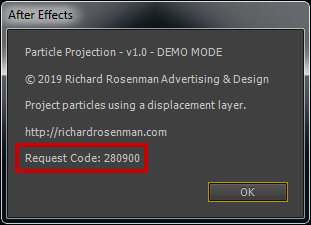
Your request code can be found by right-clicking on the plugin name in the effect window and selecting About.
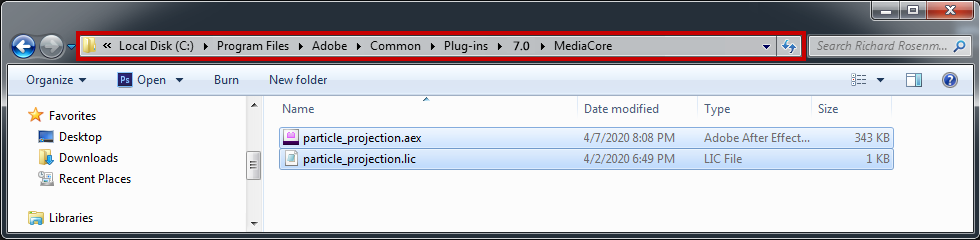
4 – A file prompt will ask you to save the license file. You must save this license file in the same folder the plugin resides in.
Place the .lic file into the location shown below. You can make a sub-folder to keep your plugins organized.
5 – Relaunch Adobe After Effects, create a new composition, add a new solid, and click on Effect > Richard Rosenman > Effect Name.
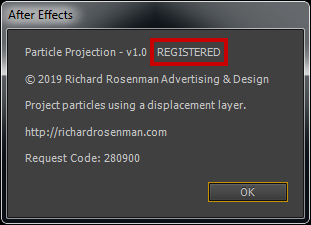
If you on click the About button located at the top of the plugin interface once again, your software should now display REGISTERED. If it is registered but you still see a red x, simply clear your cache. It is now unlocked and ready for use.
This software is compatible with the following Windows OS:
Windows 11 Home 64 bit
Windows 11 Pro 64 bit
Windows 11 Enterprise 64 bit
Windows 11 Education 64 bit
Windows 10 Home 64 bit
Windows 10 Pro 64 bit
Windows 10 Enterprise 64 bit
Windows 10 Education 64 bit
Windows 8 64 bit
Windows 8 Pro 64 bit
Windows 8 Enterprise 64 bit
Windows 7 Home Basic 64 bit
Windows 7 Home Premium 64 bit
Windows 7 Professional 64 bit
Windows 7 Enterprise 64 bit
Windows 7 Ultimate 64 bit
This software is compatible with the following hosts:
Adobe After Effects (Version CS6 or higher, including CC) 64 bit