Electra is a powerful Photoshop plugin for generating electric rays, lightning bolts, electrical charges, power currents and much more. Electra is fast, packs a rich feature-set and is fully-integrated within Adobe Photoshop.
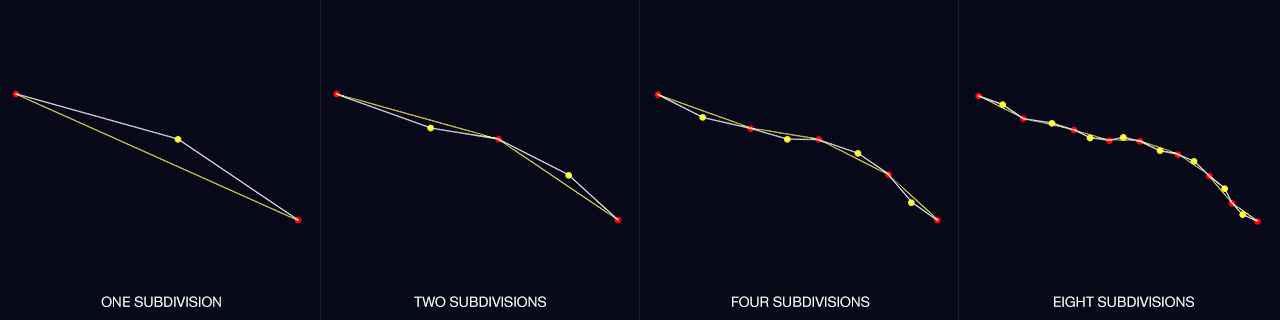
Electra operates by generating a ray between two points. Since the algorithm is recursive, calling it again subdivides that segment into two, then again into four, then eight, etc. Depending on the resolution limit specified, we end up with a highly-detailed ray.
Electra’s recursive algorithm works by subdividing
Electra’s resulting output is stunningly realistic. As a matter of fact, Electra has been modeled after real-world lightning ray examples and developed to simulate as closely as possible natural phenomena. A multitude of options allow for meticulously-generated rays including the ability to specify the start and end points, the start and end ray thickness, the resolution, the amount of displacement, the number of rays, the random seed and much, much more.
Electra simulates real-world rays photo-realistically. Can you guess which one isn’t real?
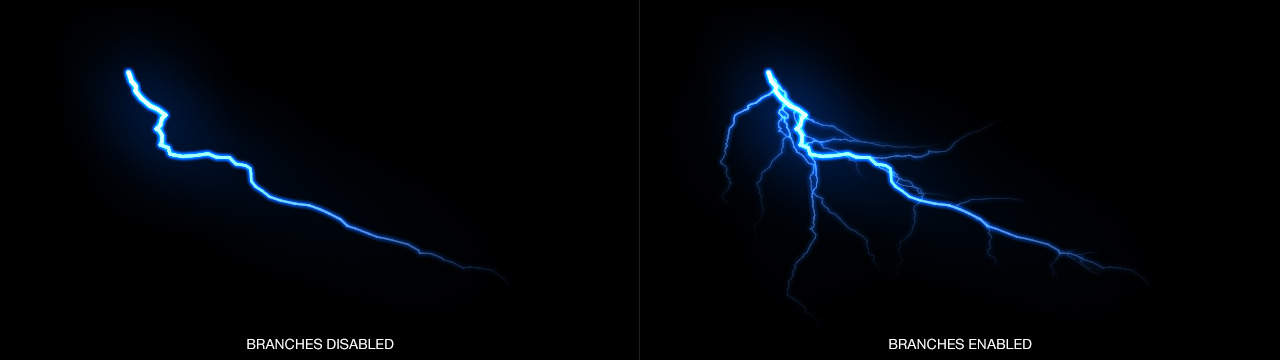
Electra not only supports rays but just like real-world electrical currents, it also supports branches. As a matter of fact, Electra can feature up to 20 branches per ray, with a depth of up to 3 levels of branches! This means the first branch could feature up to 20 rays, one of its branches could feature up to 20 rays, and one of its branches could feature another 20. Despite the potential for hundreds of thousands of rays, Electra is lightning fast and renders content in seconds.
Electra generates up to 20 branches per ray with 3 depth levels
Electra features an insane amount of control over branches. In addition to the number of branches and branch depth levels, one can use multipliers to fine-tune the various branch ray settings such as size, length, displacement, intensity, seed, rotation and more. The result is incredibly realistic branch control suitable for simulating any kind of real-world instance.
Electra generates incredibly realistic branches
Electra has a multitude of uses. From electrical rays, lightning bolts, electrical currents, electric charges, plasma rays and more, Electra is a must-have plugin for both professional and hobbyist designers alike.
Electra specializes in 100% photorealistic results
For a complete list of features, check out the documentation tab,. Better yet, download the free demo of Electra today!
Electra is 100% multi-threaded capable of using an unlimited number of cores for ultimate speed.
Electra supports both 8 bits / channel and 16 bits / channel color modes for professional workflows.
Workflow
Electra works on RGB layers. This means you simply load an image into Photoshop and launch Electra on it.
The optimal method to work with Electra is to work non-destructively. This means duplicating your layer, then run the filtering on it and, once the start and end points have been adjusted, selecting black under the preview window. This will render the effect on black, which can then be placed over your source layer and composited using screen or additive mode. Working in this manner is non-destructive and ensures you’ll always maintain your original layer intact.
Electra can be used in multiple passes. By running the filter on different layers, one has the ability to blend them together at different transparency levels if desired, not to mention more control over image processing.
The start, end and middle location can be set by clicking and dragging in the preview window.
The Conversation
Performance
Electra works by recursively subdividing itself until a specific resolution level is achieved. Electra can render hundreds of thousands of rays in seconds.
One of the single biggest hits in performance is the secondary glow. Disabling this feature will speed up performance.
Performance can be increased by reducing the size of the preview window.
Electra is capable of working in 8 bits per channel and 16 bits per channel color modes. It is highly recommended to work in 16 bits per channel mode as the glows may produce banding in 8 bits per channel mode.
Electra is fully multithreaded and will take advantage of as many workstation cores made available to it.
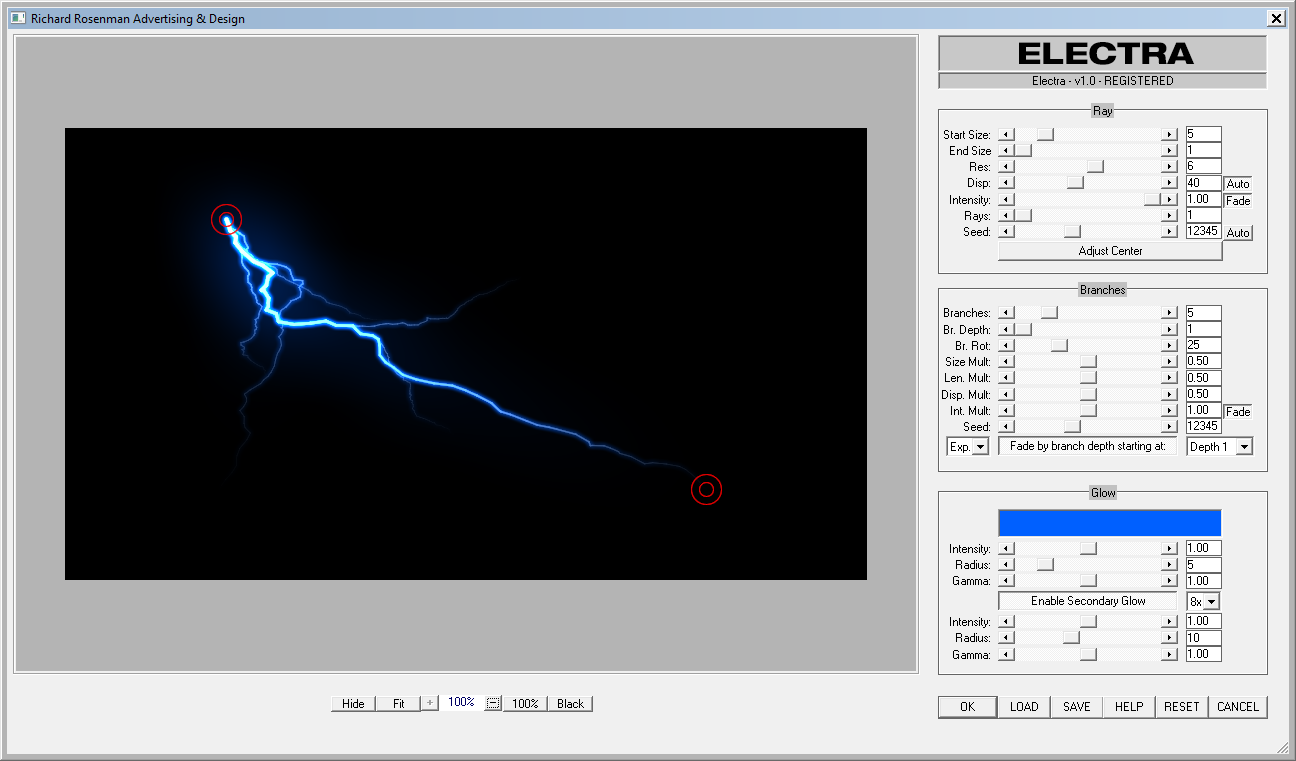
Ray Parameters
This section contains all the controls related to the main (parent) ray. Additionally, clicking and dragging any of the ray handles in the preview window will allow you to reposition the ray.
Start Size: Specifies the start thickness of the parent ray.
End Size: Specifies the end thickness of the parent ray.
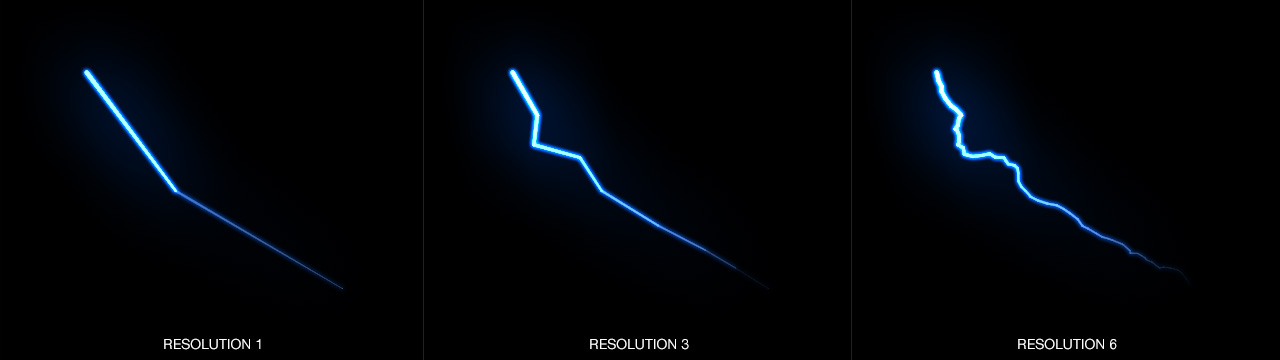
Resolution: Specifies the detail level (the number of subdivisions) to reach. A higher level of resolution will produce more detailed rays but will take longer to generate.
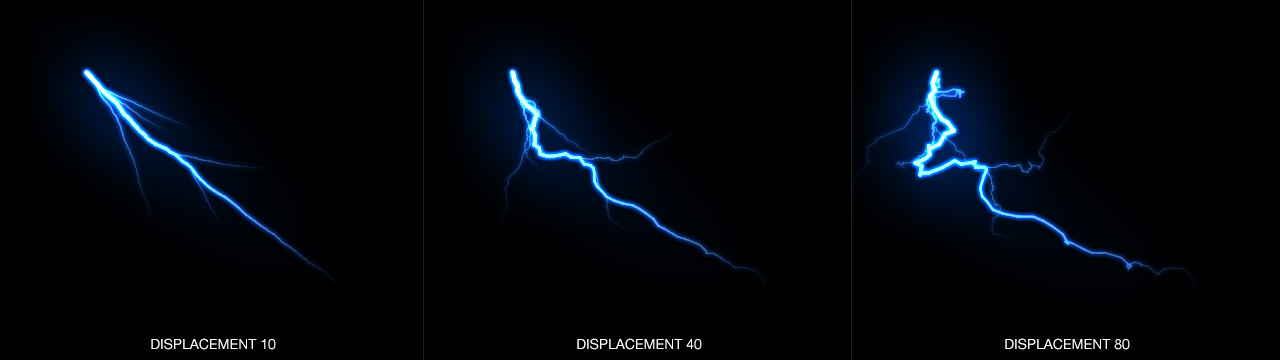
Displacement: Specifies the amount of displacement (offset). A higher level of displacement will introduce more chaos.
Auto Displacement: This feature will control the displacement according to ray length. The shorter the distance between the start and end points, the less displacement.
Intensity: Specifies the intensity of the rays. The glow parameters are dependent on the intensity of the rays so decreasing the ray intensity will also affect the glow intensity. Additionally, the branch ray intensity is also affected by this slider.
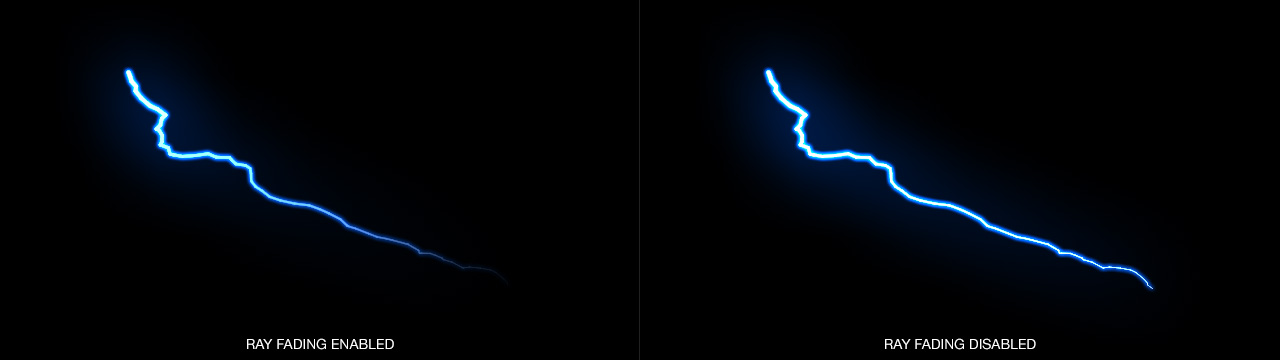
Fade: Specifies whether or not to fade out the parent ray over its length.
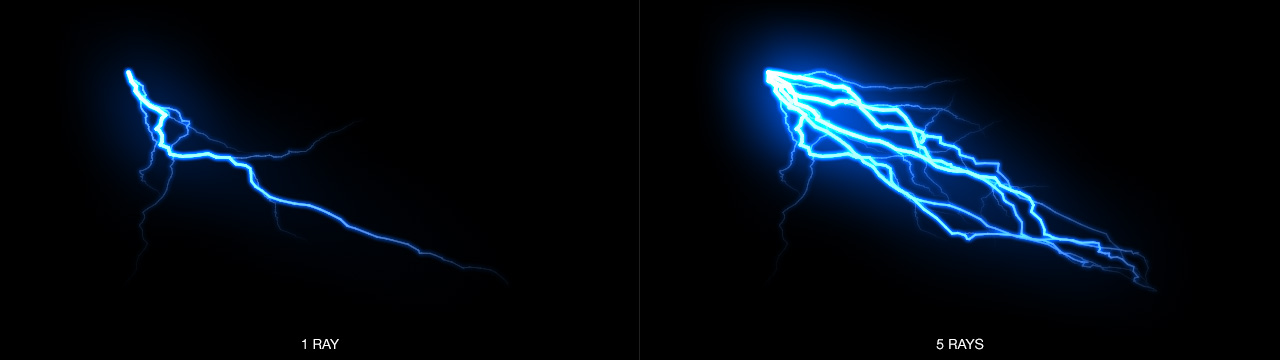
Rays: Specifies how many rays to generate.
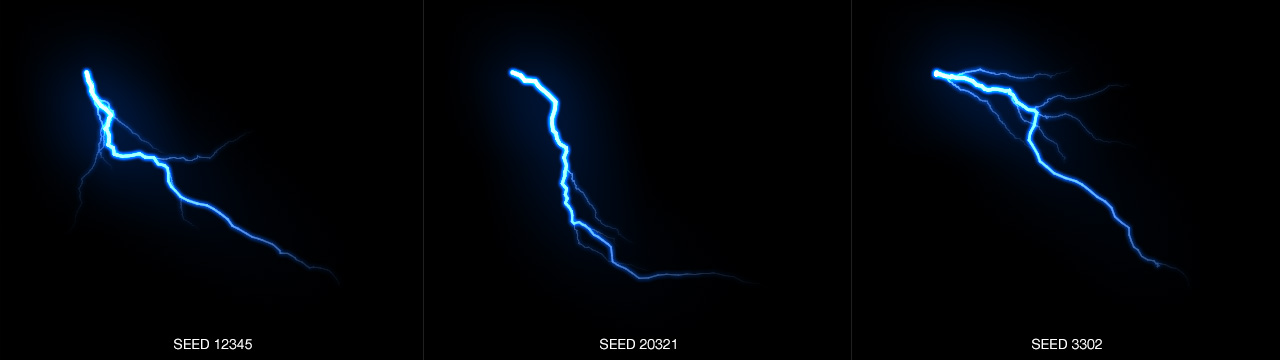
Seed: Controls the random seed generator. A new value will generate a different looking ray with the specified settings.
Auto Seed: When this feature is enabled, adjusting the handles in the preview window will generate different looking rays in real-time while the mouse button is clicked. This is useful for choosing newly-generated rays on the fly.
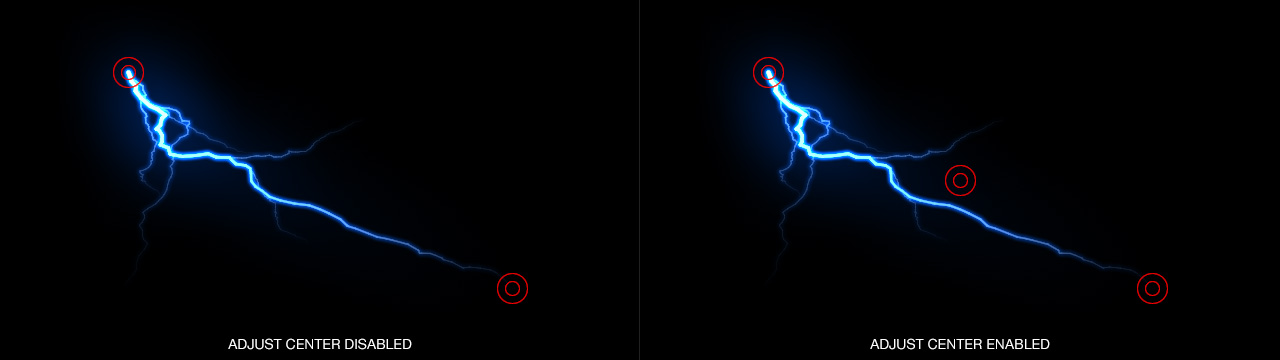
Adjust Center: Toggling this feature introduces a third handle located between the start and end handle. This allows you to adjust the parent ray curve.
Branch Parameters
This section contains all the controls related to the ray’s branches. Electra provides many powerful features for fine-tuning the branches.
Branches: Specifies the number of branches per branch depth level. This is not a fixed value but rather an upper limit so specifying a value of 10 means any number up to 10 branches will be generated along the parent ray.
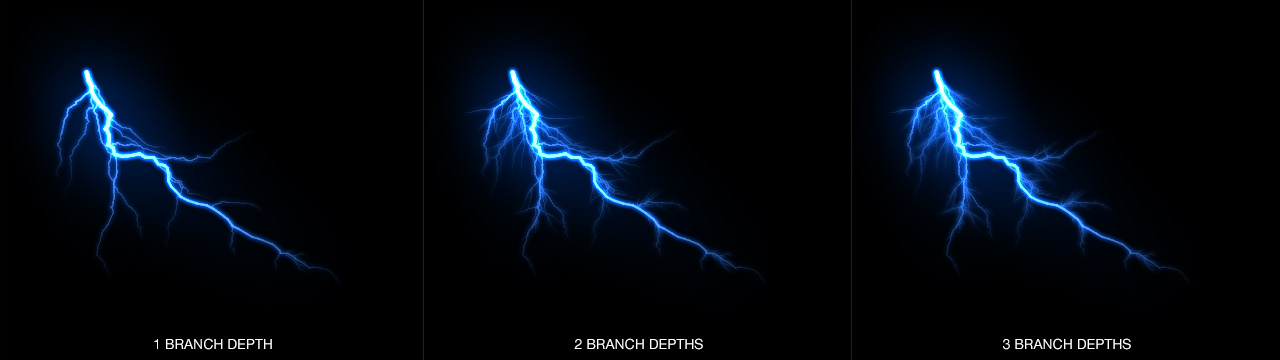
Branch Depth: Specifies the number of branch levels. One level generates branches from the parent ray. Two levels generates branches from the parent ray, and from the first set of branches. Three levels generates branches from the parent ray, from the first set of branches, and from the second set of branches. Each branch depth cuts the length of the branches by half.
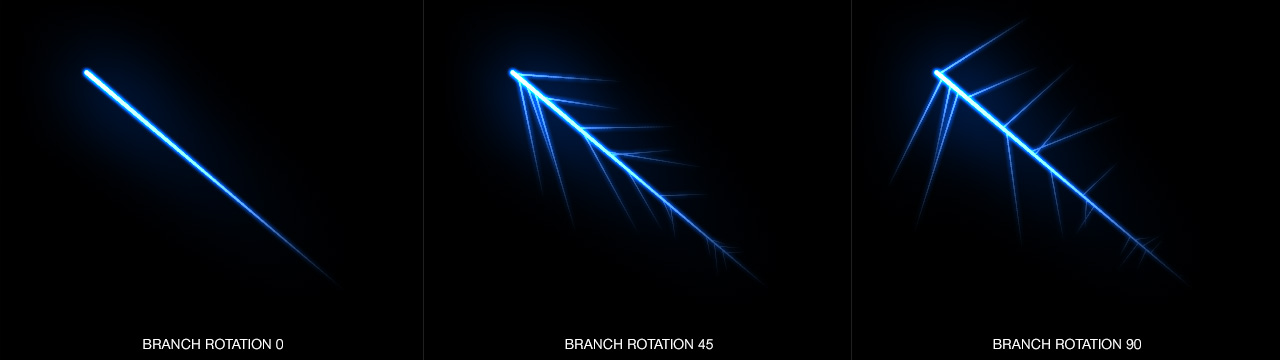
Branch Rotation: Specifies the rotation of the branches with respect to the parent ray. This is not a fixed value but rather an upper limit so specifying a value of 90 means any number of branches with a rotation up to 90 degrees will be generated along the parent ray. This is best illustrated by setting your displacement to 0 since the angle produced along the ray due to displacement will also affect the branch angle.
Size Multiplier: Adjusts the starting thickness of the branch with respect to the parent ray. A multiplier of 0.5 will reduce the thickness by half.
Length Multiplier: Adjusts the length of the branch with respect to the parent ray. A multiplier of 0.5 will reduce the length by half.
Displacement Multiplier: Adjusts the displacement of the branch with respect to the parent ray. A multiplier of 0.5 will reduce the displacement by half.
Intensity Multiplier: Adjusts the intensity of the branch with respect to the parent ray. A multiplier of 0.5 will reduce the intensity by half.
Fade: Specifies whether or not to fade out the branch ray over its length.
Seed: Controls the random seed generator for the branches. A new value will generate a different looking branch ray with the specified settings.
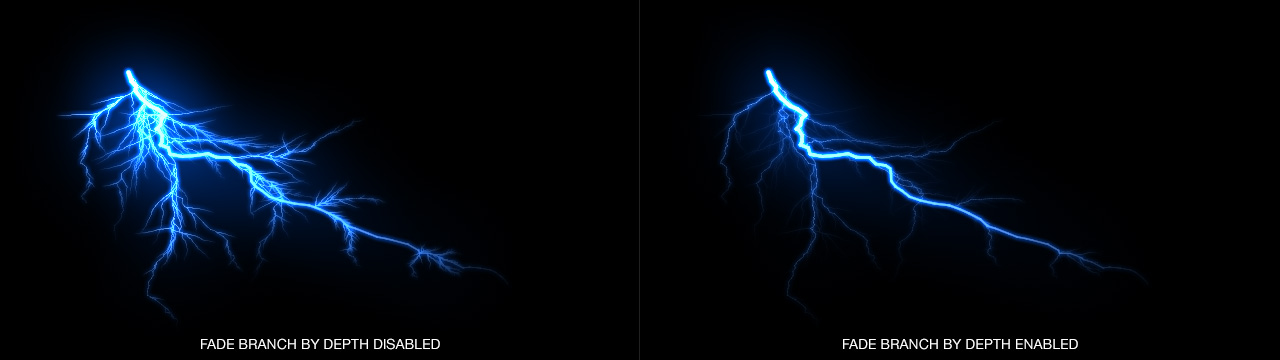
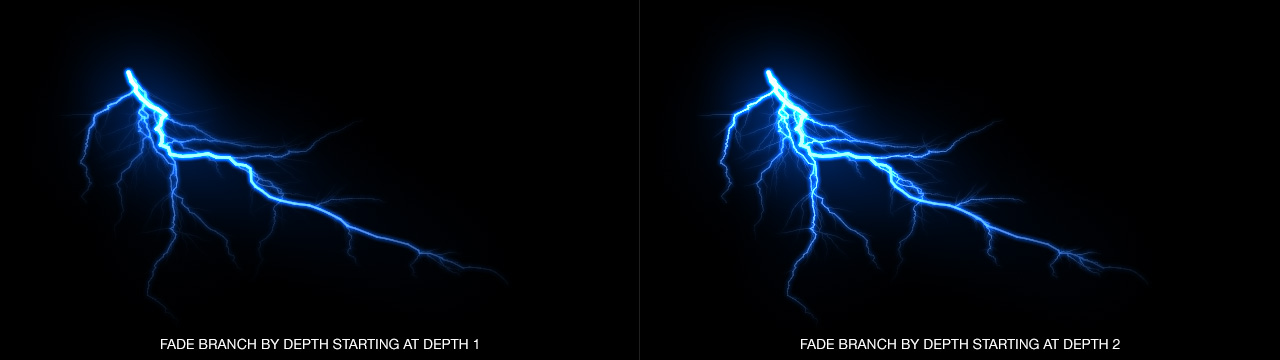
Fade By Branch Depth starting At: Specifies whether or not to reduce branch ray intensity according to branch depth. If enabled, each branch depth will be reduced by half in intensity.
Fade By Branch Depth starting At (Linear / Exponential): Specifies whether to reduce branch ray intensity according to branch depth linearly or exponentially.
Fade By Branch Depth starting At (Depth 1 / Depth 2): Specifies whether to reduce branch ray intensity according to branch depth starting on the first or second branch depth. Selecting Depth 2 will allow the branches in the first branch depth to remain as intense as the parent ray.
Glow Parameters
This control group deals with the ray glow effect. Electra performs two glows, a narrow one (primary) and a wide one (secondary). It is highly recommended to work in 16 bits per channel mode so as to avoid visible banding in the glow effect.
Intensity: Specifies the intensity of the primary glow.
Radius: Specifies the size of the primary glow.
Gamma: Specifies the gamma of the primary glow.
Enable Secondary Glow: Toggles the secondary glow effect.
Secondary Glow Size Multiplier: Specifies the size multiplier for the secondary glow effect. For example, the default value of 8 will produce a secondary glow 8X wider than the primary glow.
Intensity: Specifies the intensity of the secondary glow.
Radius: Specifies the size of the secondary glow.
Gamma: Specifies the gamma of the secondary glow.
Pixabay
Global Parameters
These controls deal with the general operation of the interface. In addition, the interface can be resized by dragging the lower right-hand corner for larger displays.
Hide: Hides the ray handles in the preview window.
Fit: Sets the zoom level to the maximum possible within the currently-set preview window size.
Zoom: Controls the zoom level.
100%: Sets the zoom level to 100%.
Black: Sets the background color to black. This is especially useful for generating rays on their own for non-destructive workflows.
Changelog
Special Thanks
Installing this software is easy and only requires three simple steps:
1 – Download the software by clicking on the Download Demo button located above on the software page. This will prompt you to save a .zip file on your computer.
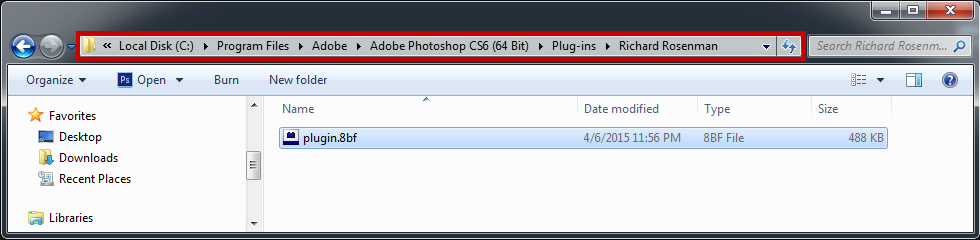
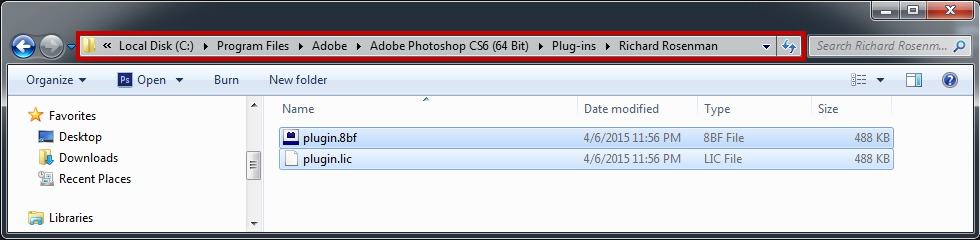
2 – Extract the contents from the .zip file and place the .8bf file into your host’s plugin folder. For instance, to install for Adobe Photoshop CS6, place the .8bf file into the location shown below. You can make a sub-folder to keep your plugins organized, such as the one below. Please make sure 64 bit plugins such as these are placed in the corresponding 64 bit Adobe Photoshop plugin folder.
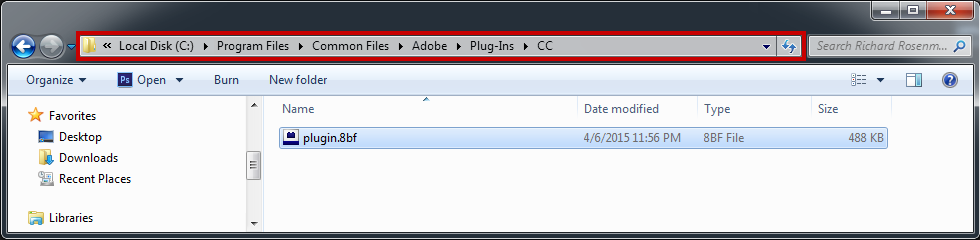
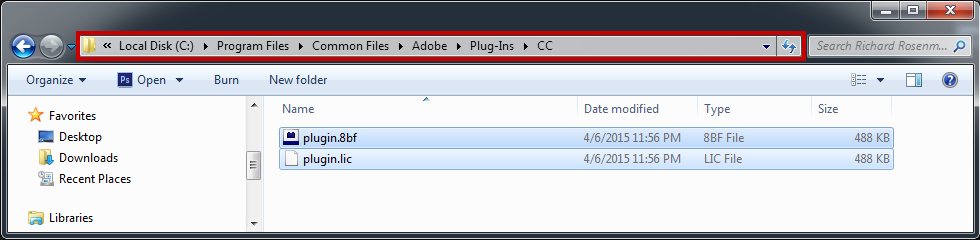
If you’re using Photoshop CC (eg. version 2013 – 2019 or later), your Photoshop plug-ins are stored in a folder shared between all Photoshop CC versions shown below.
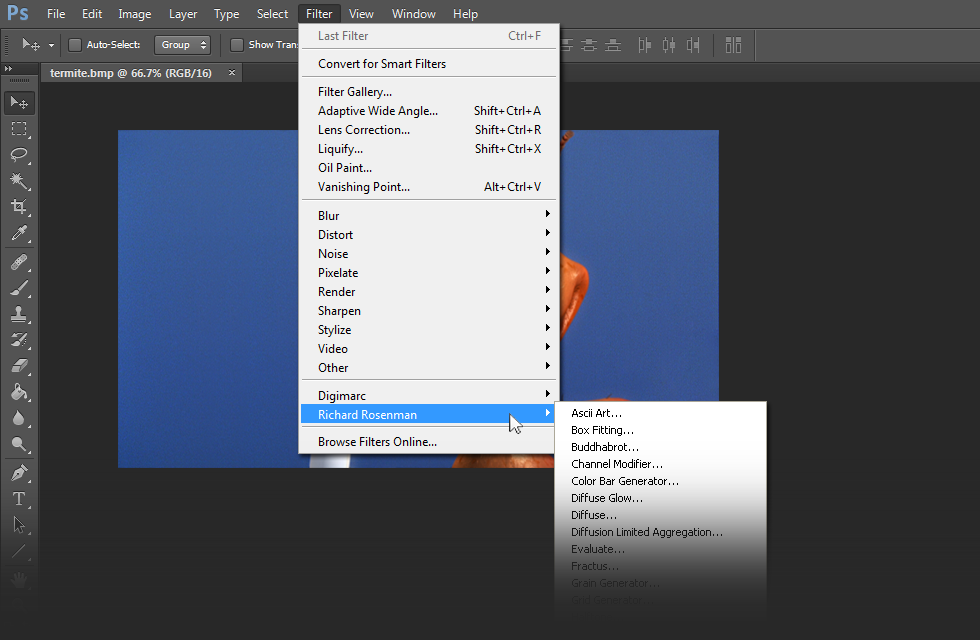
3 – Launch Adobe Photoshop, open an image and click on Filter > Richard Rosenman > Filter Name. If the filter is grayed out, it may not support your current image color depth.
If you have purchased a commercial license, please review the activation section.
If you have purchased a commercial license, you must activate your software. You can manually activate your software at any time by logging into your account. Activating this software is easy and only requires five simple steps:
1 – Log into your account by clicking on the Account button in the top menu.
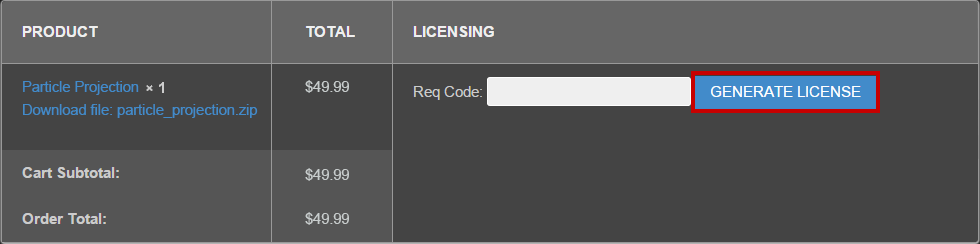
2 – Click on VIEW to display the order details containing the product you wish to activate.
3 – Enter your request code and click GENERATE LICENSE. Please see below for info on how to retrieve your request code.
Your request code can be found by clicking on the help button of the installed software.
4 – A file prompt will ask you to save the license file. You must save this license file in the same folder the plugin resides in. Below is an example for Photoshop CS6.
If you’re using Photoshop CC (eg. version 2013 – 2019 or later), your Photoshop plug-ins are stored in a folder shared between all Photoshop CC versions shown below.
5 – Relaunch Adobe Photoshop, open an image and click on Filter > Richard Rosenman > Filter Name. If the filter is grayed out, it may not support your current image color depth.
In the titlebar, your software should now display REGISTERED. It is now unlocked and ready for use.